import { CodeTabs, CodeTab } from "docs-ui"
export const metadata = {
title: `Accept Payment Flow`,
}
# {metadata.title}
In this document, you’ll learn how to implement an accept-payment flow using workflows or the Payment Module's main service.
It's highly recommended to use Medusa's workflows to implement this flow. Use the Payment Module's main service for more complex cases.
For a guide on how to implement this flow in the storefront, check out [this guide](../../../storefront-development/checkout/payment/page.mdx).
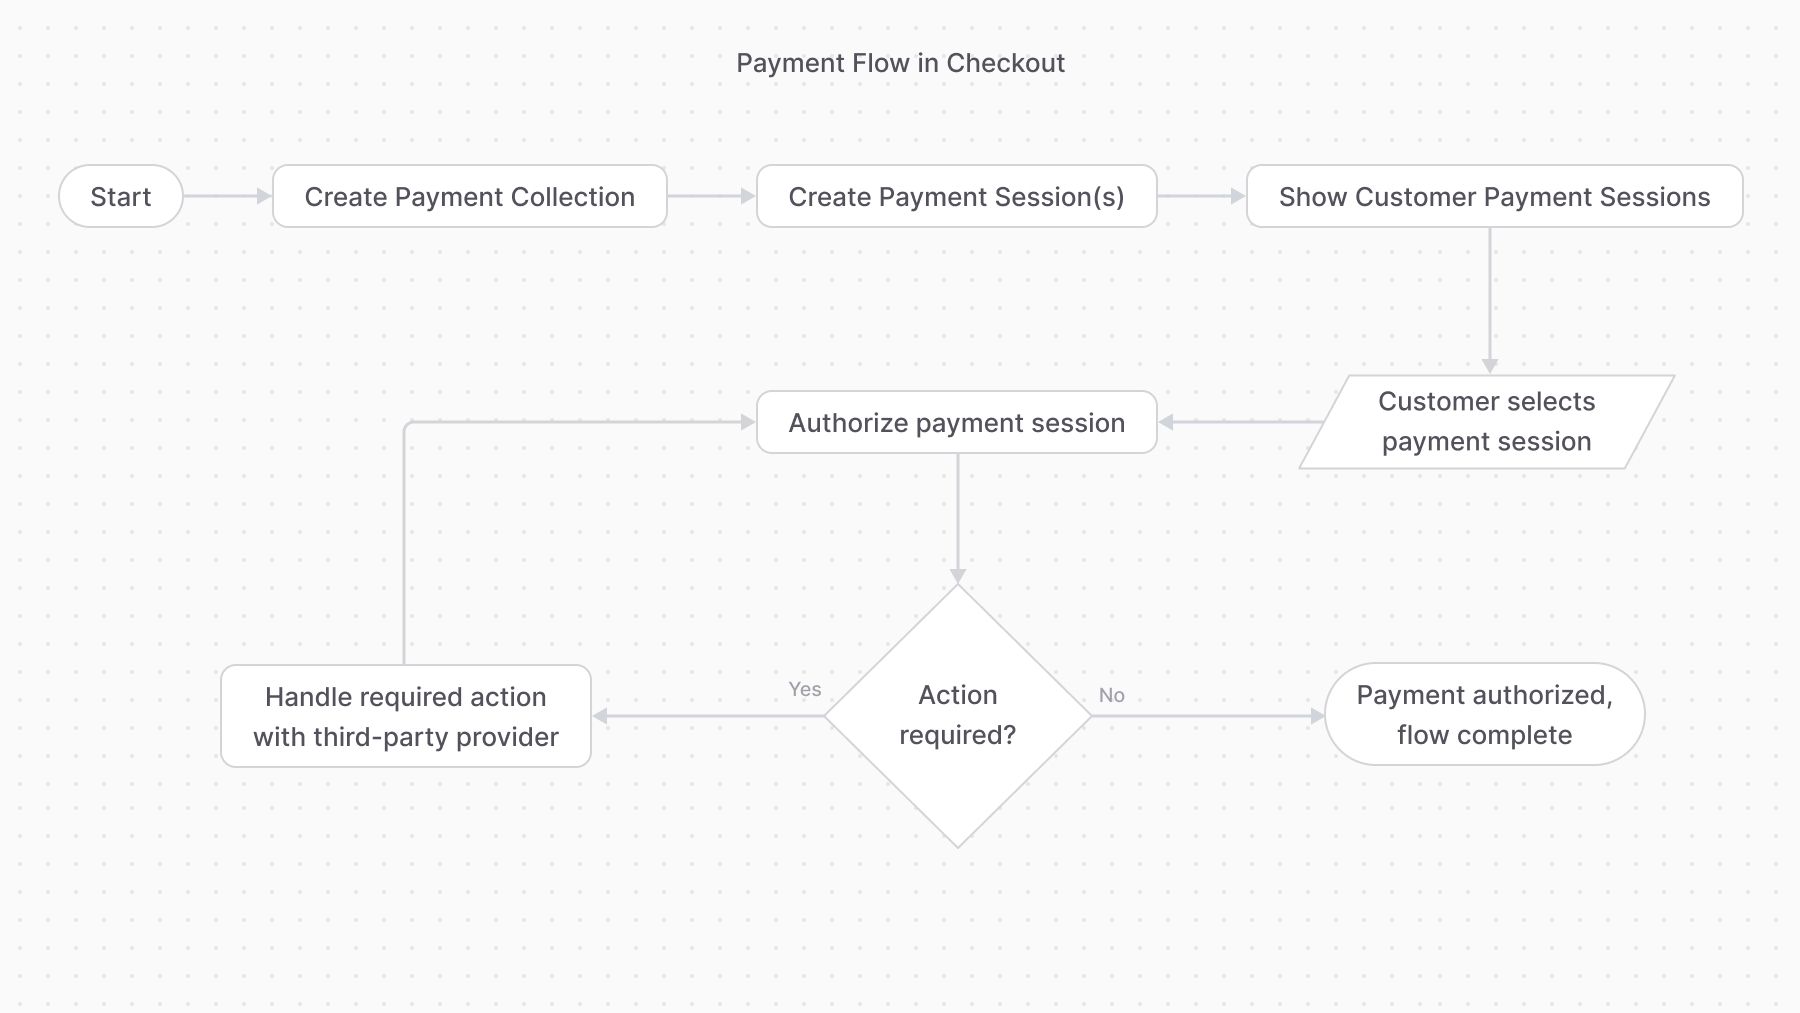
## Flow Overview
---
## 1. Create a Payment Collection
A payment collection holds all details related to a resource’s payment operations. So, you start off by creating a payment collection.
For example:
```ts
import { createPaymentCollectionForCartWorkflow } from "@medusajs/medusa/core-flows"
// ...
await createPaymentCollectionForCartWorkflow(req.scope)
.run({
input: {
cart_id: "cart_123",
},
})
```
```ts
const paymentCollection =
await paymentModuleService.createPaymentCollections({
currency_code: "usd",
amount: 5000,
})
```
---
## 2. Create Payment Sessions
The payment collection has one or more payment sessions, each being a payment amount to be authorized by a payment provider.
So, after creating the payment collection, create at least one payment session for a provider.
For example:
```ts
import { createPaymentSessionsWorkflow } from "@medusajs/medusa/core-flows"
// ...
const { result: paymentSesion } = await createPaymentSessionsWorkflow(req.scope)
.run({
input: {
payment_collection_id: "paycol_123",
provider_id: "stripe",
},
})
```
```ts
const paymentSession =
await paymentModuleService.createPaymentSession(
paymentCollection.id,
{
provider_id: "stripe",
currency_code: "usd",
amount: 5000,
data: {
// any necessary data for the
// payment provider
},
}
)
```
---
## 3. Authorize Payment Session
Once the customer chooses a payment session, start the authorization process. This may involve some action performed by the third-party payment provider, such as entering a 3DS code.
For example:
```ts
import { authorizePaymentSessionStep } from "@medusajs/medusa/core-flows"
// ...
authorizePaymentSessionStep({
id: "payses_123",
context: {},
})
```
```ts
const payment = authorizePaymentSessionStep({
id: "payses_123",
context: {},
})
```
When the payment authorization is successful, a payment is created and returned.
### Handling Additional Action
If you used the `authorizePaymentSessionStep`, you don't need to implement this logic as it's implemented in the step.
If the payment authorization isn’t successful, whether because it requires additional action or for another reason, the method updates the payment session with the new status and throws an error.
In that case, you can catch that error and, if the session's `status` property is `requires_more`, handle the additional action, then retry the authorization.
For example:
```ts
try {
const payment =
await paymentModuleService.authorizePaymentSession(
paymentSession.id,
{}
)
} catch (e) {
// retrieve the payment session again
const updatedPaymentSession = (
await paymentModuleService.listPaymentSessions({
id: [paymentSession.id],
})
)[0]
if (updatedPaymentSession.status === "requires_more") {
// TODO perform required action
// TODO authorize payment again.
}
}
```
---
## 4. Payment Flow Complete
The payment flow is complete once the payment session is authorized and the payment is created.
You can then:
- Capture the payment either using the [capturePaymentWorkflow](/references/medusa-workflows/capturePaymentWorkflow) or [capturePayment method](/references/payment/capturePayment).
- Refund captured amounts using the [refundPaymentWorkflow](/references/medusa-workflows/refundPaymentWorkflow) or [refundPayment method](/references/payment/refundPayment).
Some payment providers allow capturing the payment automatically once it’s authorized. In that case, you don’t need to do it manually.