* initial

* initial

* update tests

* remove unused import

* allow passing with no tests

* vale fixes
287 lines
16 KiB
Plaintext
287 lines
16 KiB
Plaintext
import { Prerequisites, InlineIcon } from "docs-ui"
|
|
import { ChevronUpDown } from "@medusajs/icons"
|
|
|
|
export const metadata = {
|
|
title: `Create Projects and Deploy to Cloud`,
|
|
}
|
|
|
|
# {metadata.title}
|
|
|
|
In this guide, you'll learn about projects, how to create them, view their details, and manage their settings in Cloud.
|
|
|
|
## What is a Project?
|
|
|
|
A project is the collection of resources, environments, deployments, and settings related to a Medusa application deployed to the Cloud. The project is linked to a GitHub repository that hosts the Medusa application's code.
|
|
|
|
To deploy a Medusa application to the Cloud, you create a project for it. Medusa will automatically set up and configure the necessary resources in the project to run the application, such as PostgreSQL, Redis, and S3.
|
|
|
|
{/* TODO add links */}
|
|
|
|
You can deploy either a Medusa application (server and admin dashboard) only, or a Medusa application along with a [storefront](../storefront/page.mdx).
|
|
|
|
Each project can have multiple environments, such as production and staging. These environments allow you to test changes before pushing them live to users. You can learn more in the [Environments documentation](../environments/page.mdx).
|
|
|
|
---
|
|
|
|
## Create a Project
|
|
|
|
<Note>
|
|
|
|
If you've reached the limit of projects allowed in your organization's plan, you need to upgrade your plan to create more projects. Learn more in the [Plans & Pricing](../pricing/page.mdx) guide.
|
|
|
|
</Note>
|
|
|
|
In this section, you'll learn how to create a project in Cloud to deploy your Medusa application.
|
|
|
|
To create a project:
|
|
|
|
1. Make sure you're viewing the [correct organization's dashboard in Cloud](../organizations/page.mdx#switch-organization).
|
|
2. Click on the **Create Project** button in your organization's dashboard.
|
|
|
|
In the project-creation page, you can either [create from a starter](#1-create-project-from-a-starter) or [create from an existing application](#2-create-project-from-an-existing-application).
|
|
|
|
---
|
|
|
|
## 1. Create Project from a Starter
|
|
|
|
Medusa provides you with the following starters that you can use to quickly set up your ecommerce application:
|
|
|
|
- **DTC Starter**: Standard Medusa application with fully-fledged commerce features.
|
|
- **B2B Starter**: Medusa application with powerful B2B and commerce features.
|
|
|
|
Both starters come with a pre-configured Medusa server, admin dashboard, and the Next.js Starter Storefront.
|
|
|
|
To create a project from either of these starters:
|
|
|
|
1. Click on the **Browse Starters** button at the top right of the [project creation page](#create-a-project).
|
|
2. Click the **Clone** button of the starter you want to use.
|
|
3. In the Repository step, authenticate with your GitHub account if you haven't already.
|
|
4. Choose a GitHub organization to clone the starter into in the "Organization" field.
|
|
- If you don't see your organization, you can click the **Configure accessible organizations** link to manage accessible organizations in GitHub.
|
|
5. In the "Repository name" field, enter a name for your new repository.
|
|
6. Once you're done, click the **Continue** button.
|
|
|
|
The repository will be cloned and you'll move forward to the [Configure step](#configure-project-during-creation).
|
|
|
|
---
|
|
|
|
## 2. Create Project from an Existing Application
|
|
|
|
If you already have a Medusa application, you can create a project from it.
|
|
|
|
Refer to the [Prerequisites for Creating Projects](./prerequisites/page.mdx) guide to ensure your Medusa application meets the necessary prerequisites before deploying it to Cloud. This is especially necessary if you're deploying a storefront along with your Medusa application.
|
|
|
|
To create a project from an existing Medusa application:
|
|
|
|
1. In the GitHub section of the [project-creation page](#create-a-project), authenticate with your GitHub account if you haven't already.
|
|
2. Under the Repository section, choose the repository to create the project from.
|
|
- If you don't see your repository, you can click the **Configure repositories** link to manage the GitHub repositories that Medusa can access.
|
|
3. Once you're done, click the **Continue** button.
|
|
|
|
You'll move forward to the [Configure step](#configure-project-during-creation).
|
|
|
|
---
|
|
|
|
## Configure Project During Creation
|
|
|
|
After selecting the repository, you'll move on to the project configuration step. You can set the following information:
|
|
|
|
1. **Project name**: Enter the name of the project.
|
|
2. **Custom subdomain**: Enter a custom subdomain for the Medusa application. All projects are subdomains of `medusajs.app`.
|
|
- For example, if you enter `my-project`, the project will be accessible at `my-project.medusajs.app`. Refer to the [subdomain restrictions](#subdomain-restrictions-for-projects) section for more details.
|
|
- If you're hosting a storefront, it will be accessible at `my-project.medusajs.site`.
|
|
- **Region**: Select a [region](#available-regions-for-projects-in-cloud) to deploy the project. For better performance, choose a region that's closer to your target users. The region can't be changed later.
|
|
3. In the **Build details** section, set the following:
|
|
- **Project root directory**: If your project is in a monorepo, specify the path to the Medusa project in the repository. Otherwise, leave it empty.
|
|
- **Storefront root directory**: If you're deploying a storefront along with your Medusa application, specify the path to the storefront project in the repository. Otherwise, leave it empty.
|
|
4. You can expand the "Initial user" section to optionally set up the credentials of the initial admin user for the Medusa Admin:
|
|
- **Email**: The email of the initial admin user.
|
|
- **Password**: The password of the initial admin user.
|
|
5. You can expand the "Environment variables" section to optionally add environment variables for both backend and storefront:
|
|
- Enter the key and value for each environment variable you want to add.
|
|
- Mark the variable as "Sensitive" to hide its value in the UI.
|
|
- To add more variables, click the "Add another" button.
|
|
- You can also add and change environment variables later in the project's environment settings.
|
|
6. Once you're done configuring the project, click the "Create" button.
|
|
|
|
After creating the project, it will take a few minutes to create the necessary resources for it and deploy it. Once the deployment is complete, you'll be able to access the project from your organization's dashboard.
|
|
|
|
<Note>
|
|
|
|
If the project creation takes too long, check out the [troubleshooting section](#troubleshooting-project-creation).
|
|
|
|
</Note>
|
|
|
|
|
|
|
|
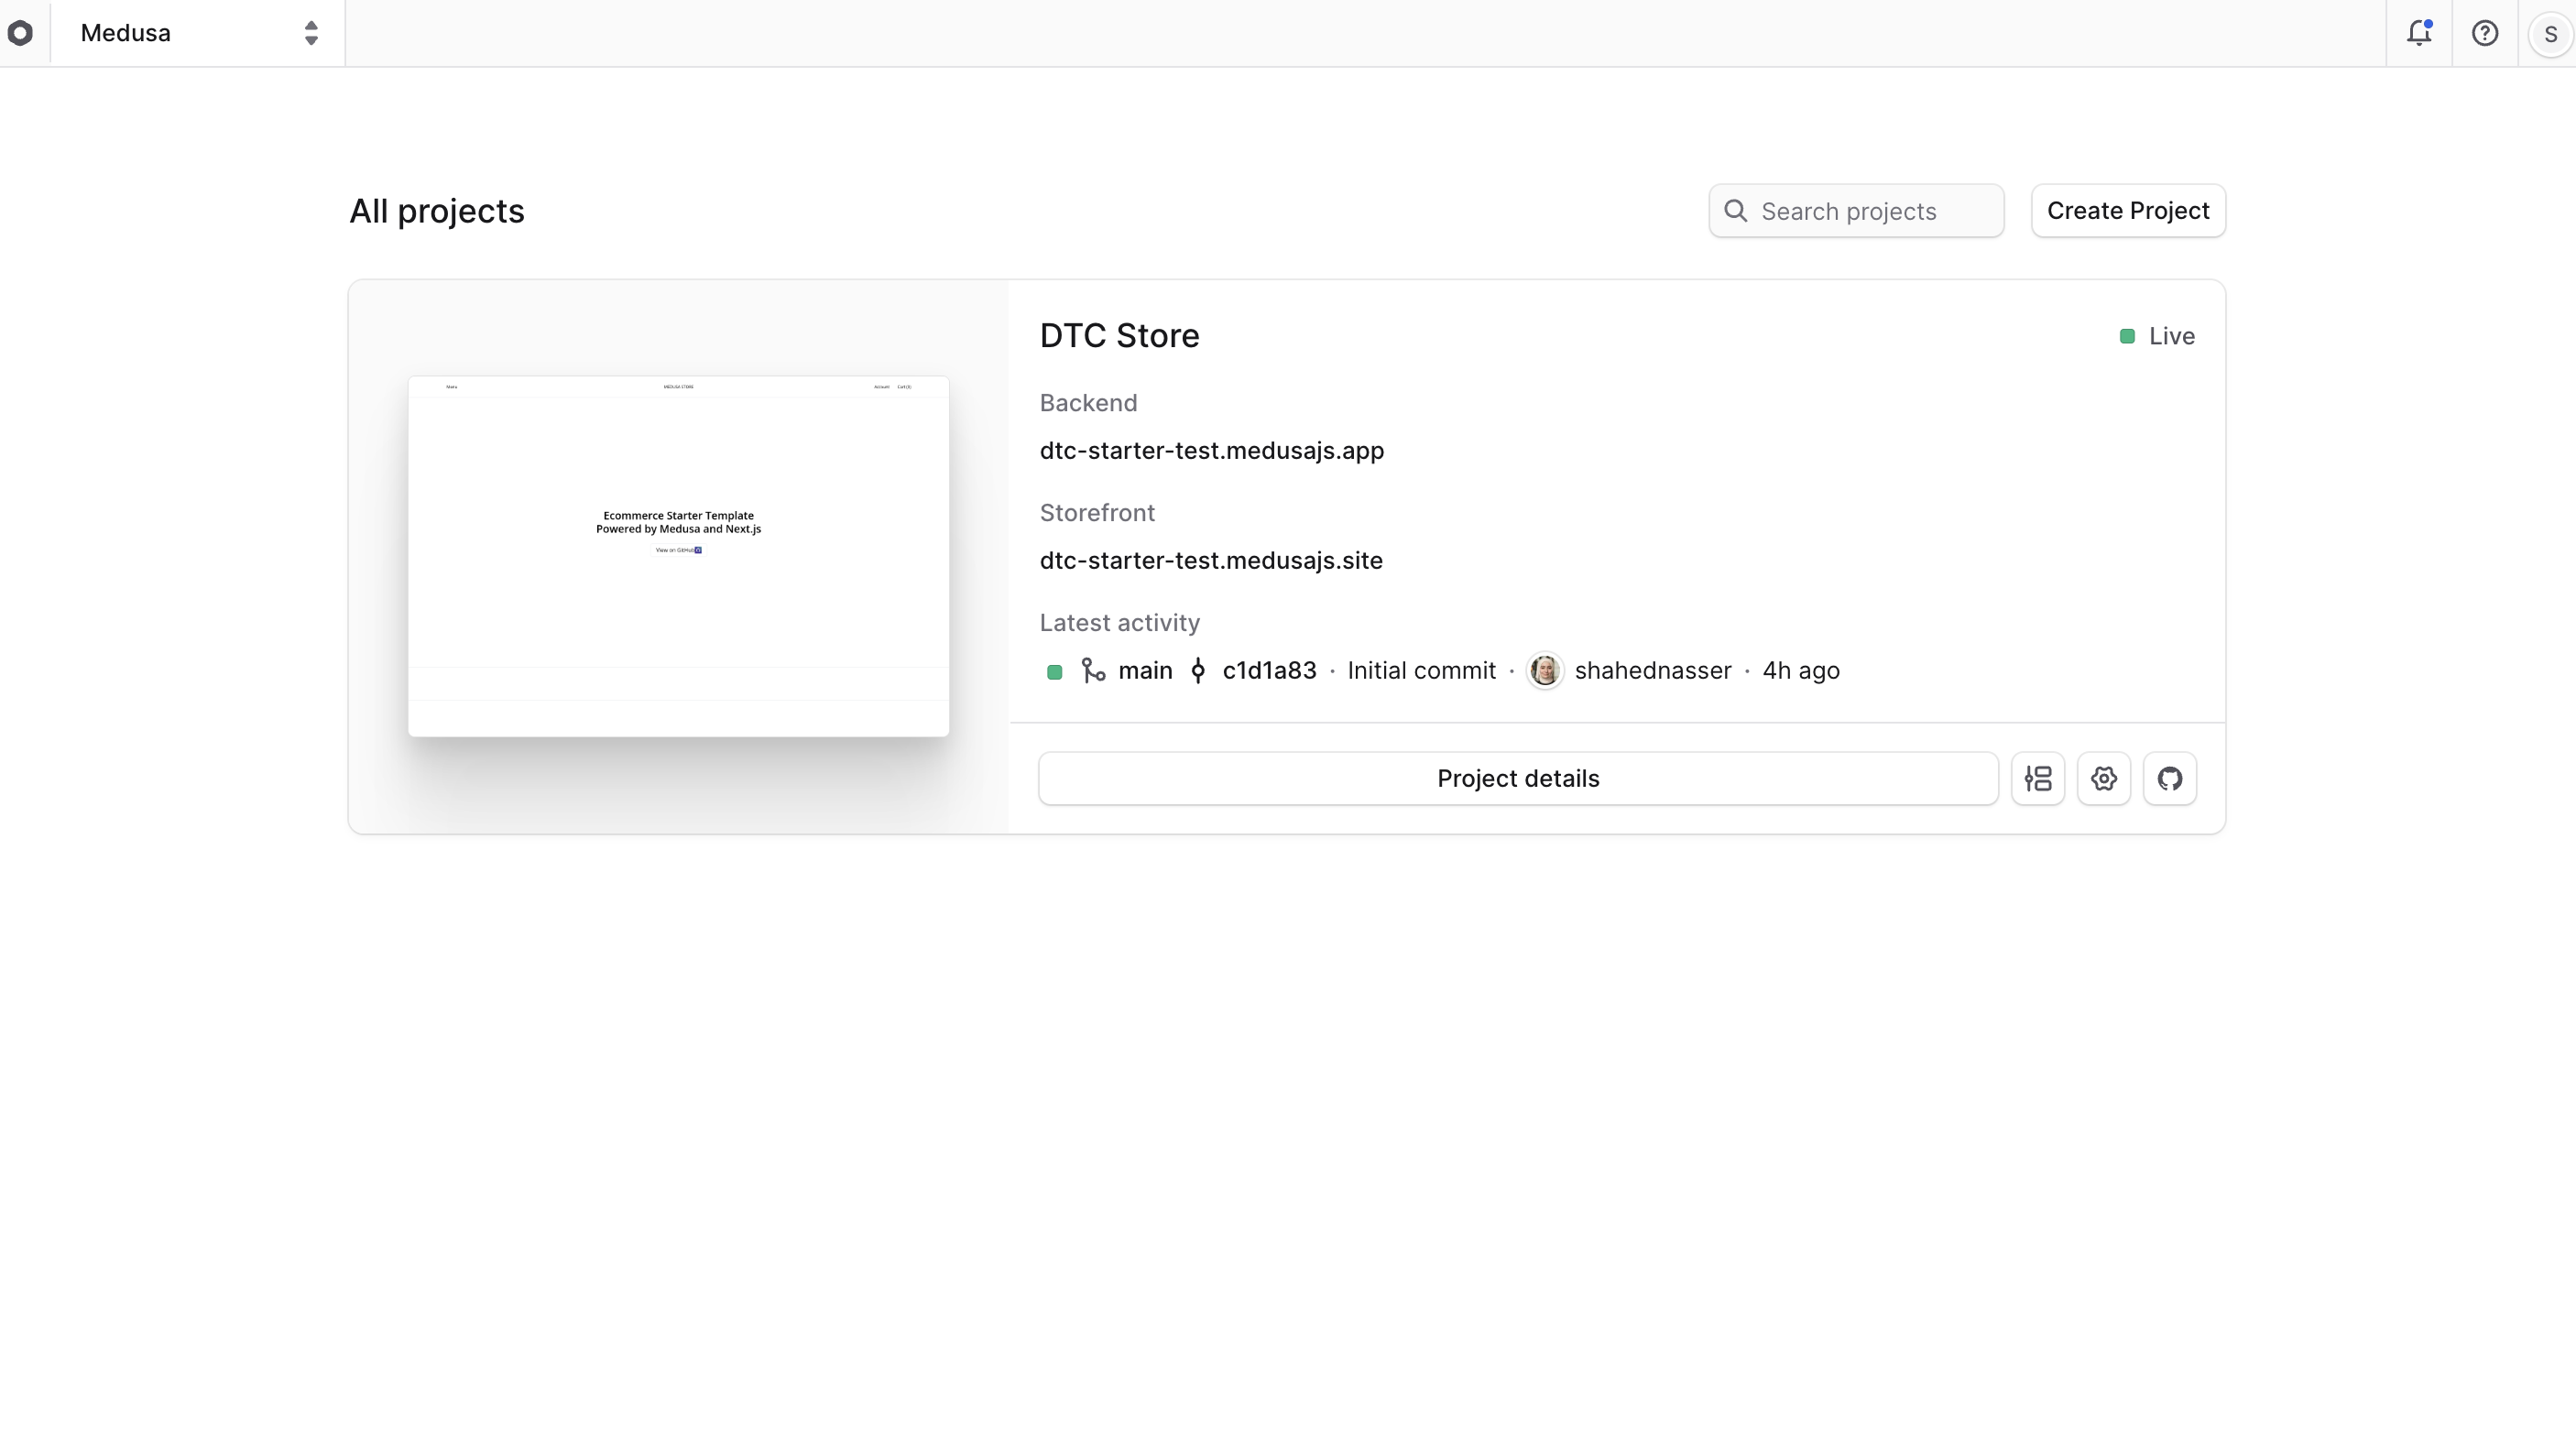
If you click on the project, you'll be taken to the project's dashboard, where you can view [its details and status](#find-project-details).
|
|
|
|
Once the project is created and deployed, you'll receive a notification in the Cloud dashboard. You can also view its status in the list of projects and in the project's details.
|
|
|
|
|
|
|
|
---
|
|
|
|
## Troubleshooting Project Creation
|
|
|
|
If you encounter any issues while creating a project, [check common deployment issues and their solutions](../deployments/troubleshooting/page.mdx)
|
|
|
|
---
|
|
|
|
## Subdomain Restrictions for Projects
|
|
|
|
Your backend's URL must be a subdomain of `medusajs.app`. For example, if you choose `my-store` as your subdomain, your project's URL will be `my-store.medusajs.app`.
|
|
|
|
When you choose a subdomain for your project, it must be at least five characters long. It also can't be one of the following reserved subdomains:
|
|
|
|
- `medusa`
|
|
- `admin`
|
|
- `staging`
|
|
- `production`
|
|
- `preview`
|
|
- `development`
|
|
- `proxy`
|
|
|
|
If you also deployed a storefront with your Medusa application, its URL will be a subdomain of `medusajs.site`. For example, if your backend's subdomain is `my-store`, your storefront's URL will be `my-store.medusajs.site`. You can also add a custom domain, as explained in the [Storefront Custom Domain](../storefront/page.mdx#storefront-custom-domain) guide.
|
|
|
|
---
|
|
|
|
## Available Regions for Projects in Cloud
|
|
|
|
Medusa supports hosting your Medusa projects on Cloud in the following regions:
|
|
|
|
- US East (`us-east-1`)
|
|
- Europe Central (`eu-central-1`)
|
|
- Asia Southeast (`ap-southeast-1`)
|
|
|
|
All your project's deployments will be in the selected region. For better performance, choose a region that's closer to your target users. If you need to host your Medusa project in a different region, contact support.
|
|
|
|
---
|
|
|
|
## Access Deployed Project
|
|
|
|
To access the deployed project, you can navigate to:
|
|
|
|
- The Backend URL of the environment. Clicking this URL will open the Medusa Admin in a new tab.
|
|
- The Storefront URL of the environment (if you deployed a storefront along with your Medusa application). Clicking this URL will open the storefront in a new tab.
|
|
|
|
Learn more in the [Access Deployment](../deployments/access/page.mdx) guide.
|
|
|
|
---
|
|
|
|
## Open Project Dashboard
|
|
|
|
To open a project's dashboard:
|
|
|
|
1. Make sure you're viewing the [correct organization's dashboard in Cloud](../organizations/page.mdx#switch-organization).
|
|
2. Open the project's dashboard by clicking on the project card in the organization's dashboard.
|
|
|
|
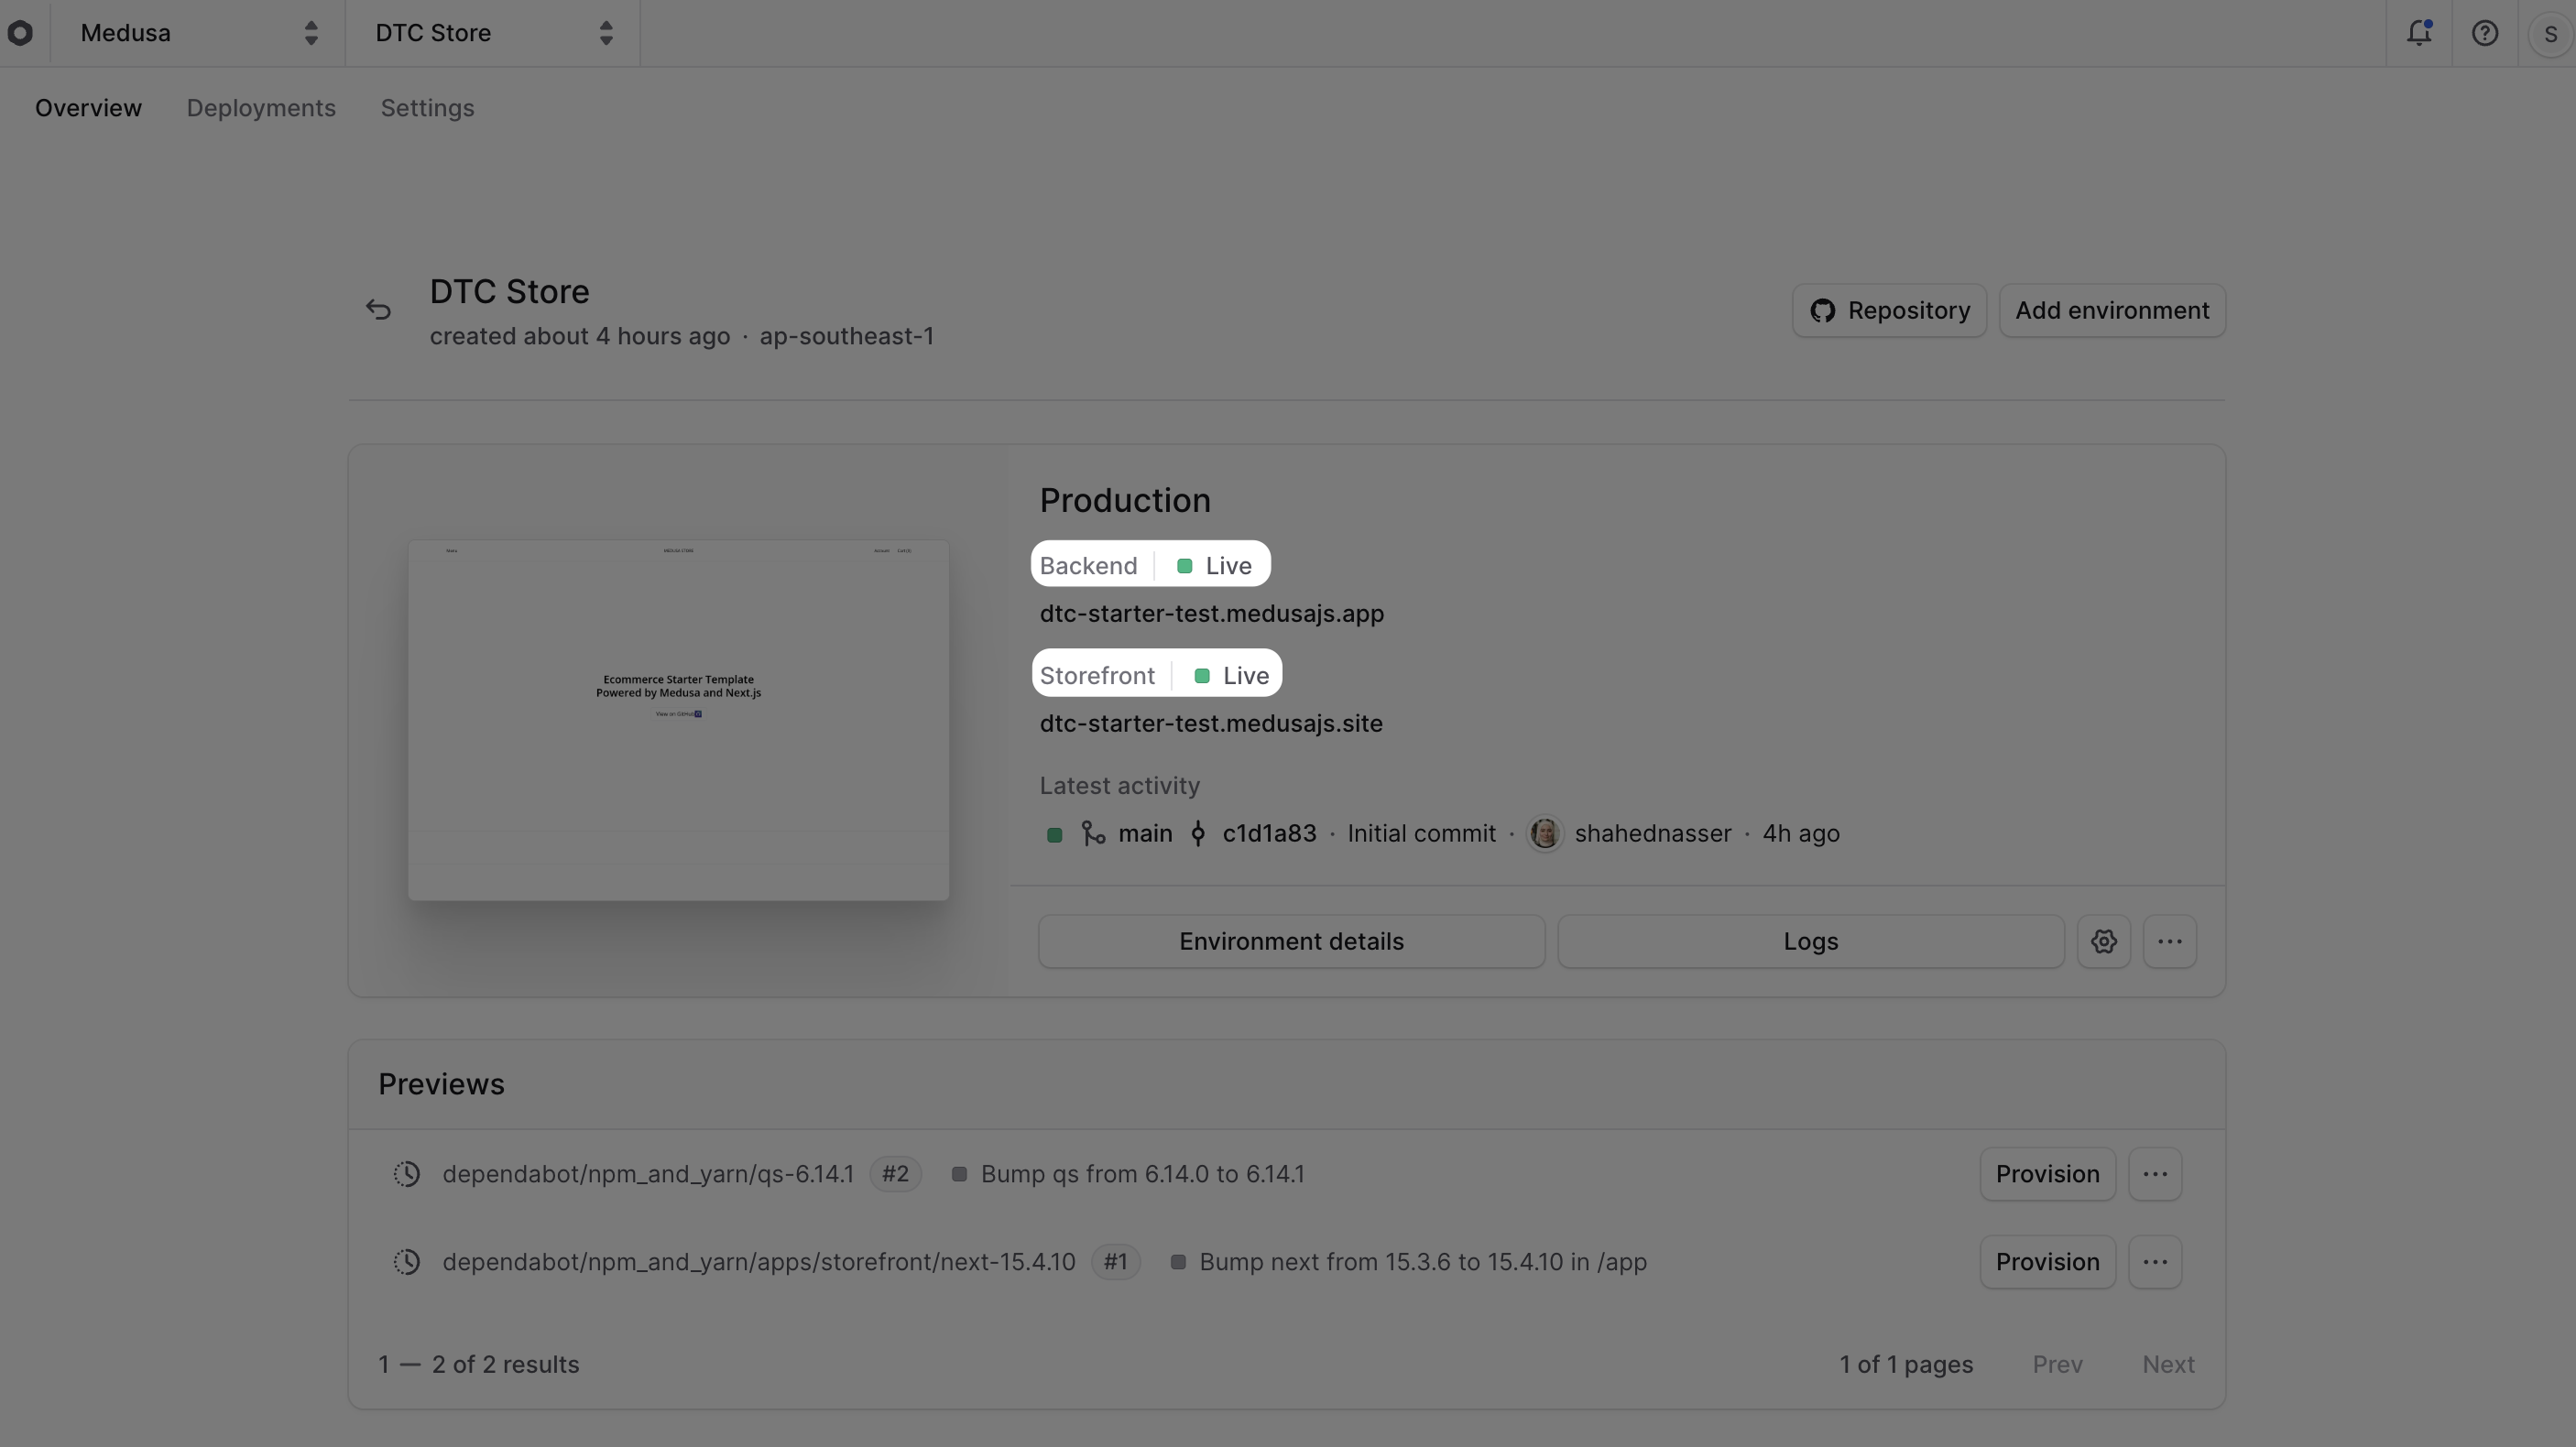
When you open a project's dashboard, its name will be shown at the top left next to the [organization switcher](../organizations/page.mdx#organization-switcher).
|
|
|
|

|
|
|
|
### Find Project Details
|
|
|
|
On the project's dashboard, you can view the following details:
|
|
|
|
|
|
|
|
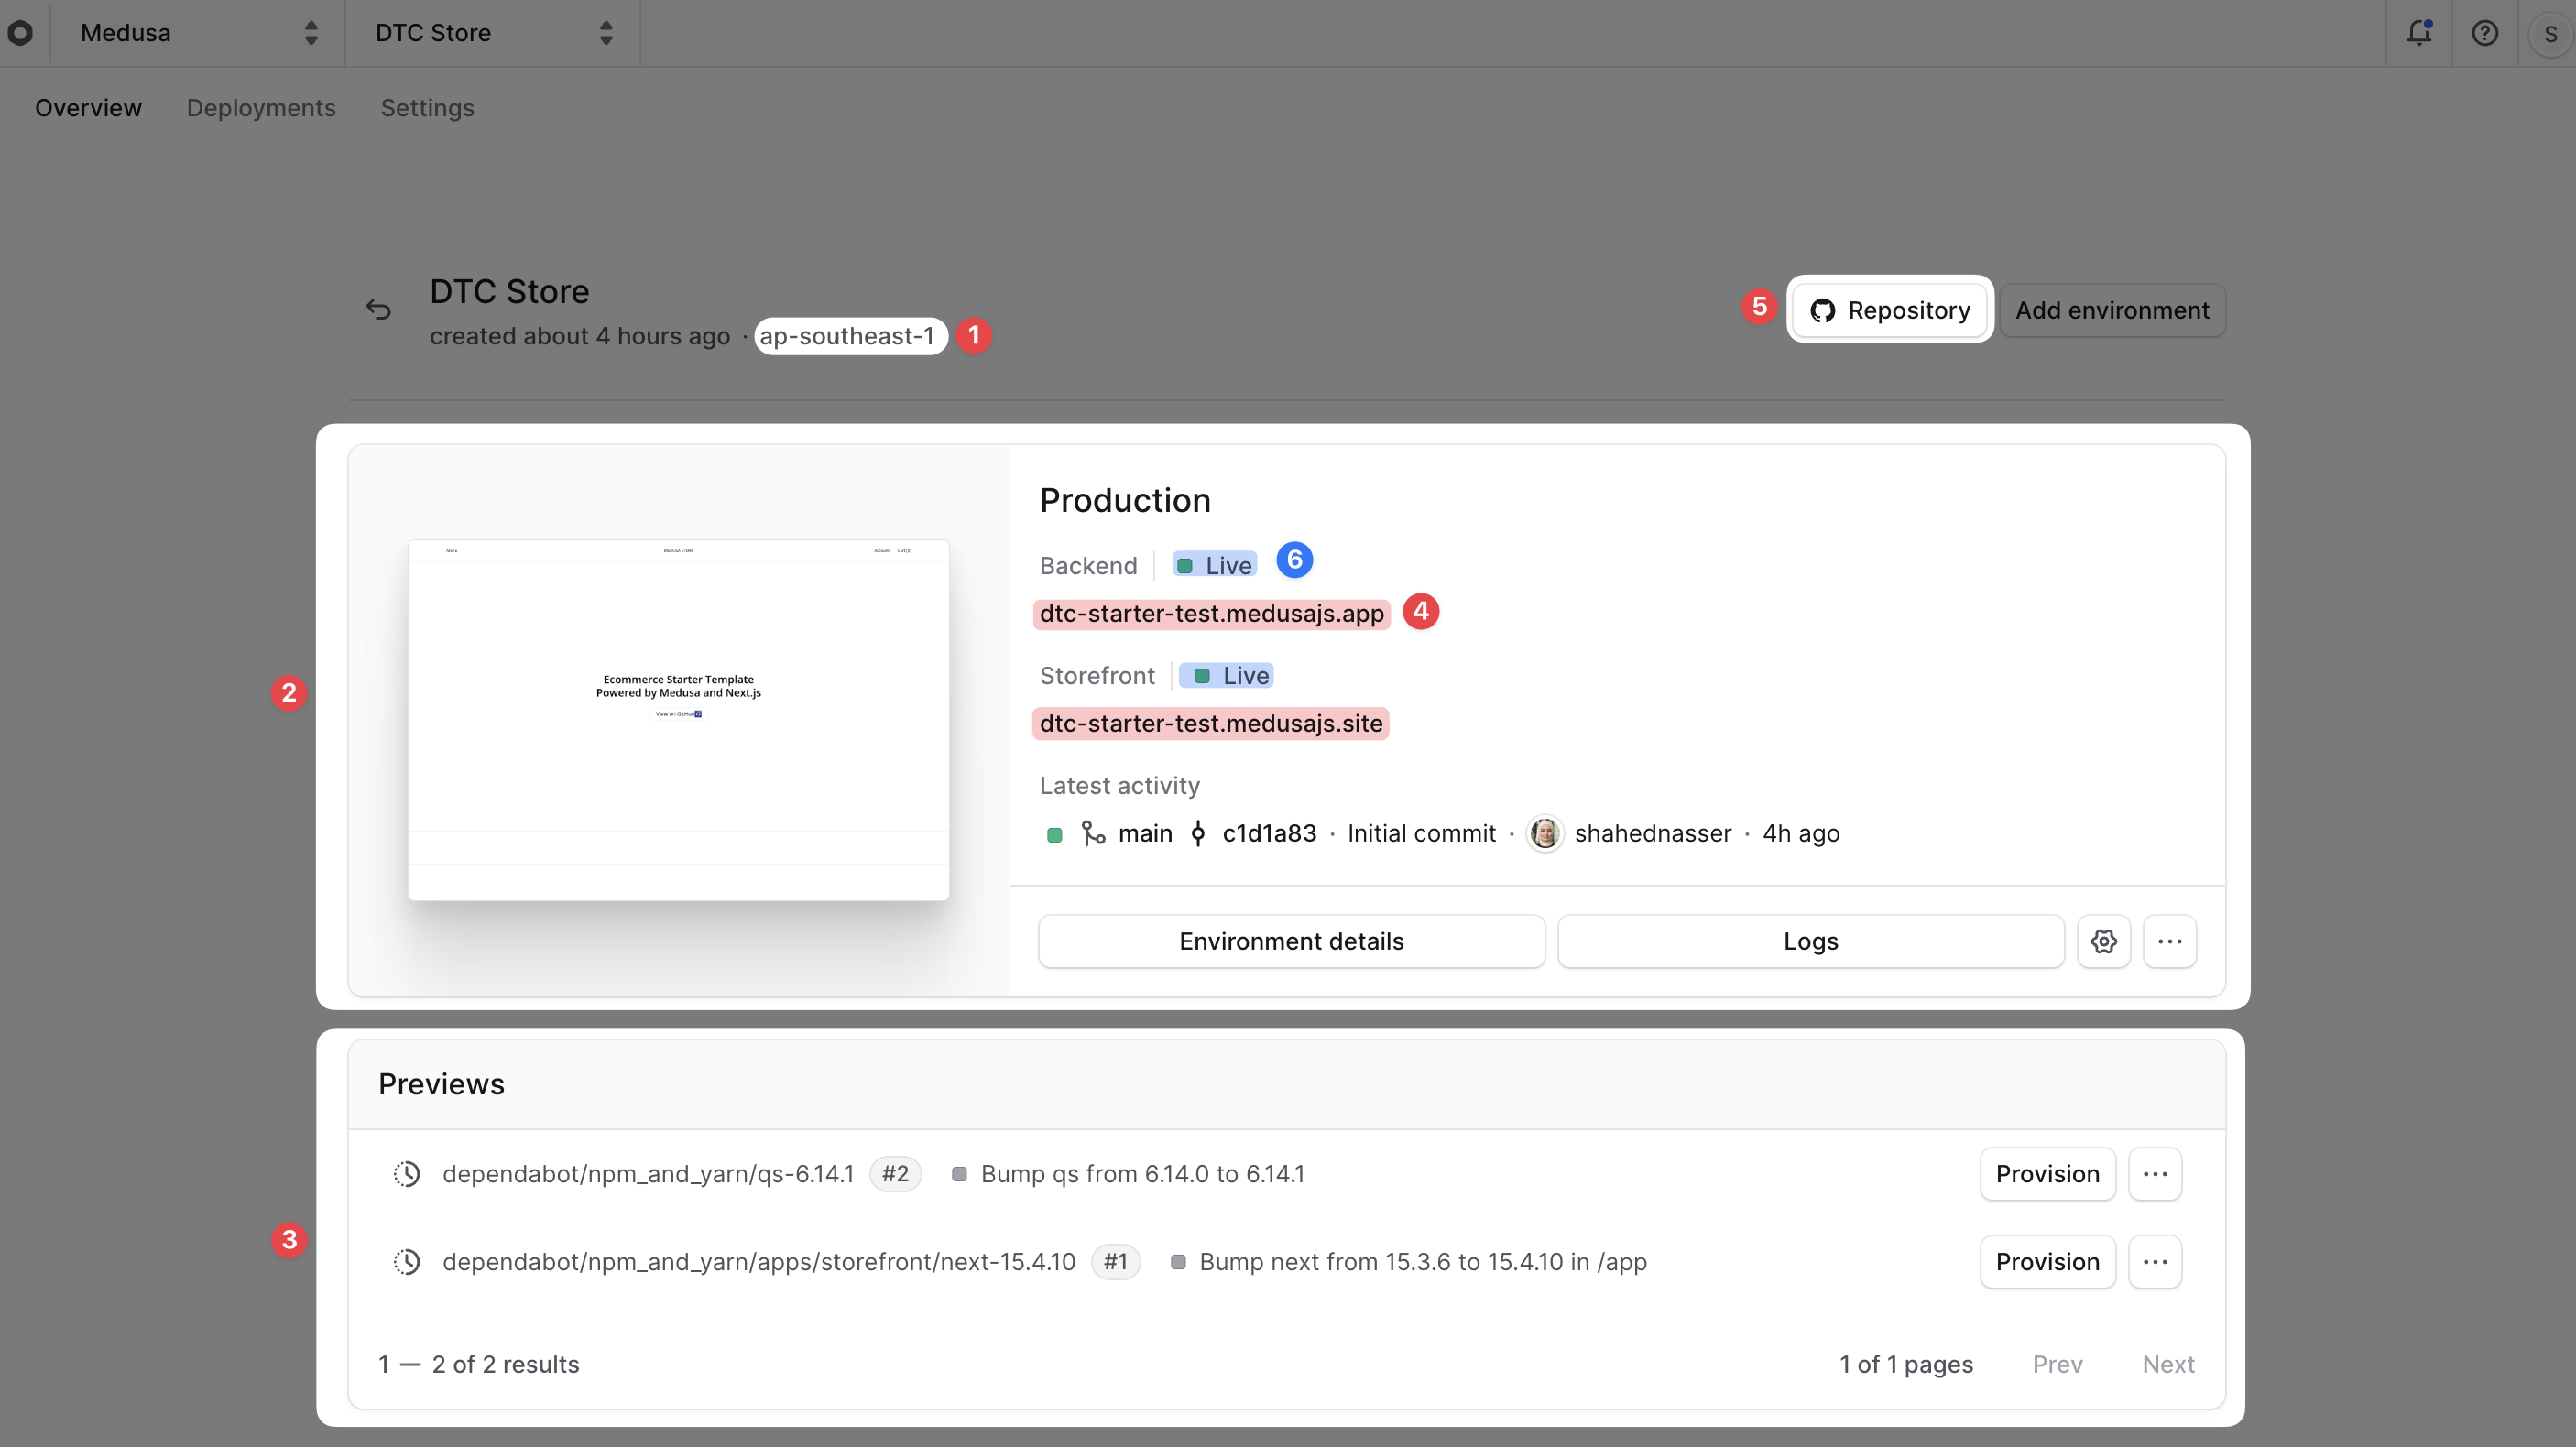
1. **Region**: The region where the project is deployed. You'll find it below the project name.
|
|
2. **Long-Lived Environments**: The long-lived environments for the project are shown as cards. By default, you'll find the Production environment. You can learn more about environments in the [Environments](../environments/page.mdx) guide.
|
|
- The Production environment is the live environment where your Medusa application is deployed and clients connect to.
|
|
- Other [Long-lived environments](../environments/long-lived/page.mdx) like Staging will be shown here if you create them. These are useful for testing changes before deploying them to Production.
|
|
- Each environment card shows the environment's name, URLs, and status.
|
|
3. **Preview Environments**: The Preview environments for the project are shown in a table below the long-lived environments.
|
|
- Previews environments are created whenever you create a pull request in the linked GitHub repository. They allow you to preview changes before merging them into the main branch.
|
|
- Learn more in the [Preview Environments](../environments/preview/page.mdx) guide.
|
|
4. **Production URL**: The URL of the project's production deployment. You'll find the backend and storefront URLs (if deployed) under their respective titles in the Production environment card.
|
|
5. **Repository**: The GitHub repository linked to the project. You'll find it as a "Repository" button at the top right of the project's dashboard. Clicking it will open the repository in a new tab.
|
|
6. **Production Deployment Status**: The deployment status of the project for the backend and storefront. If it's "Live", then the deployment was successful. Learn more in the [Deployments](../deployments/page.mdx#deployment-statuses-and-lifecycle) guide.
|
|
|
|
### Switch Projects
|
|
|
|
The project's name at the top left of the dashboard is also a project switcher.
|
|
|
|
To switch to a different project:
|
|
|
|
1. Click on the <InlineIcon Icon={ChevronUpDown} alt="switch project" /> icon next to the project's name at the top left of the Cloud dashboard, next to the organization name.
|
|
2. Choose the project you want to switch to from the dropdown.
|
|
|
|

|
|
|
|
This will change the view to the selected project, and you'll see its details, environments, and settings.
|
|
|
|
---
|
|
|
|
## View Project Deployments
|
|
|
|
To view the deployments of a project, click on the "Deployments" tab in the project's dashboard. This will show you a list of all deployments for the project, including their status, environment, and how long the deployment took.
|
|
|
|
Learn more in the [Deployments](../deployments/page.mdx) guide.
|
|
|
|
---
|
|
|
|
## Add Storefront to Existing Project
|
|
|
|
If you initially created a project with only a Medusa application and later want to add a storefront to it, you can do it from the organization or project's dashboard.
|
|
|
|
Before adding a storefront, make sure you've changed your repository structure to a monorepo that includes both the Medusa application and storefront code. Learn how to create the monorepo in the [Prerequisites for Creating Projects](./prerequisites/page.mdx#prerequisites-for-medusa-application-with-storefront) guide.
|
|
|
|
Then, to add a storefront to an existing project:
|
|
|
|
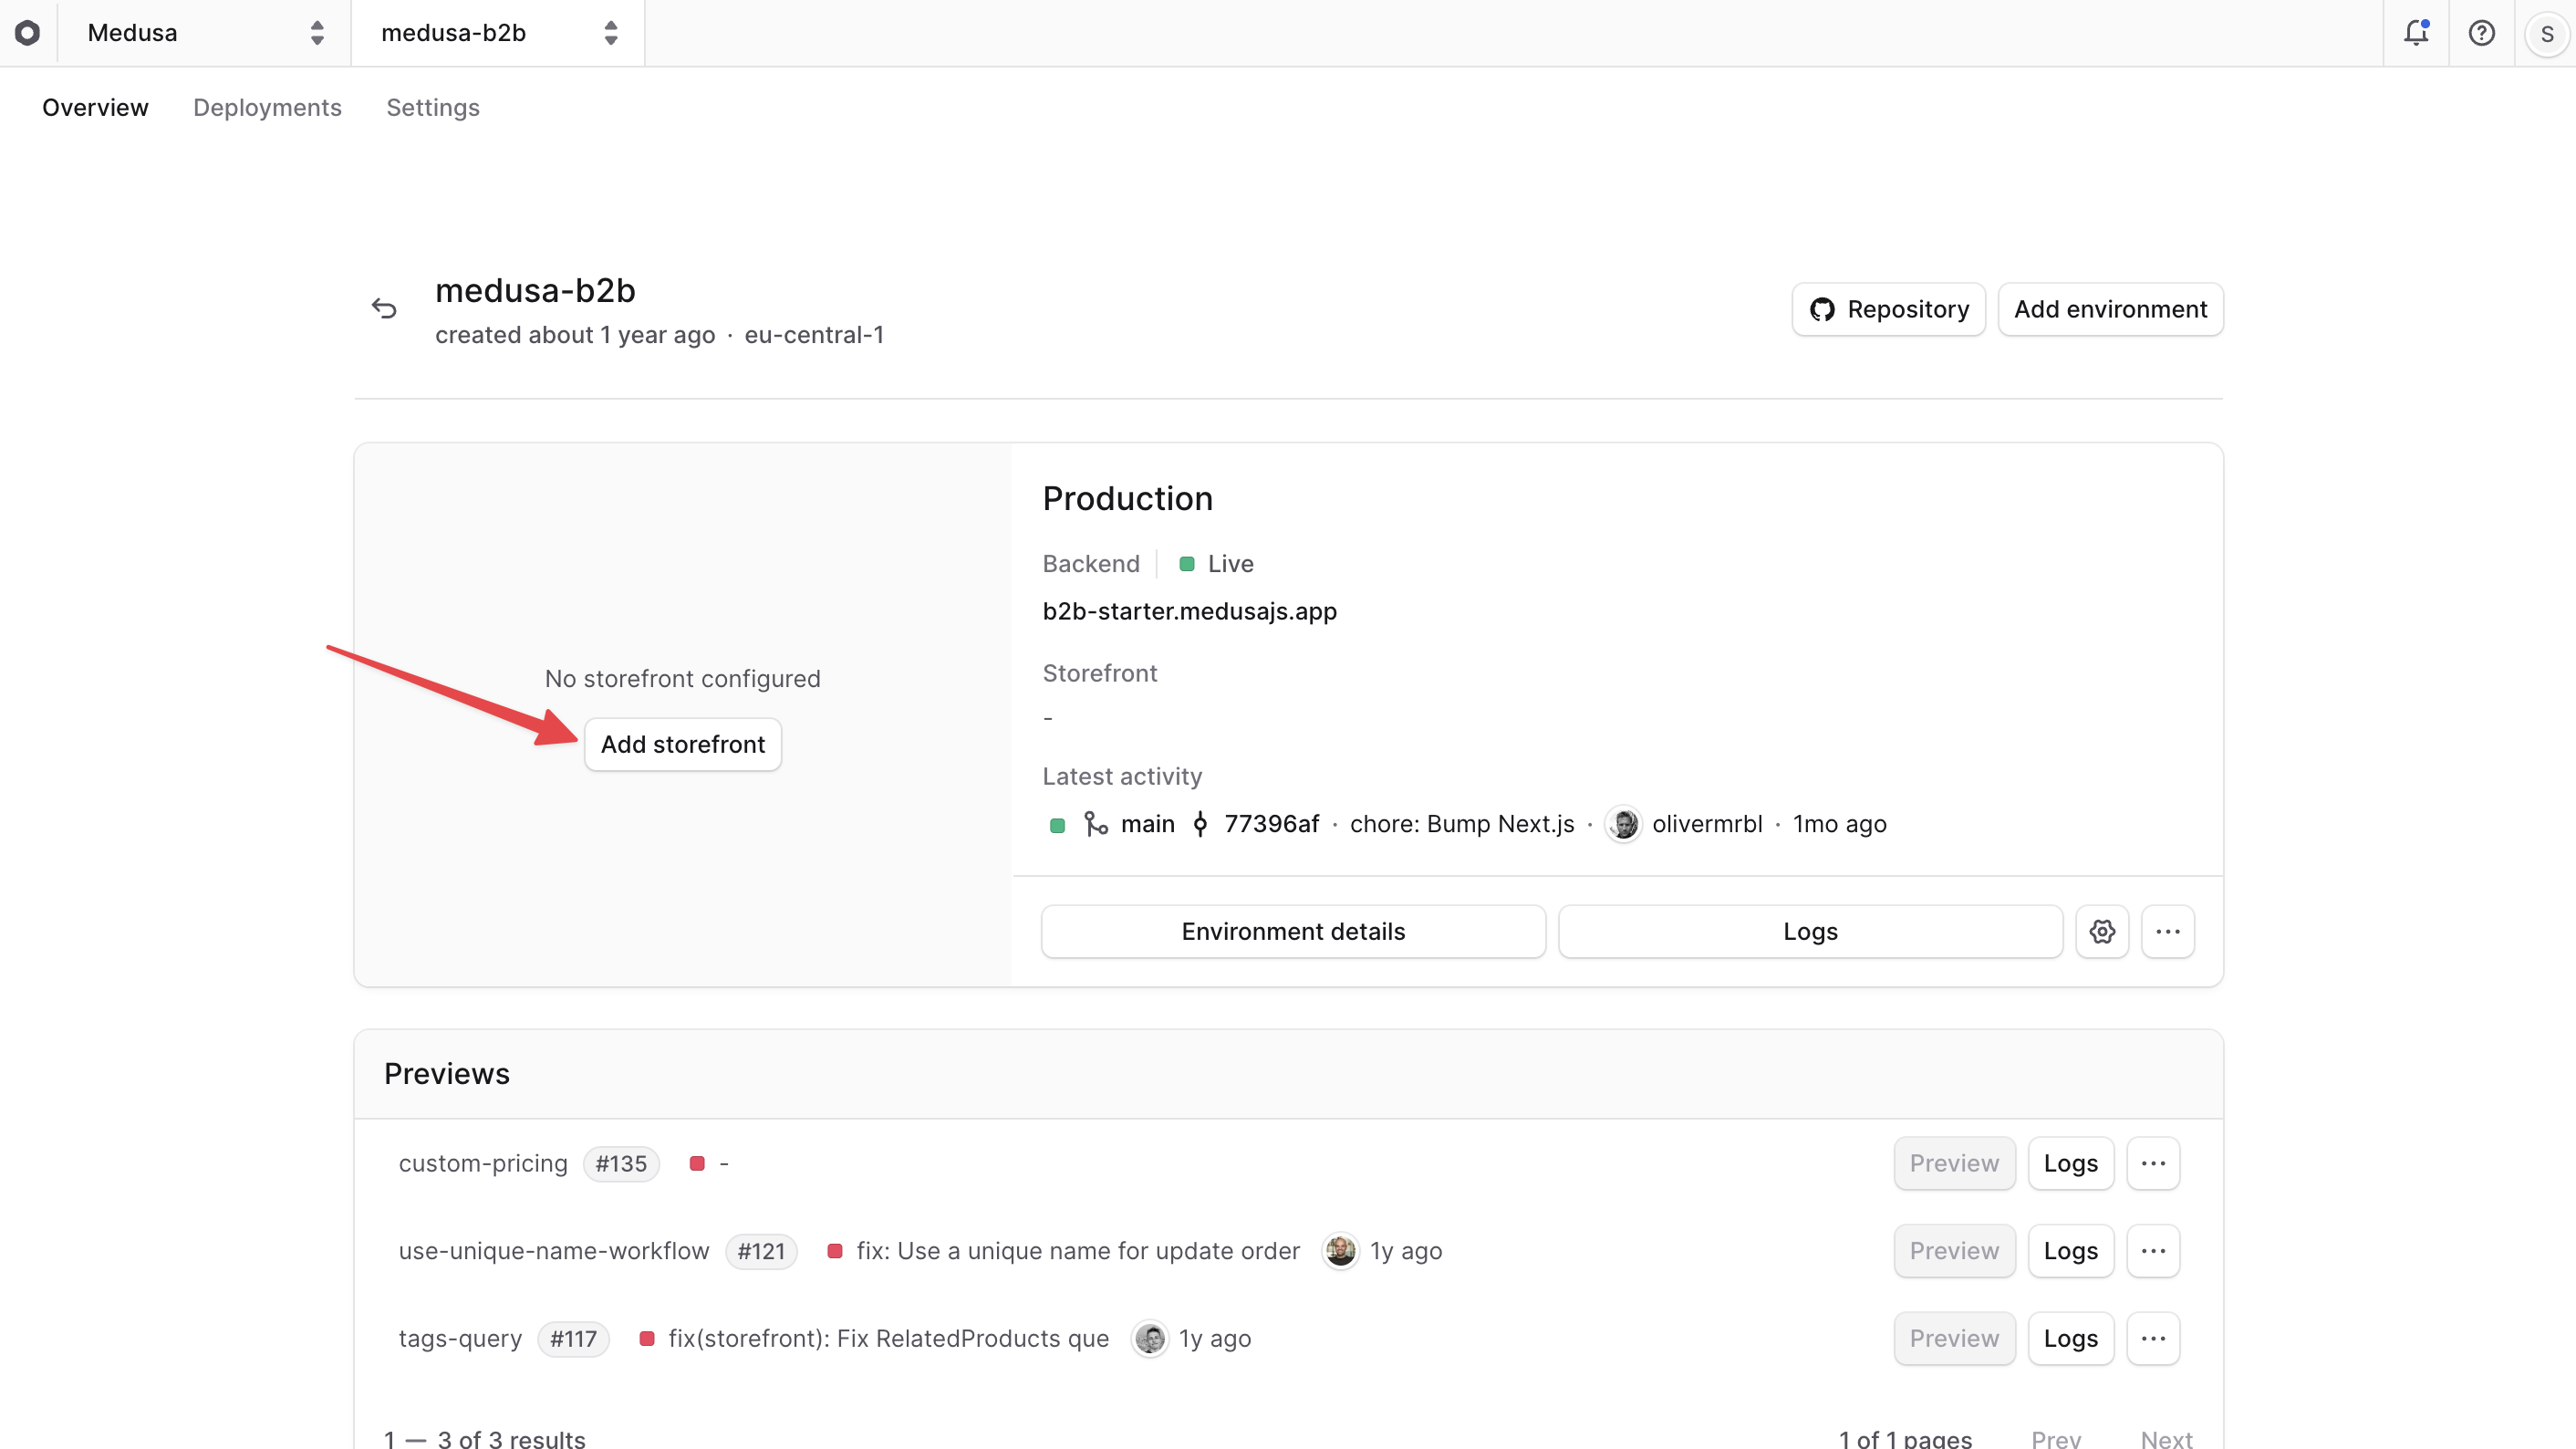
1. Open the project's dashboard.
|
|
2. Click on the "Add storefront" button at the Production environment card.
|
|
|
|
|
|
|
|
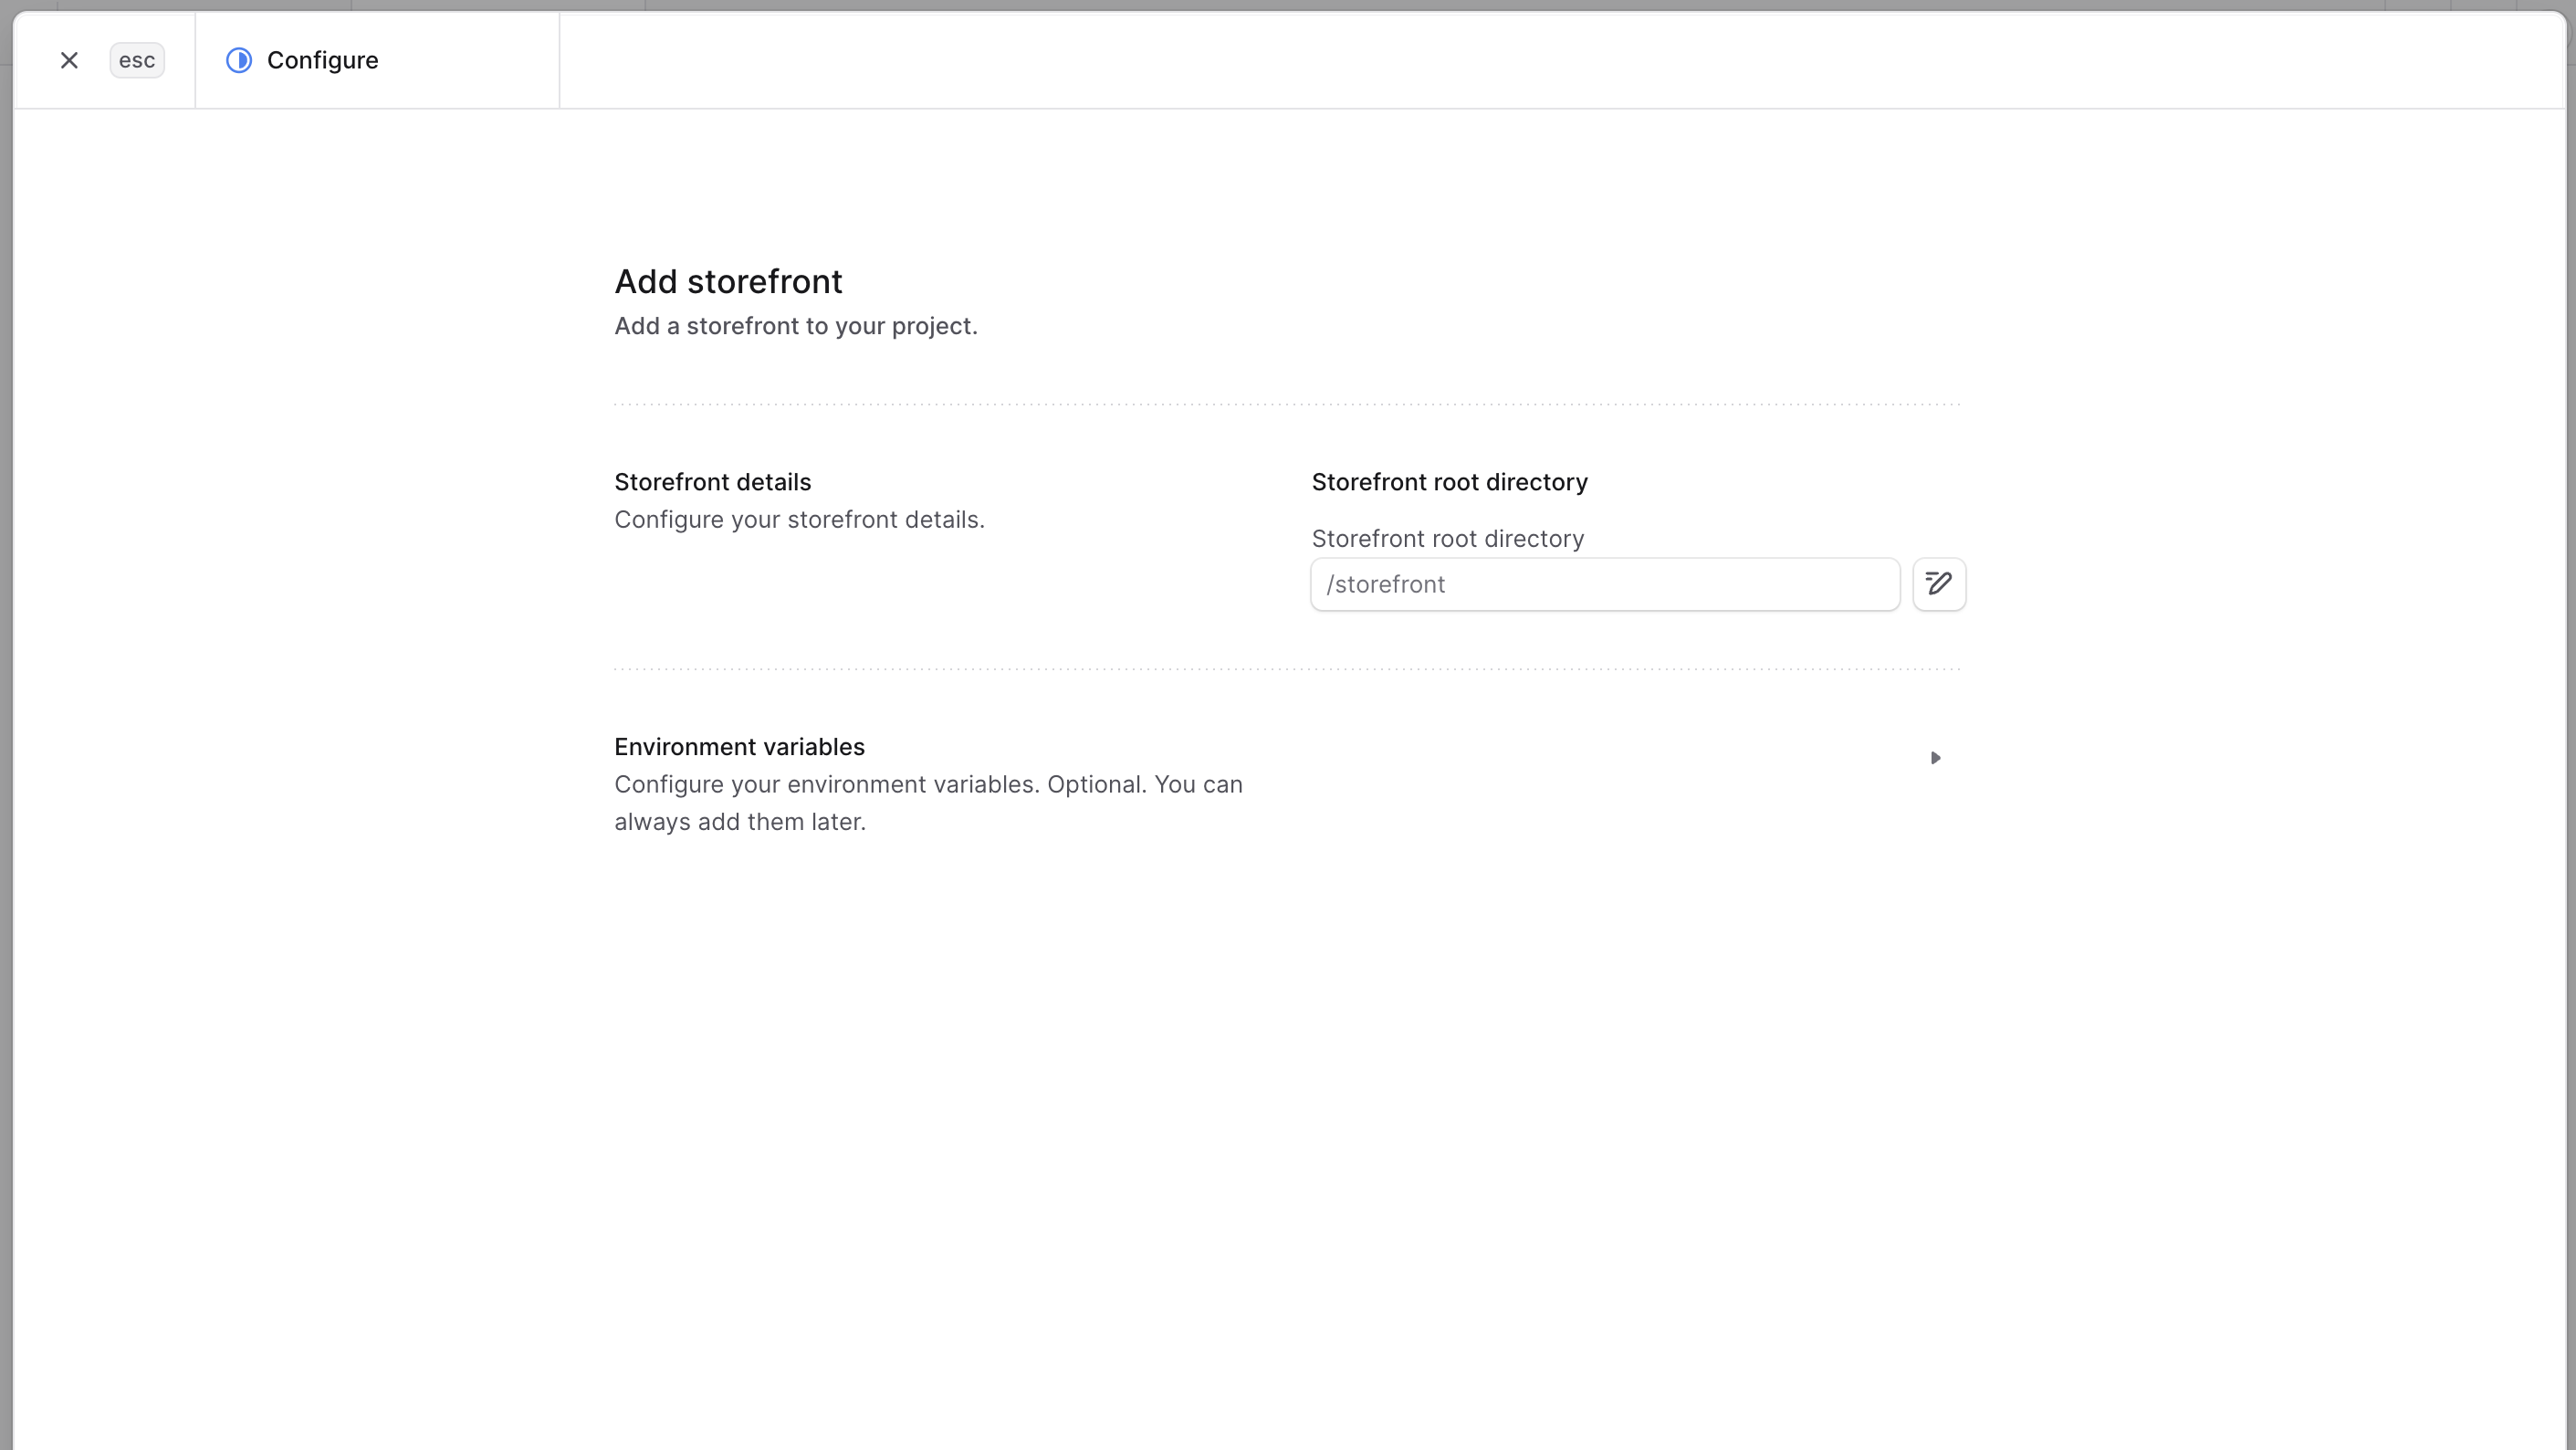
3. In the "Add Storefront" form, enter the following details:
|
|
- **Storefront root directory**: The path to the storefront project in the repository.
|
|
- **Environment variables**: (Optional) Expand this section to add any necessary environment variables.
|
|
4. Once you're done, click the "Create" button.
|
|
|
|
|
|
|
|
Cloud will then deploy the storefront along with the Medusa application. Once the deployment is complete, you'll be able to access the storefront from the Production environment card in the project's dashboard.
|
|
|
|
You can also set a custom domain for the storefront, as explained in the [Storefront](../storefront/page.mdx#storefront-custom-domain) guide.
|
|
|
|
---
|
|
|
|
## Edit Project Details
|
|
|
|
After creating a project, you can edit its general details, such as the project name and root directory in the repository, and manage its preview settings.
|
|
|
|
To edit a project's general details:
|
|
|
|
1. Open the project's dashboard.
|
|
2. Click on the "Settings" tab.
|
|
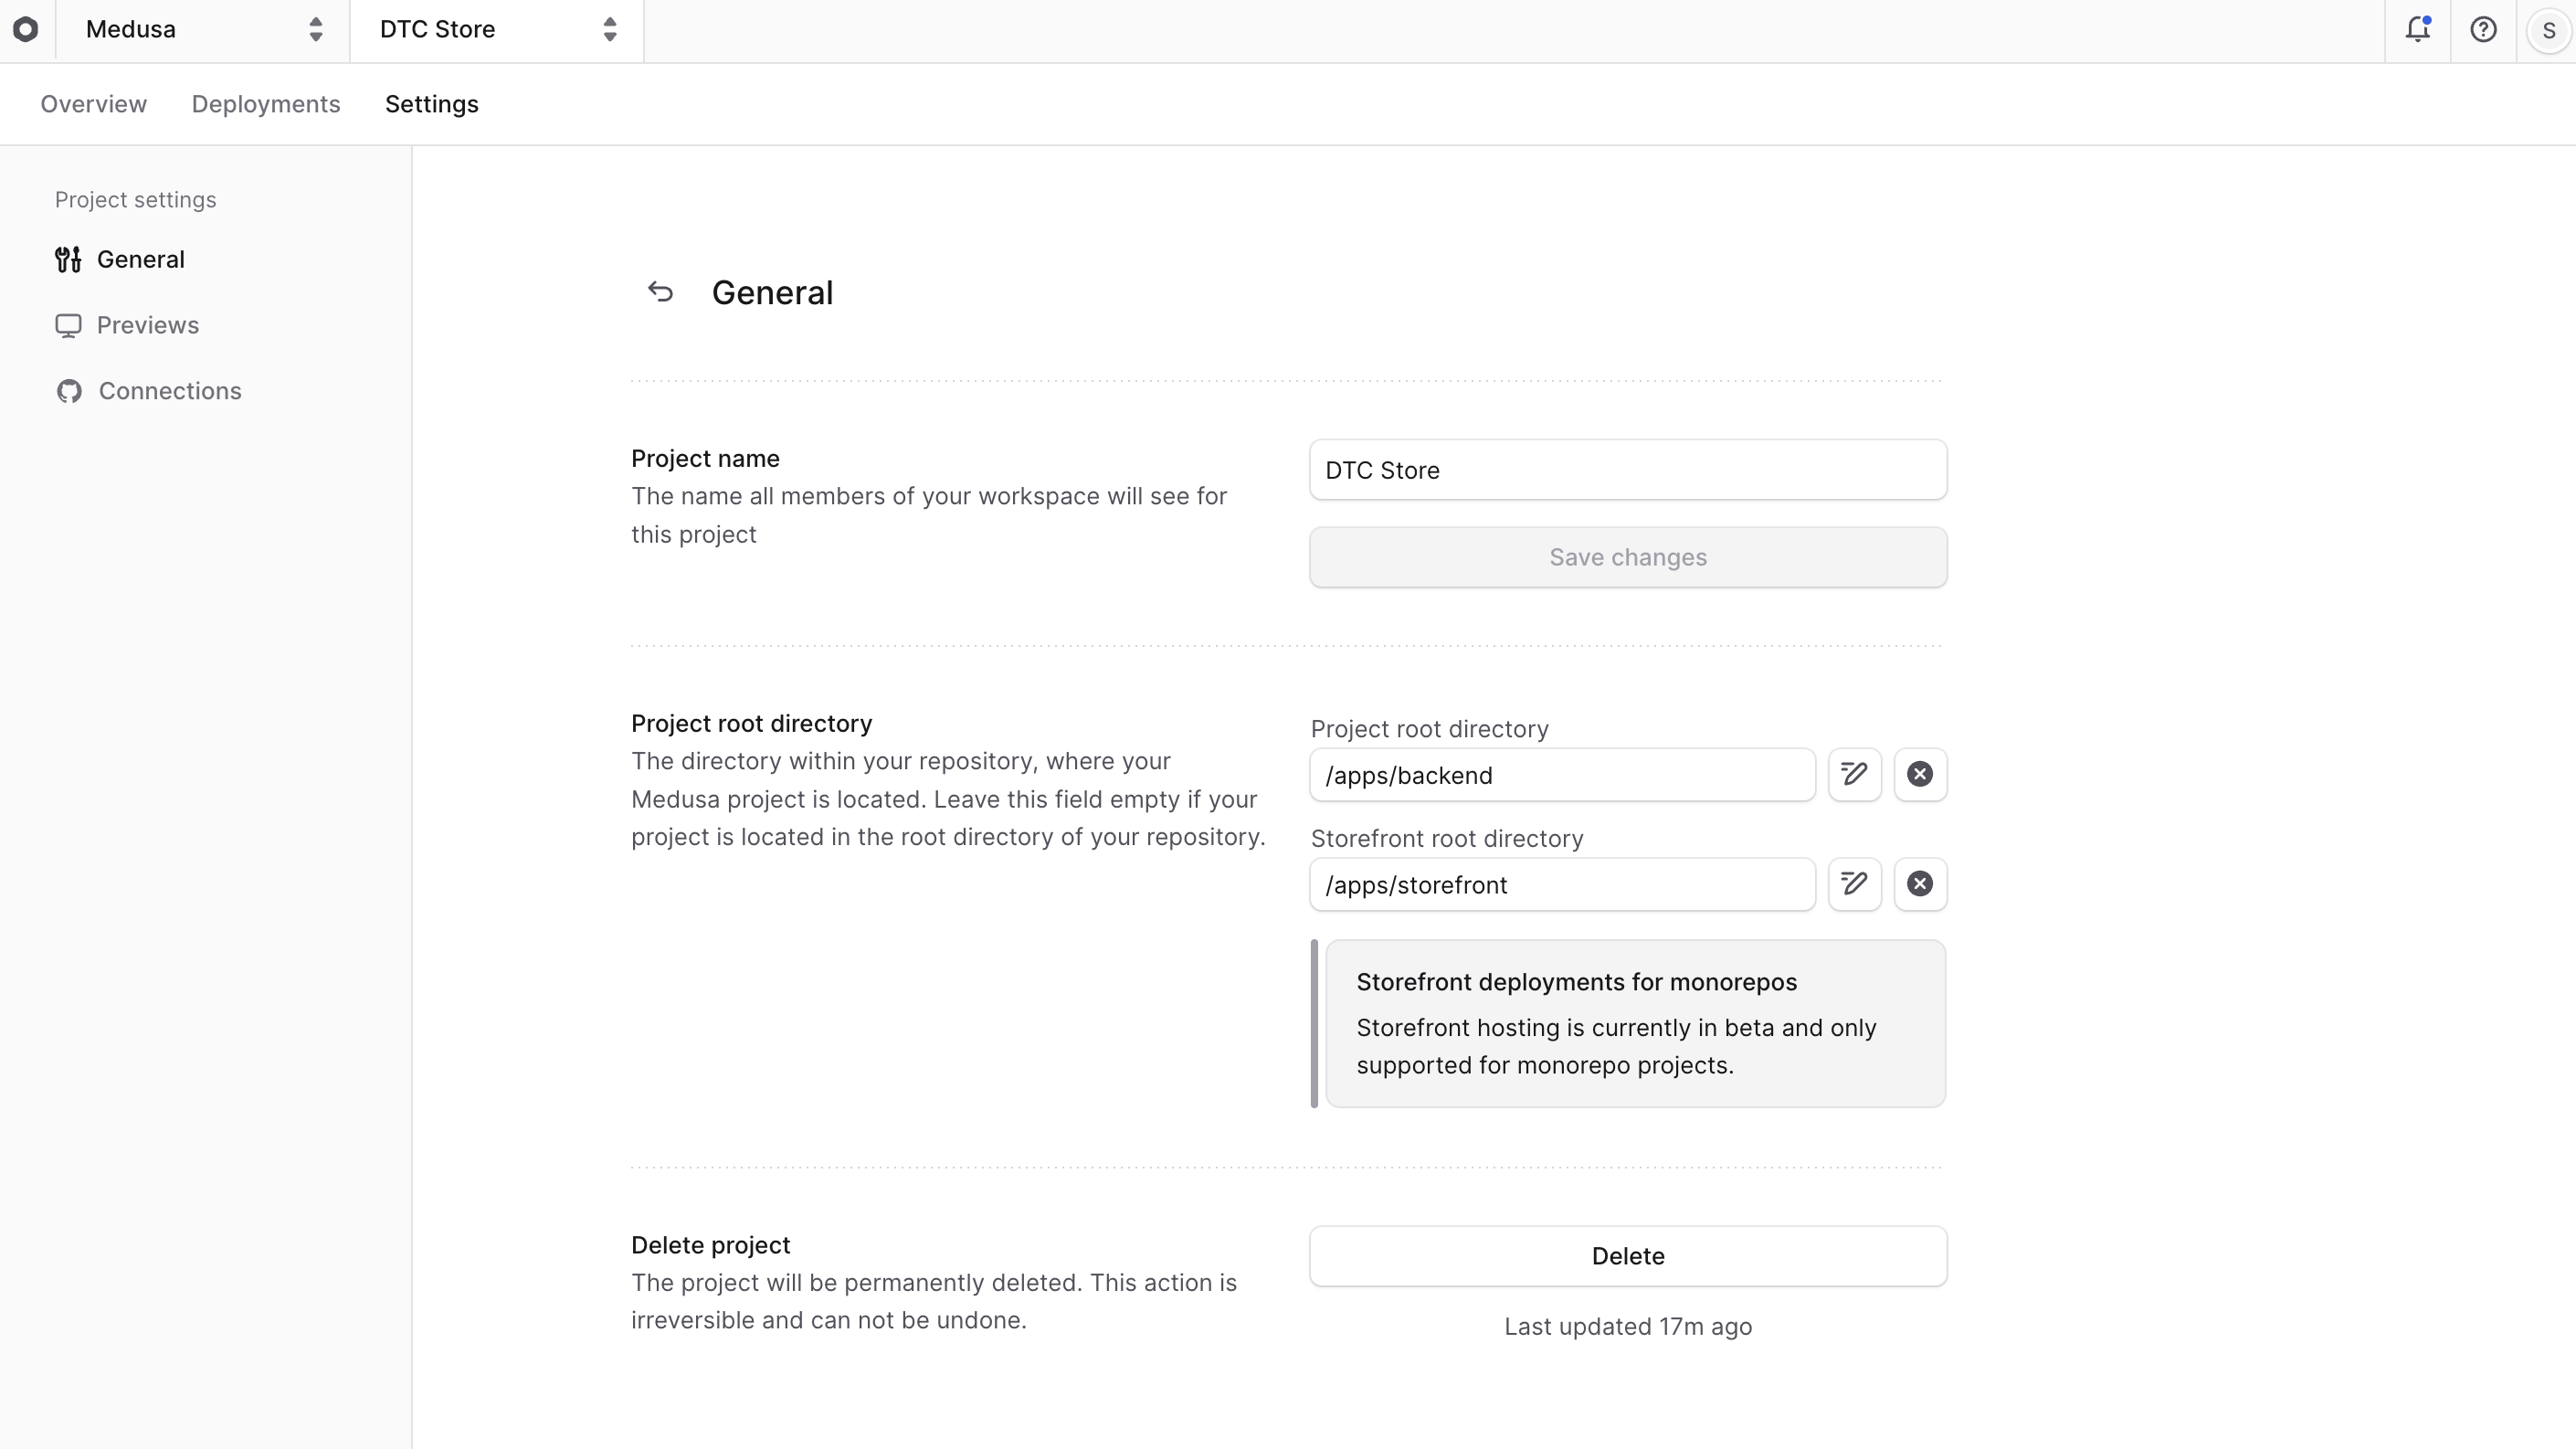
3. In the "General" tab of the Settings page, you can edit the project's name and root directories of the backend and storefront in the repository.
|
|
- Changing the root directory is useful if the structure of your repository has changed.
|
|
4. Once you're done making changes, click the "Save changes" button next to the input field.
|
|
|
|
|
|
|
|
### Editing Previews Settings
|
|
|
|
You can also edit the "Previews" settings of a project from the "Settings" tab, which are general settings related to Previews environments.
|
|
|
|
Learn more in the [Preview Environments](../environments/preview/page.mdx) guide.
|
|
|
|
---
|
|
|
|
## Delete Project
|
|
|
|
<Note type="warning" title="Danger">
|
|
Deleting a project will delete all its environments and deployments. This action is irreversible.
|
|
You won't be able to recover any data after deletion.
|
|
</Note>
|
|
|
|
To delete a project:
|
|
|
|
1. Open the project's dashboard.
|
|
2. Click on the "Settings" tab.
|
|
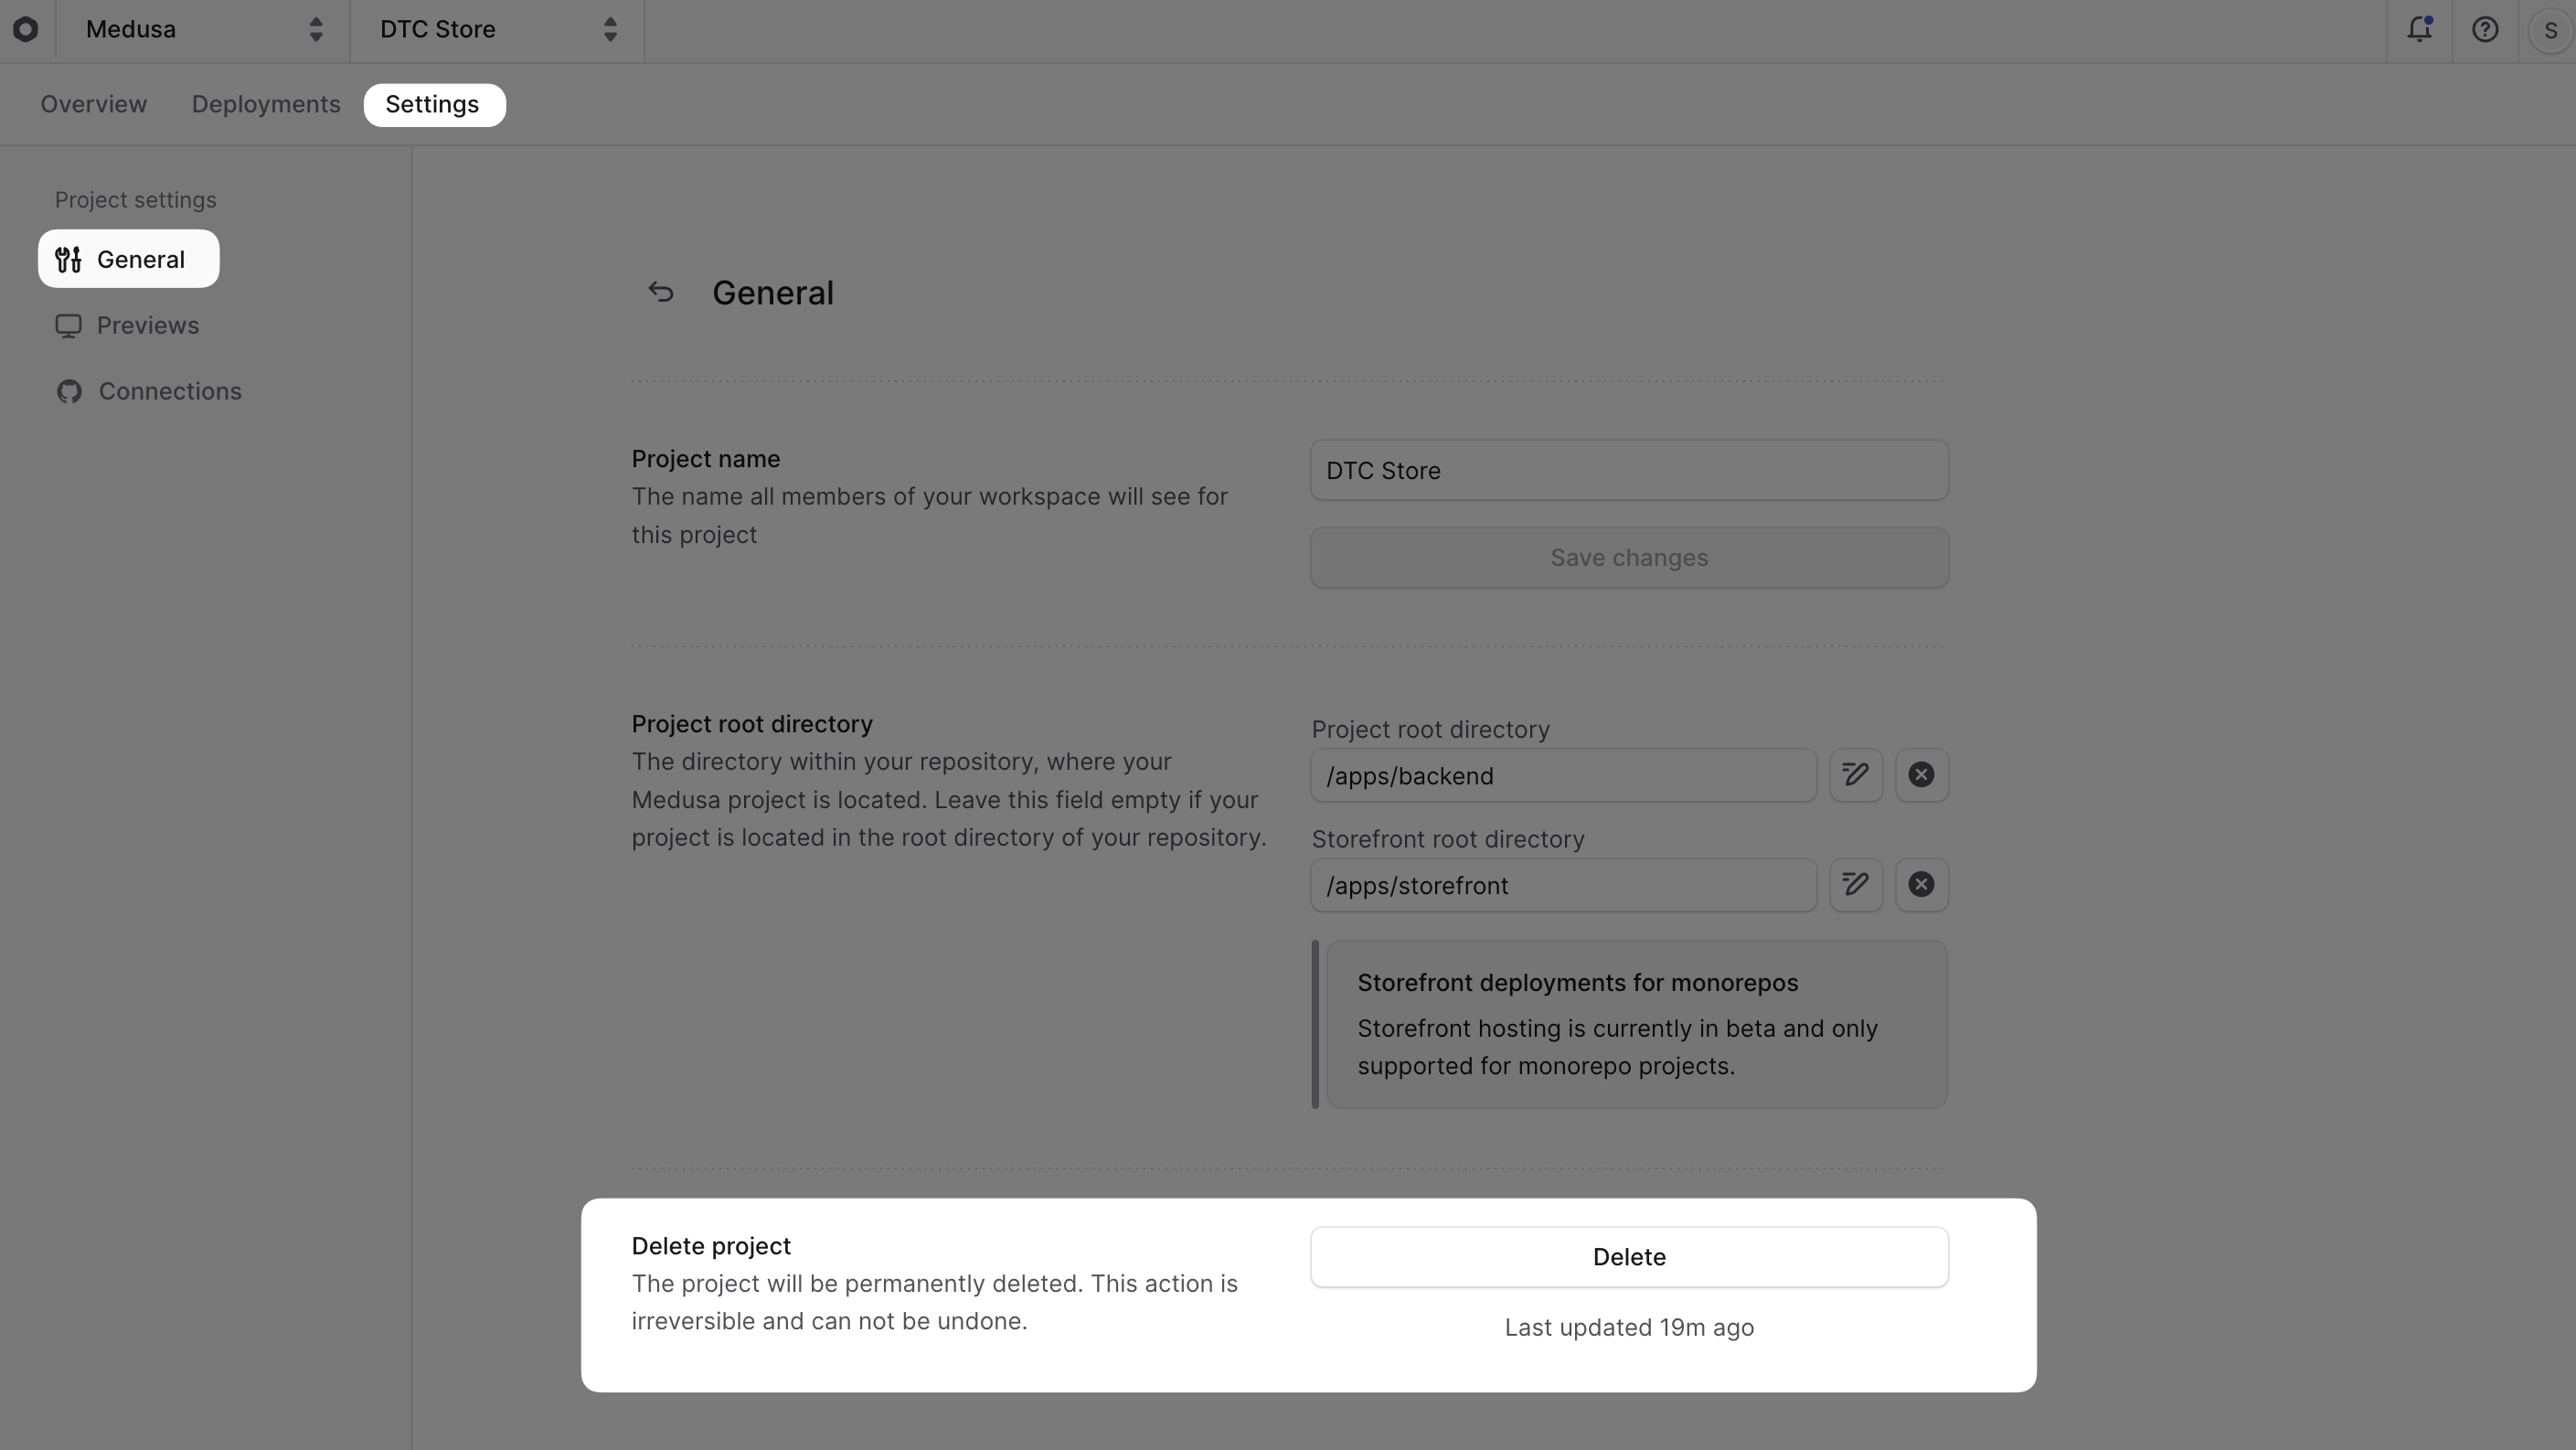
3. In the "General" tab of the Settings page, click the "Delete" button in the "Delete project" section at the bottom.
|
|
4. Confirm the deletion by typing "delete project" in the confirmation input, then click the "Delete" button.
|
|
|
|
|