36 lines
2.0 KiB
Plaintext
36 lines
2.0 KiB
Plaintext
export const metadata = {
|
|
title: `Environments`,
|
|
}
|
|
|
|
# {metadata.title}
|
|
|
|
In this guide, you'll learn about environments in Cloud, how to create and manage them, and how to use preview environments.
|
|
|
|
## Environments Overview
|
|
|
|
A Cloud project can have multiple environments, each representing a different stage of your application. For example, you can have a Production environment for your live application, and a Staging environment for testing new features.
|
|
|
|
Each environment has its own resources, such as a database and server instance. By default, a project has at least a Production environment, and you can create custom environments based on your development needs.
|
|
|
|
Environments are useful to test changes in production-like conditions before actually pushing them to production. You can test out new features, bug fixes, and integrations without affecting the live application.
|
|
|
|
### Environment Types
|
|
|
|
There are two types of environments:
|
|
|
|
- [Long-lived environments](./long-lived/page.mdx): These are environments that you create for specific branches in your GitHub repository, such as Production or Staging environments.
|
|
- [Short-lived Preview environments](./preview/page.mdx): These are environments automatically created for each pull request (PR) towards a branch that has a long-lived environment in Cloud. They're created as a preview for the PR, and are destroyed once the PR is merged or closed.
|
|
|
|
---
|
|
|
|
## View Project's Environments on Cloud
|
|
|
|
To view a project's environments:
|
|
|
|
1. Make sure you're viewing the [correct organization's dashboard in Cloud](../organizations/page.mdx#switch-organization).
|
|
2. Click on the project whose environments you want to view.
|
|
|
|
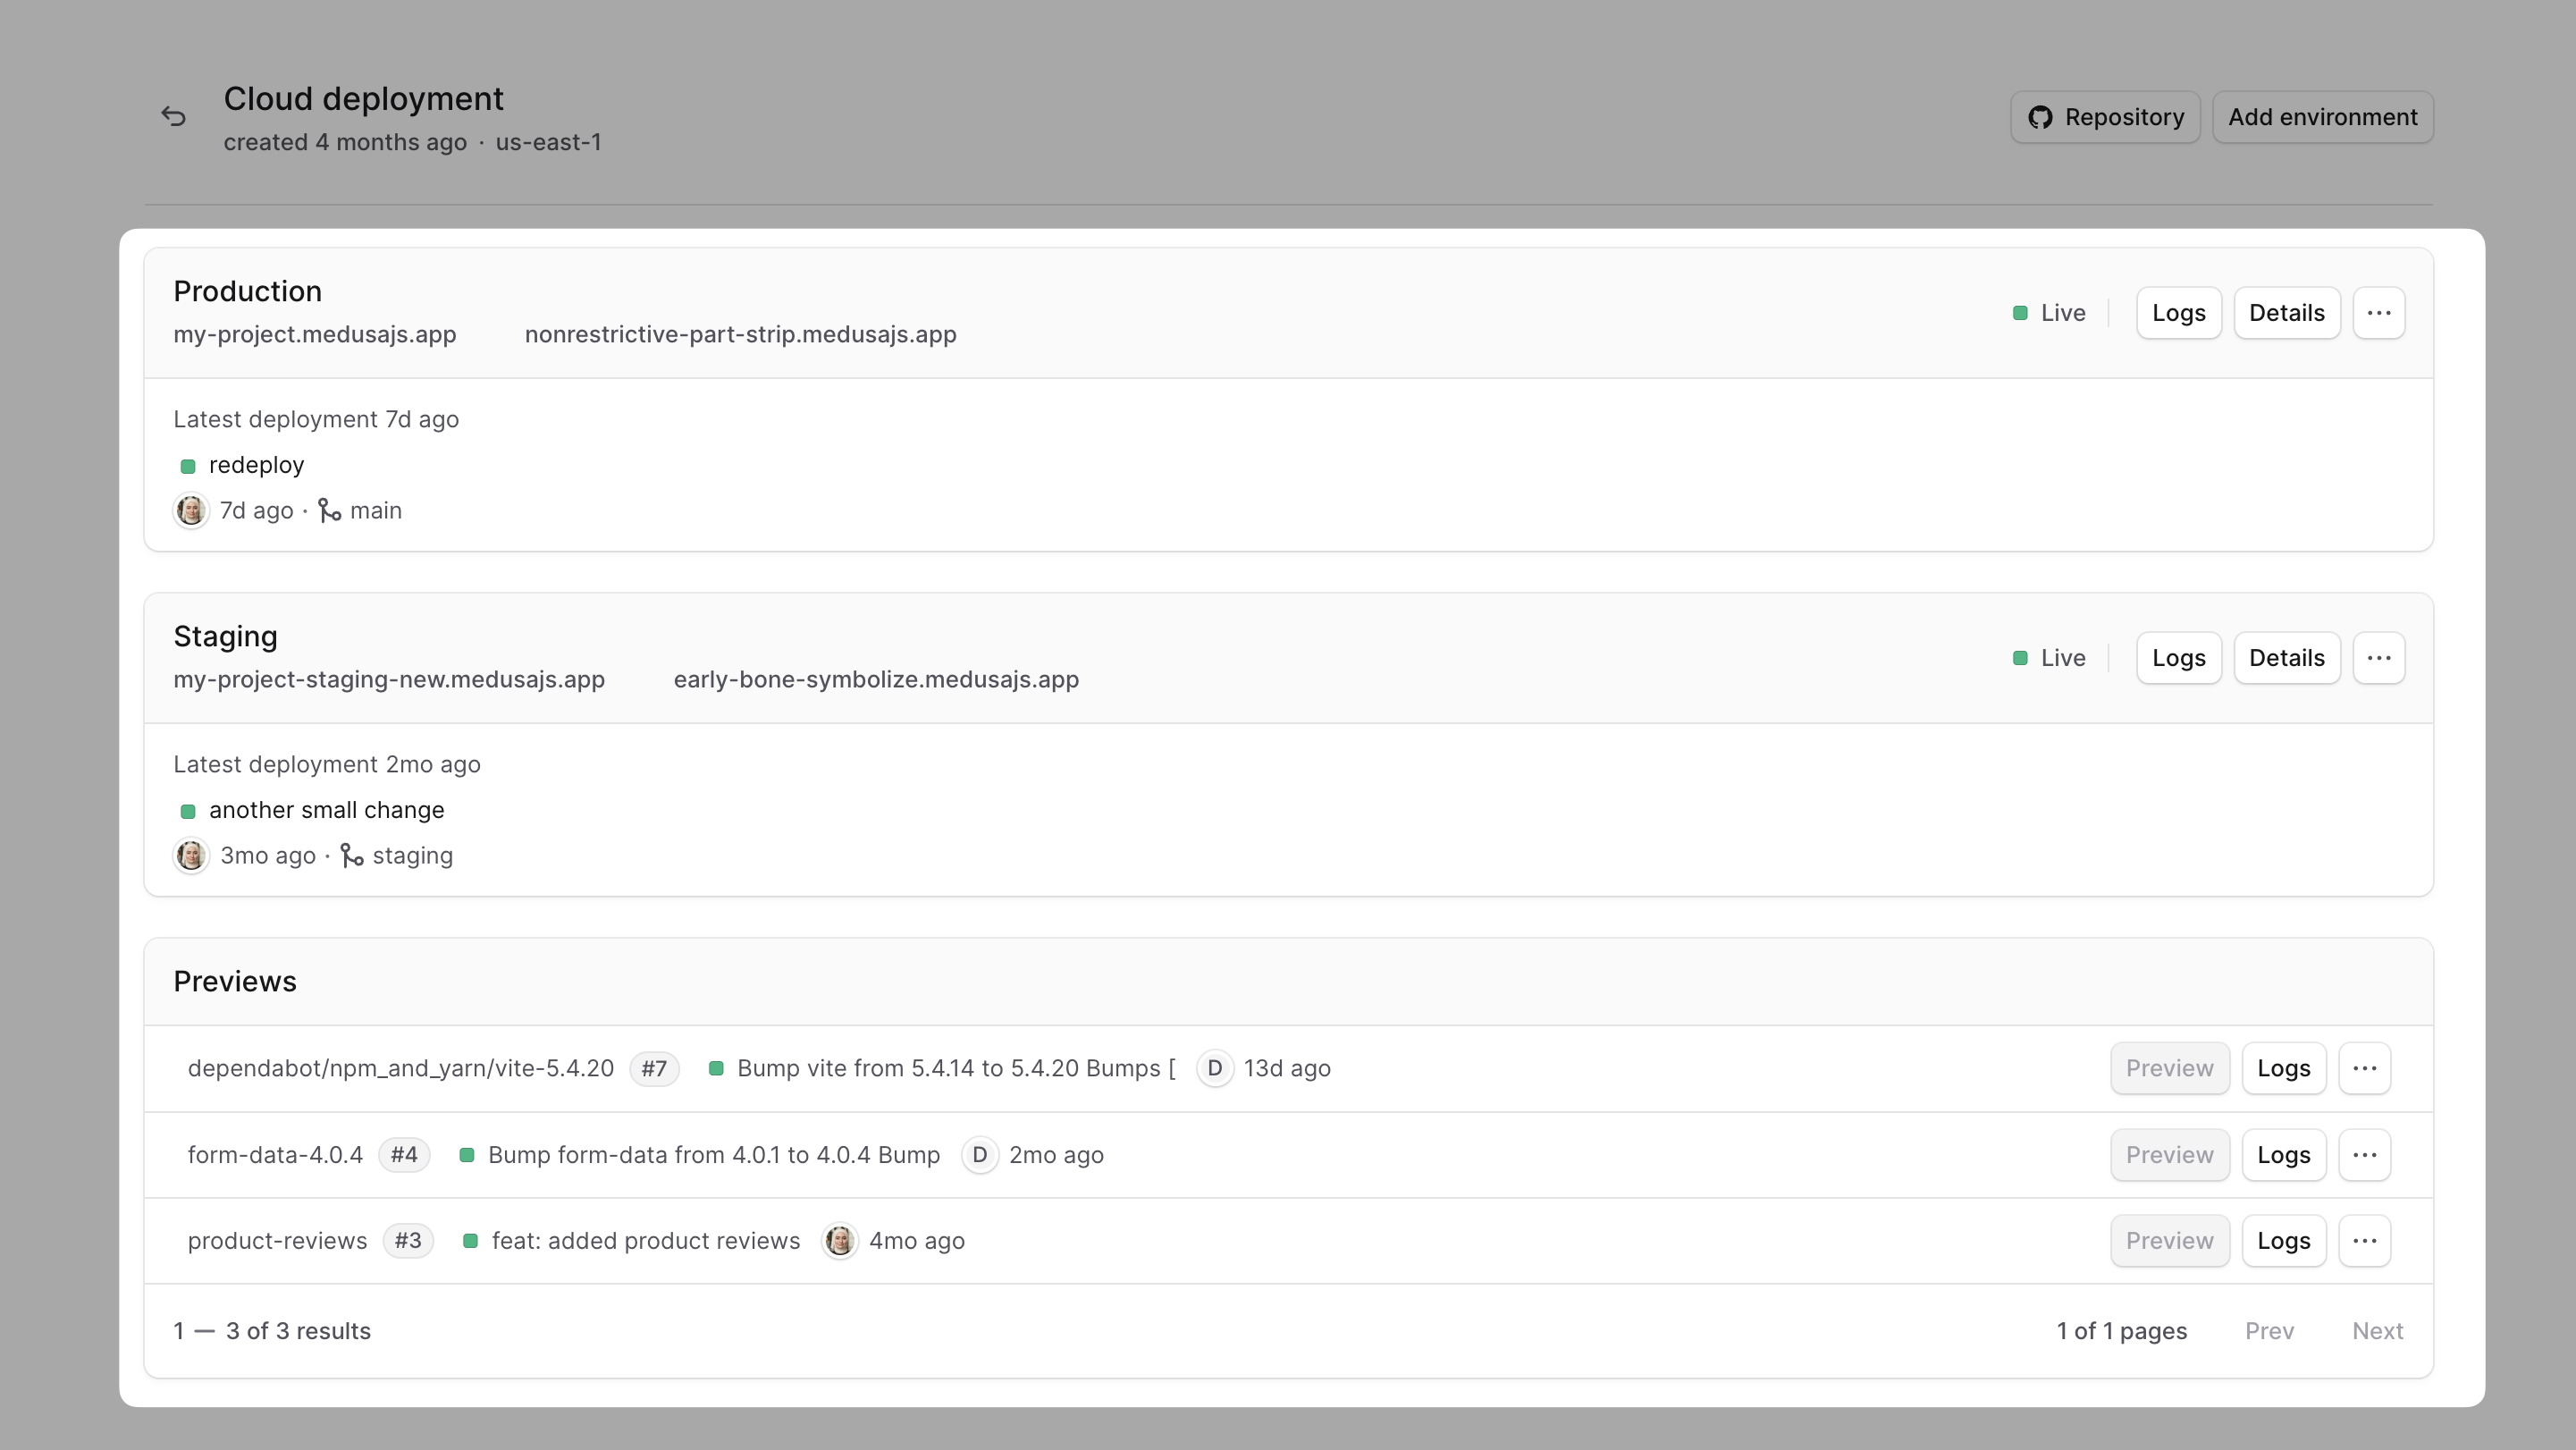
In the project's dashboard, you'll find a card for every environment in your project. For example, you may have Production, Staging, and Previews cards.
|
|
|
|
|