104 lines
5.0 KiB
Plaintext
104 lines
5.0 KiB
Plaintext
---
|
||
sidebar_position: 7
|
||
sidebar_label: "Manage Order Exchanges"
|
||
tags:
|
||
- user guide
|
||
- order
|
||
products:
|
||
- order
|
||
---
|
||
|
||
import {
|
||
EllipsisHorizontal,
|
||
PencilSquare
|
||
} from "@medusajs/icons"
|
||
|
||
export const metadata = {
|
||
title: `Manage Exchanges in Medusa Admin`,
|
||
}
|
||
|
||
# {metadata.title}
|
||
|
||
In this guide, you’ll learn how to manage order exchanges.
|
||
|
||
## Order Exchange Overview
|
||
|
||
After items have been delivered to the customer, you can create an exchange where the customer returns the items and you send them a new one. Order exchanges are useful if the customer received an incorrect item or they changed their mind about the item they purchased, and you want to offer them a replacement.
|
||
|
||
|
||
|
||
---
|
||
|
||
## Create an Order Exchange
|
||
|
||
You can create an order exchange after the order's items have been [delivered](../fulfillments/page.mdx#mark-fulfillment-as-delivered).
|
||
|
||
To create an order exchange:
|
||
|
||
1. Go to an order’s details page.
|
||
2. In the Summary section, click on the <InlineIcon Icon={EllipsisHorizontal} alt="three-dots" /> icon in the section's header.
|
||
3. Choose "Create Exchange" from the dropdown.
|
||
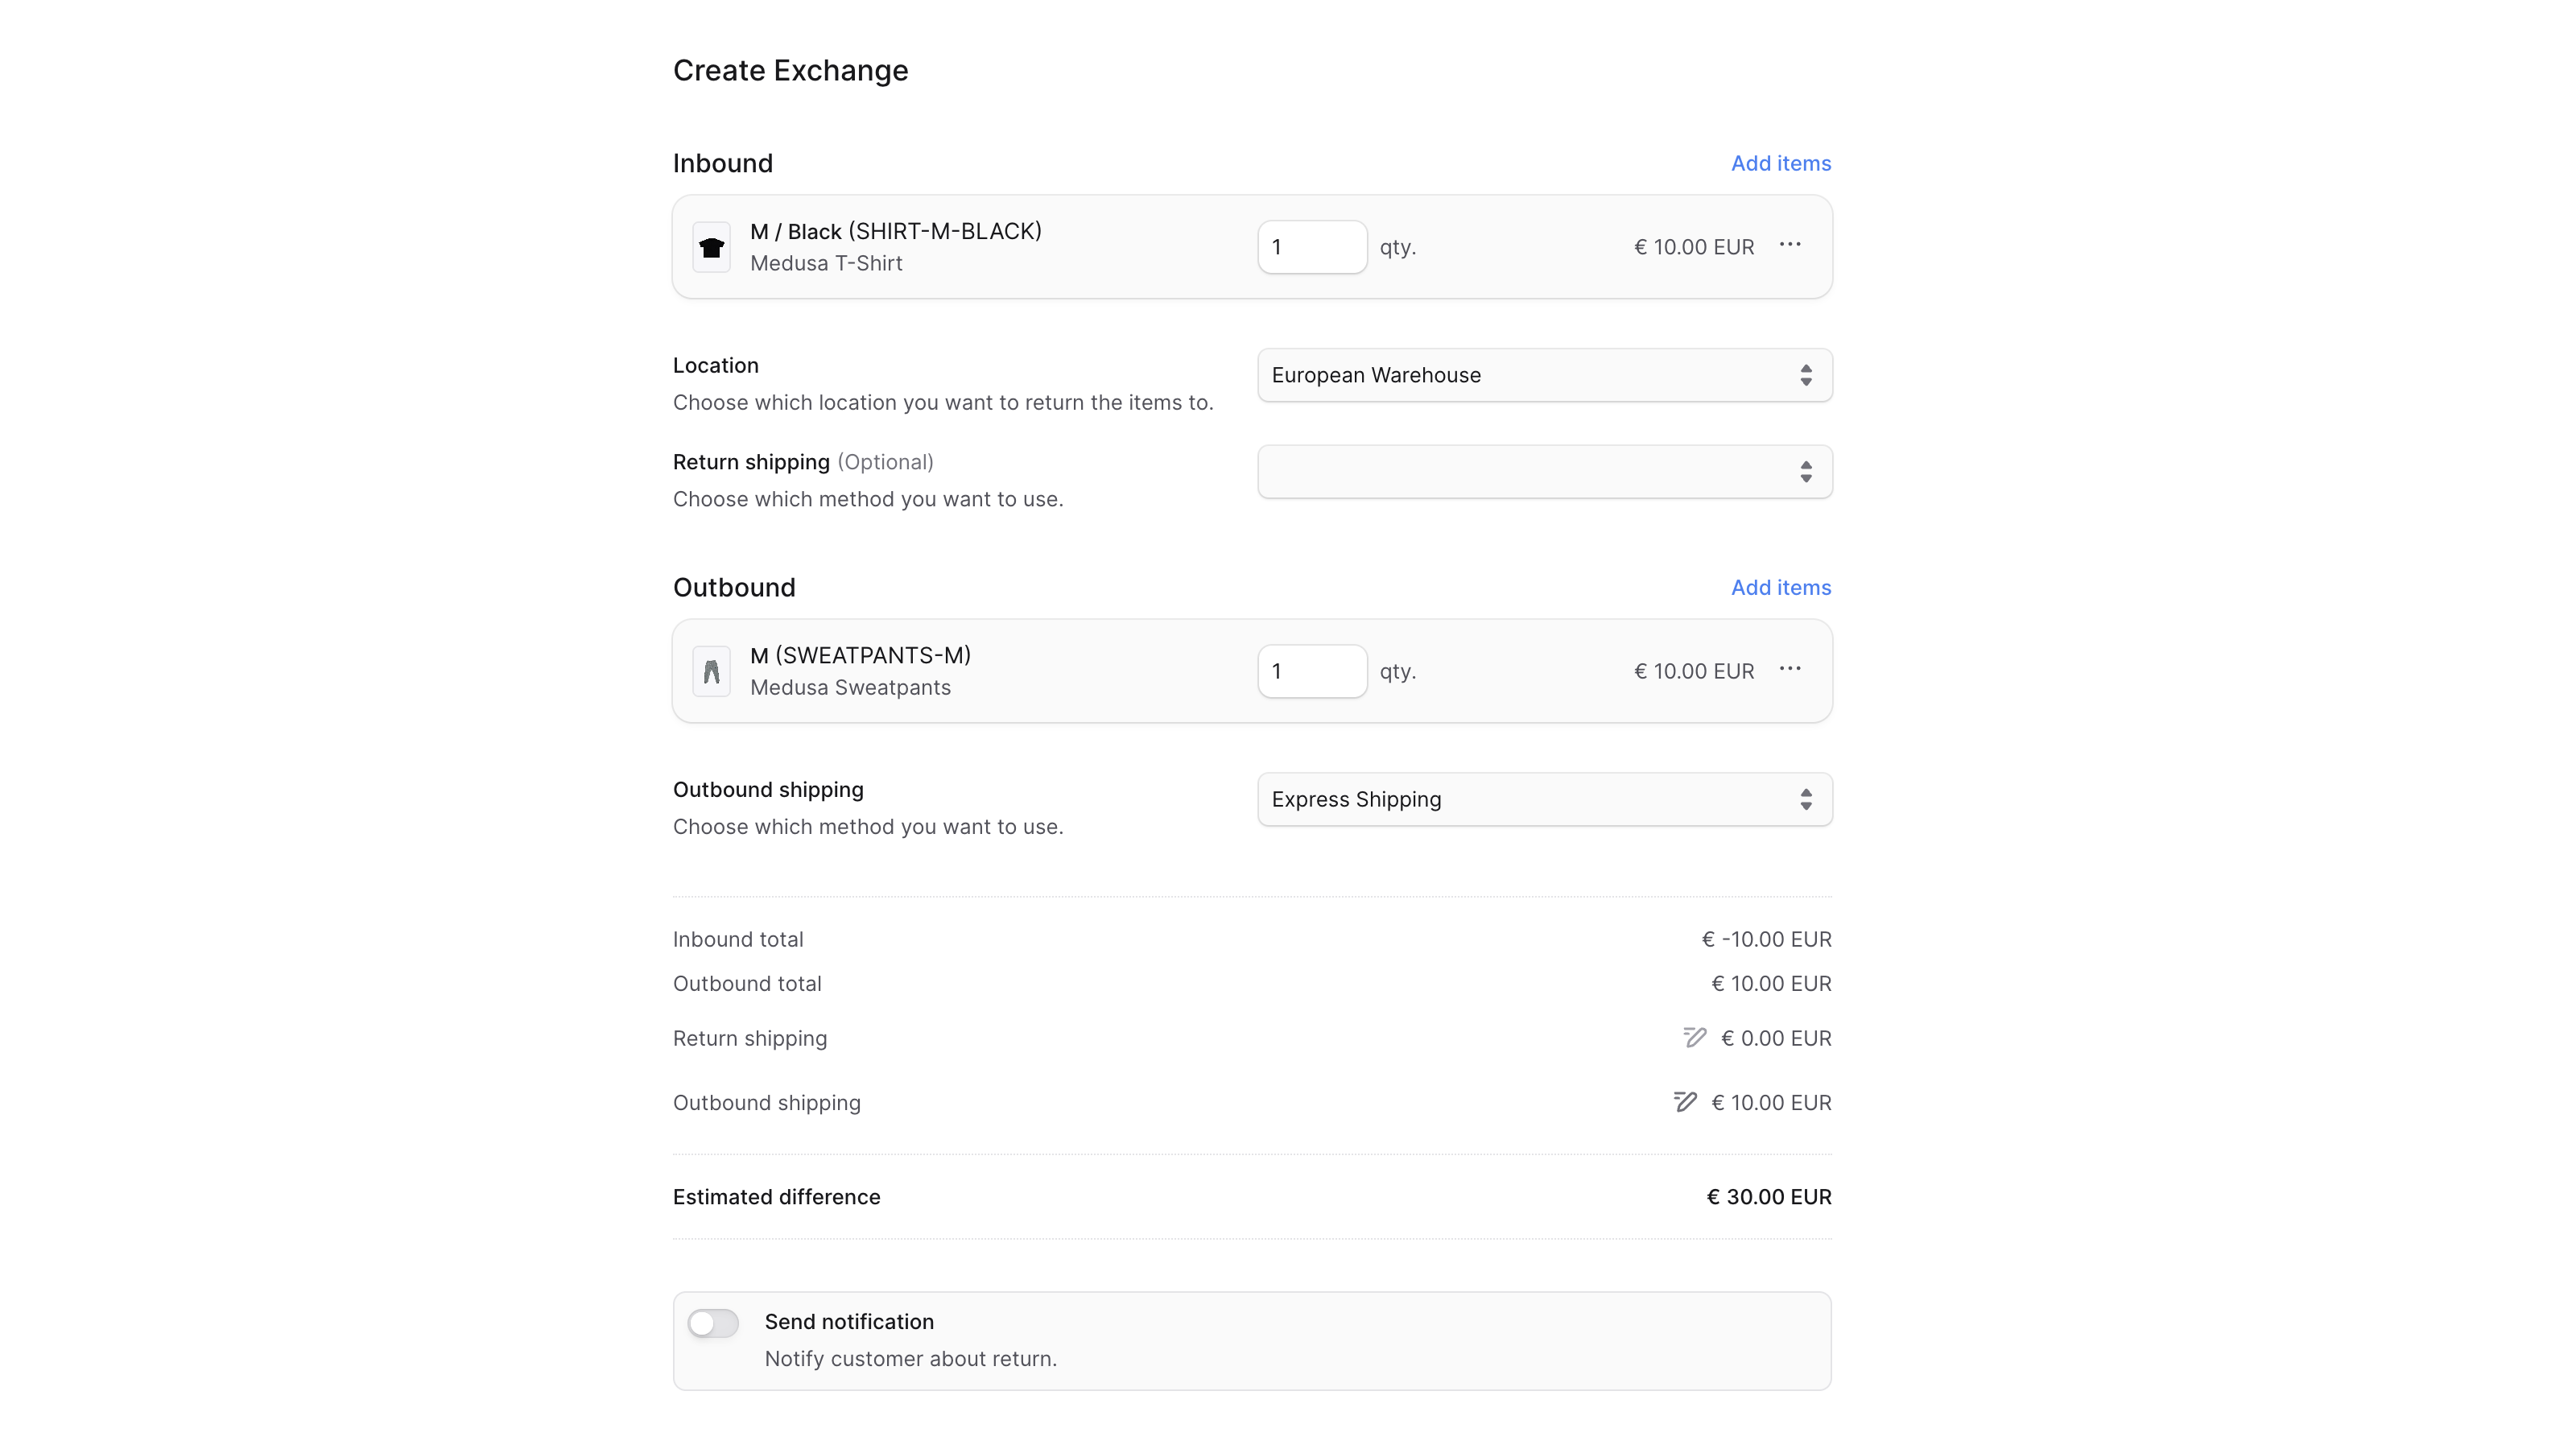
4. In the form that opens:
|
||
- To add items to be returned:
|
||
- Click on the "Add items" button in the "Inbound" section.
|
||
- In the list that opens, click on the checkbox next to the items you want the customer to return.
|
||
- Once done, click on the "Save" button.
|
||
- You can then change the quantity to return or manage the item's details by clicking the <InlineIcon Icon={EllipsisHorizontal} alt="three-dots" /> icon next to it.
|
||
- For the inbound items:
|
||
- For the Location field, choose the location to return the items to.
|
||
- For the Return Shipping field, you can optionally choose the shipping method to return the items with.
|
||
- Choosing a return shipping method adds its cost to the exchange total. You can modify the cost by clicking the <InlineIcon Icon={PencilSquare} alt="edit" /> icon next to the Return Shipping total, then entering the new cost.
|
||
- To add an item to be sent to the customer:
|
||
- Click on the "Add items" button in the "Outbound" section.
|
||
- In the list that opens, click on the checkbox next to the items you want to send to the customer.
|
||
- Once done, click on the "Save" button.
|
||
- You can then change the quantity to send or remove the item by clicking the <InlineIcon Icon={EllipsisHorizontal} alt="three-dots" /> icon next to it and choosing "Remove" from the dropdown.
|
||
- For outbound items, choose the shipping method used to send the items in the Outbound Shipping field.
|
||
- The shipping method's cost is added to the exchange total. To edit its cost:
|
||
- Click the <InlineIcon Icon={PencilSquare} alt="edit" /> icon next to the Outbound Shipping total.
|
||
- Enter the new cost in the input shown.
|
||
- If you want the customer to receive a notification that an exchange has been created, check the “Send notifications” toggle.
|
||
5. Once done, click on the "Confirm Exchange" button, then confirm the action by clicking the "Continue" button in the pop-up.
|
||
|
||
|
||
|
||
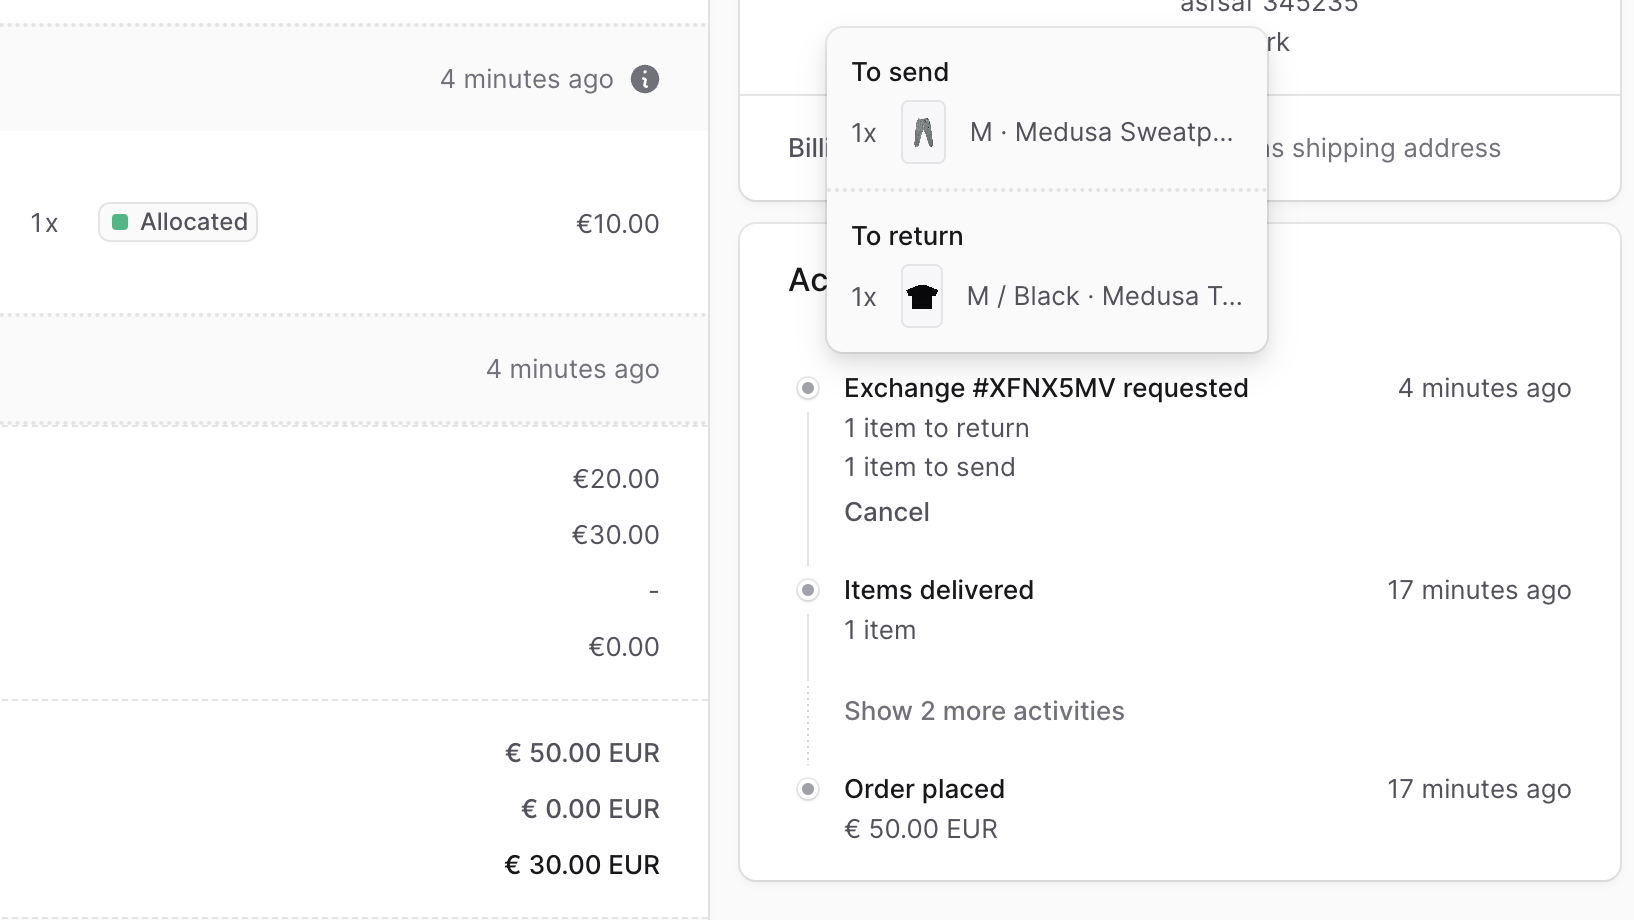
You can then see the exchange in the Activity section. The outbound items to be sent to the customer will also be added to the "Unfulfilled Items" section.
|
||
|
||
---
|
||
|
||
## Handle Outstanding Payment of an Exchange
|
||
|
||
After creating an exchange, you can check if there are any outstanding amounts (to be captured from the customer or returned) in the Summary section.
|
||
|
||
To handle outstanding amounts by refunding or capturing the payment, refer to the [Payments guide](../payments/page.mdx#handling-outstanding-amounts).
|
||
|
||
---
|
||
|
||
## Managing Returned Items in an Exchange
|
||
|
||
The items to be returned from the customer as part of the exchange can be managed similarly to a return. Once you receive the items from the customer, you can mark them as received as explained in the [Returns guide](../returns/page.mdx#mark-return-items-as-received).
|
||
|
||
---
|
||
|
||
## Fulfill Outbound Items in an Exchange
|
||
|
||
As mentioned earlier, the outbound items of an exchange are added into the "Unfulfilled Items" section. To fulfill and deliver these items to the customer, refer to the [Fulfillment guide](../fulfillments/page.mdx#create-fulfillment).
|
||
|
||
---
|
||
|
||
## Cancel an Exchange
|
||
|
||
<Note type="warning">
|
||
|
||
Canceling an exchange is irreversible. You can only cancel the exchange if the outbound items haven't been fulfilled yet, and the inbound items haven't been marked as received.
|
||
|
||
</Note>
|
||
|
||
To cancel an exchange:
|
||
|
||
1. Go to an order’s details page.
|
||
2. In the Activity section, click Cancel next to the exchange.
|
||
3. Confirm the cancellation by clicking the "Confirm" button in the pop-up.
|
||
|
||
The exchange will be canceled, and outbound items added by the exchange will be removed from the Summary and Unfulfilled Items sections.
|