203 lines
9.4 KiB
Plaintext
203 lines
9.4 KiB
Plaintext
---
|
||
sidebar_position: 1
|
||
sidebar_label: "Manage Order Details"
|
||
tags:
|
||
- user guide
|
||
- order
|
||
products:
|
||
- order
|
||
---
|
||
|
||
import {
|
||
ArrowUpRightOnBox,
|
||
EllipsisHorizontal,
|
||
FaceSmile,
|
||
ArrowUpCircleSolid
|
||
} from "@medusajs/icons"
|
||
|
||
export const metadata = {
|
||
title: `Manage Order Details in Medusa Admin`,
|
||
}
|
||
|
||
# {metadata.title}
|
||
|
||
In this guide, you’ll learn how to find an order’s details page, what information you find on the order details page, and how to manage the order’s details. Order details include the general details, such as customer or address details.
|
||
|
||
## Open Order’s Details
|
||
|
||
To open an order’s details:
|
||
|
||
1. Go to Orders from the sidebar.
|
||
2. Select one of the orders to open its details page.
|
||
|
||
|
||
|
||
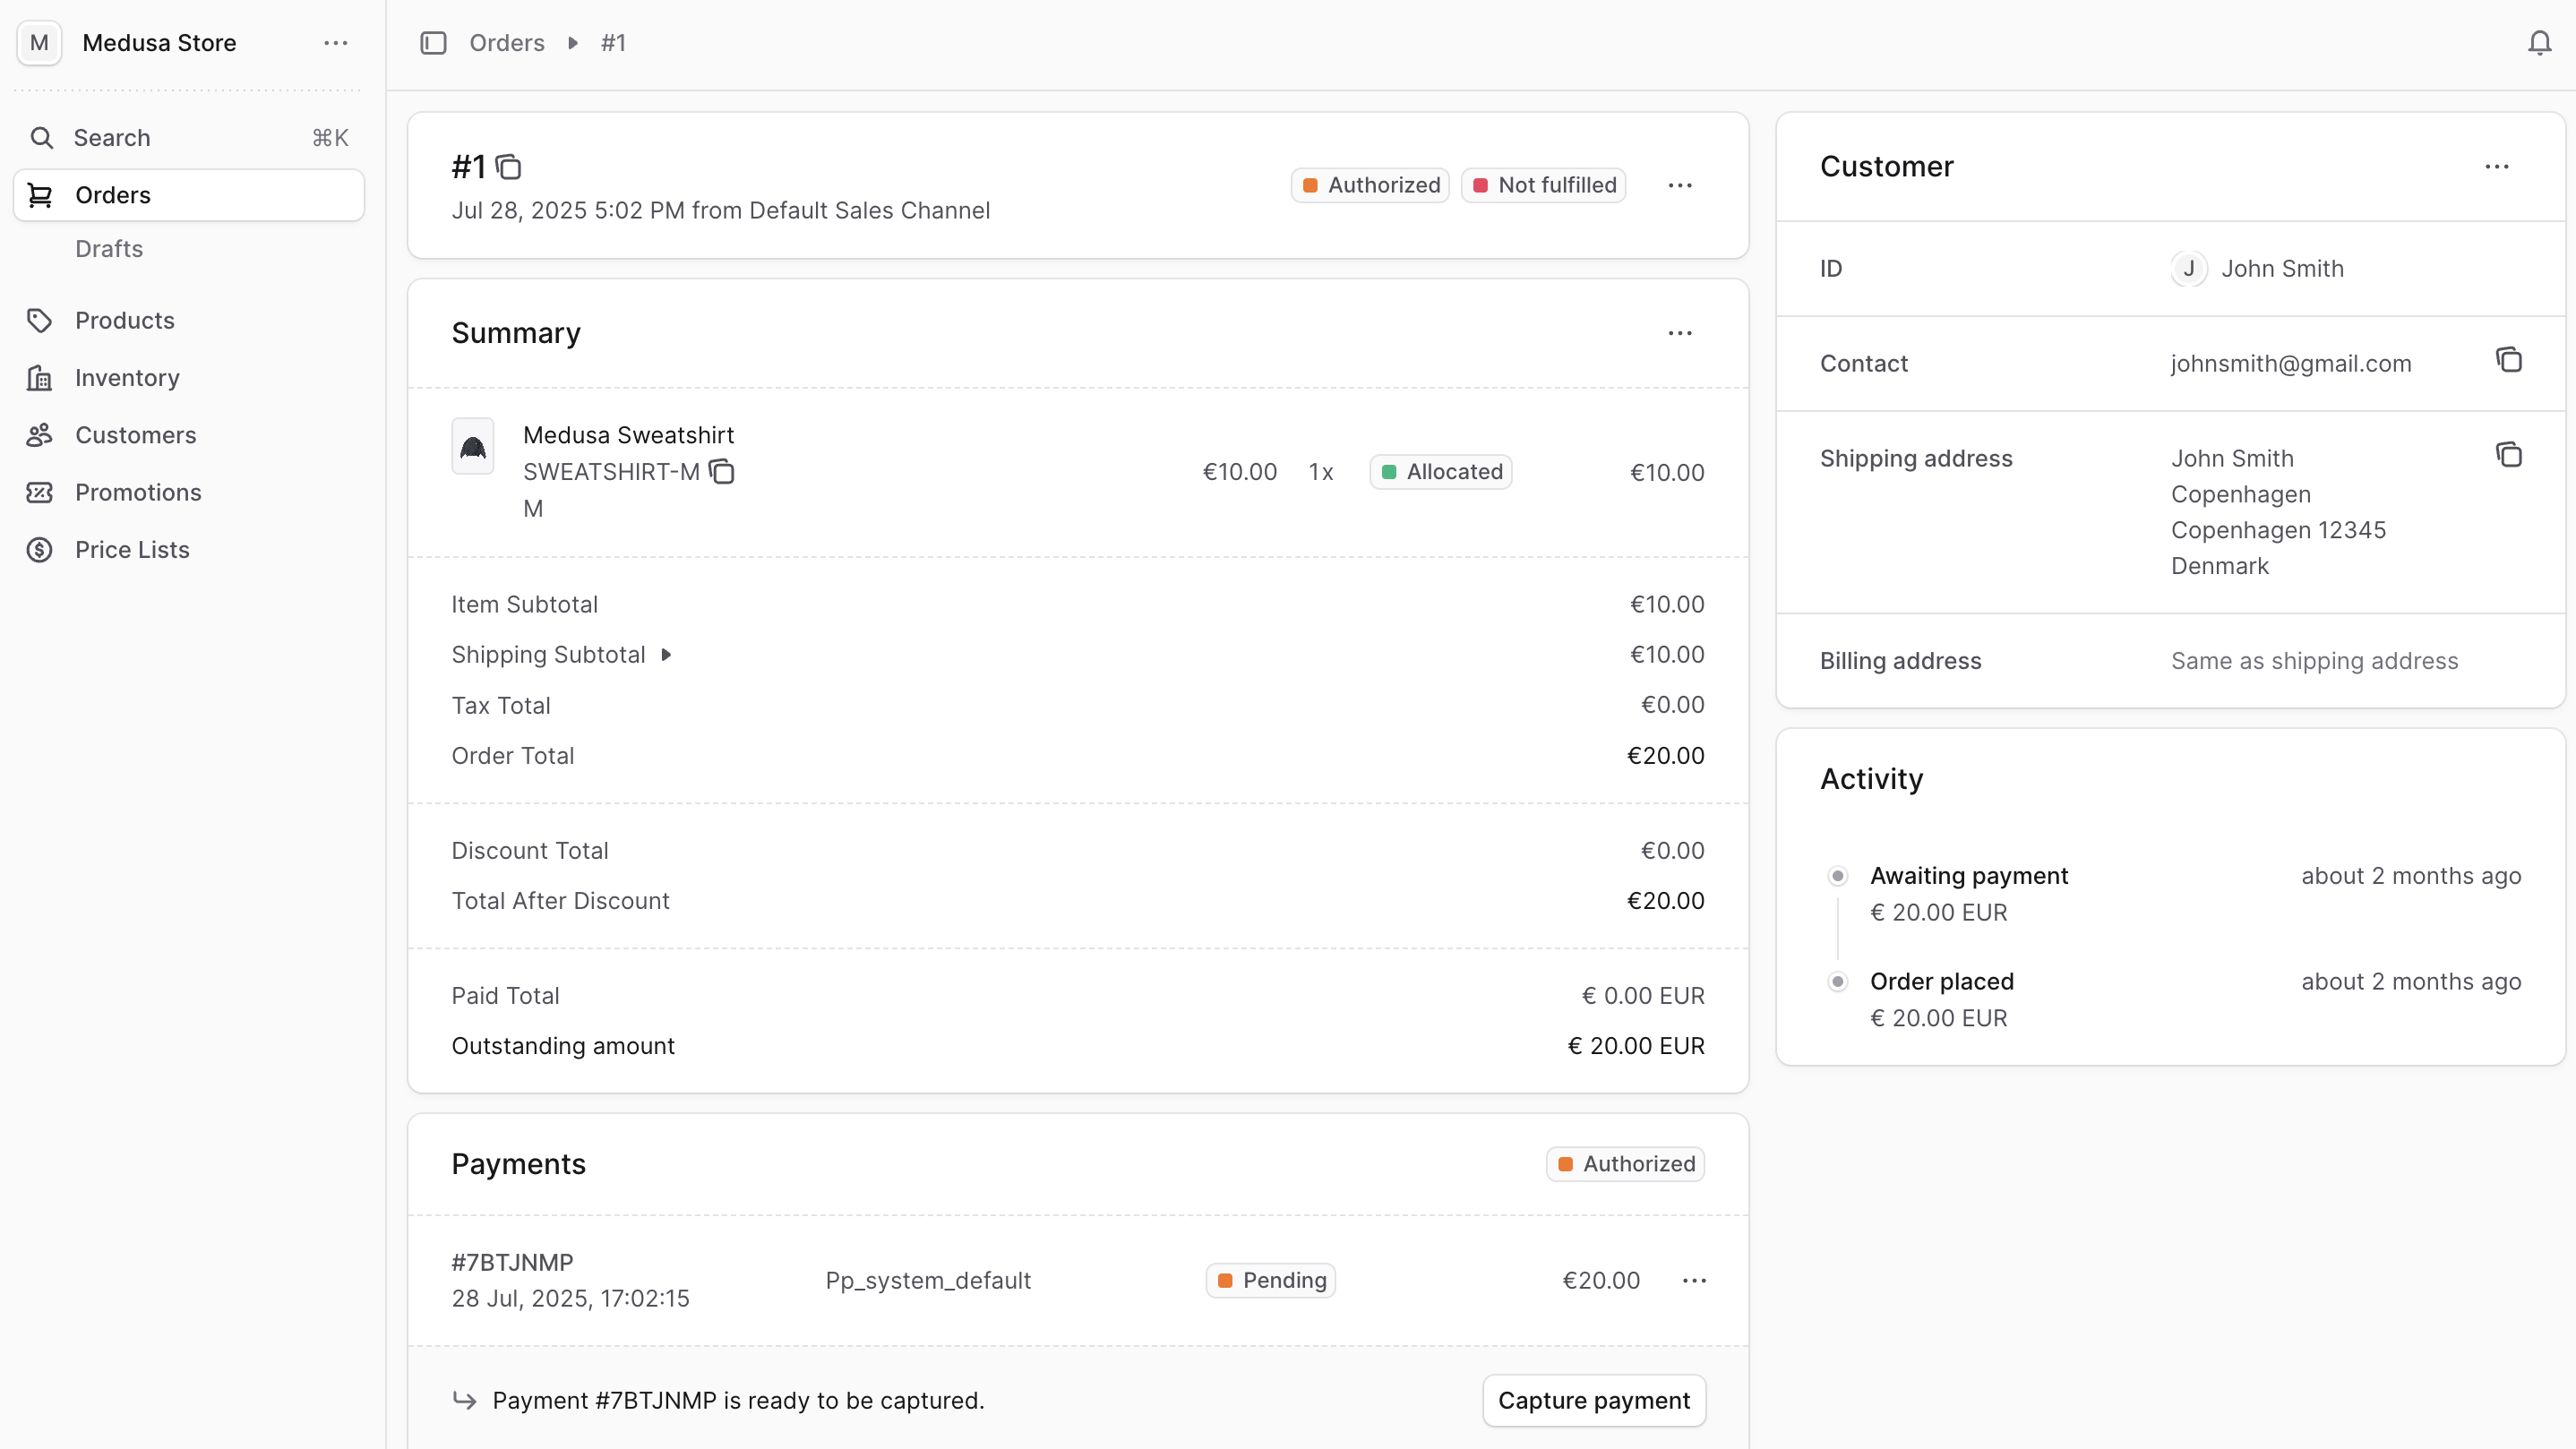
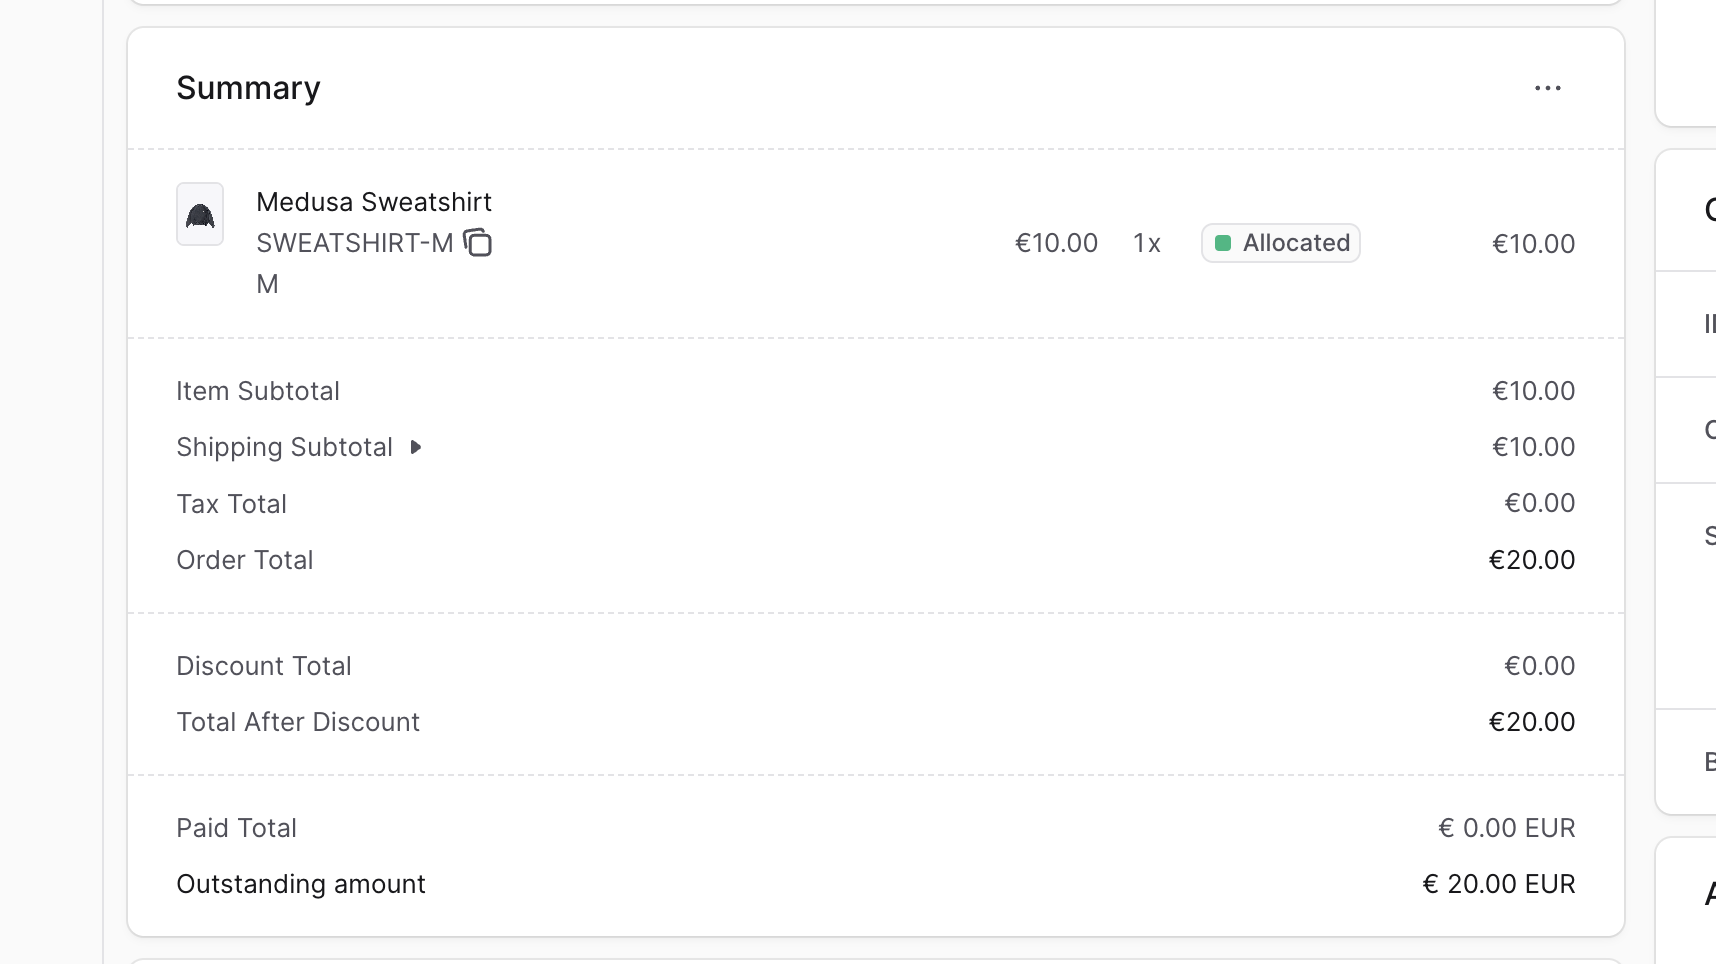
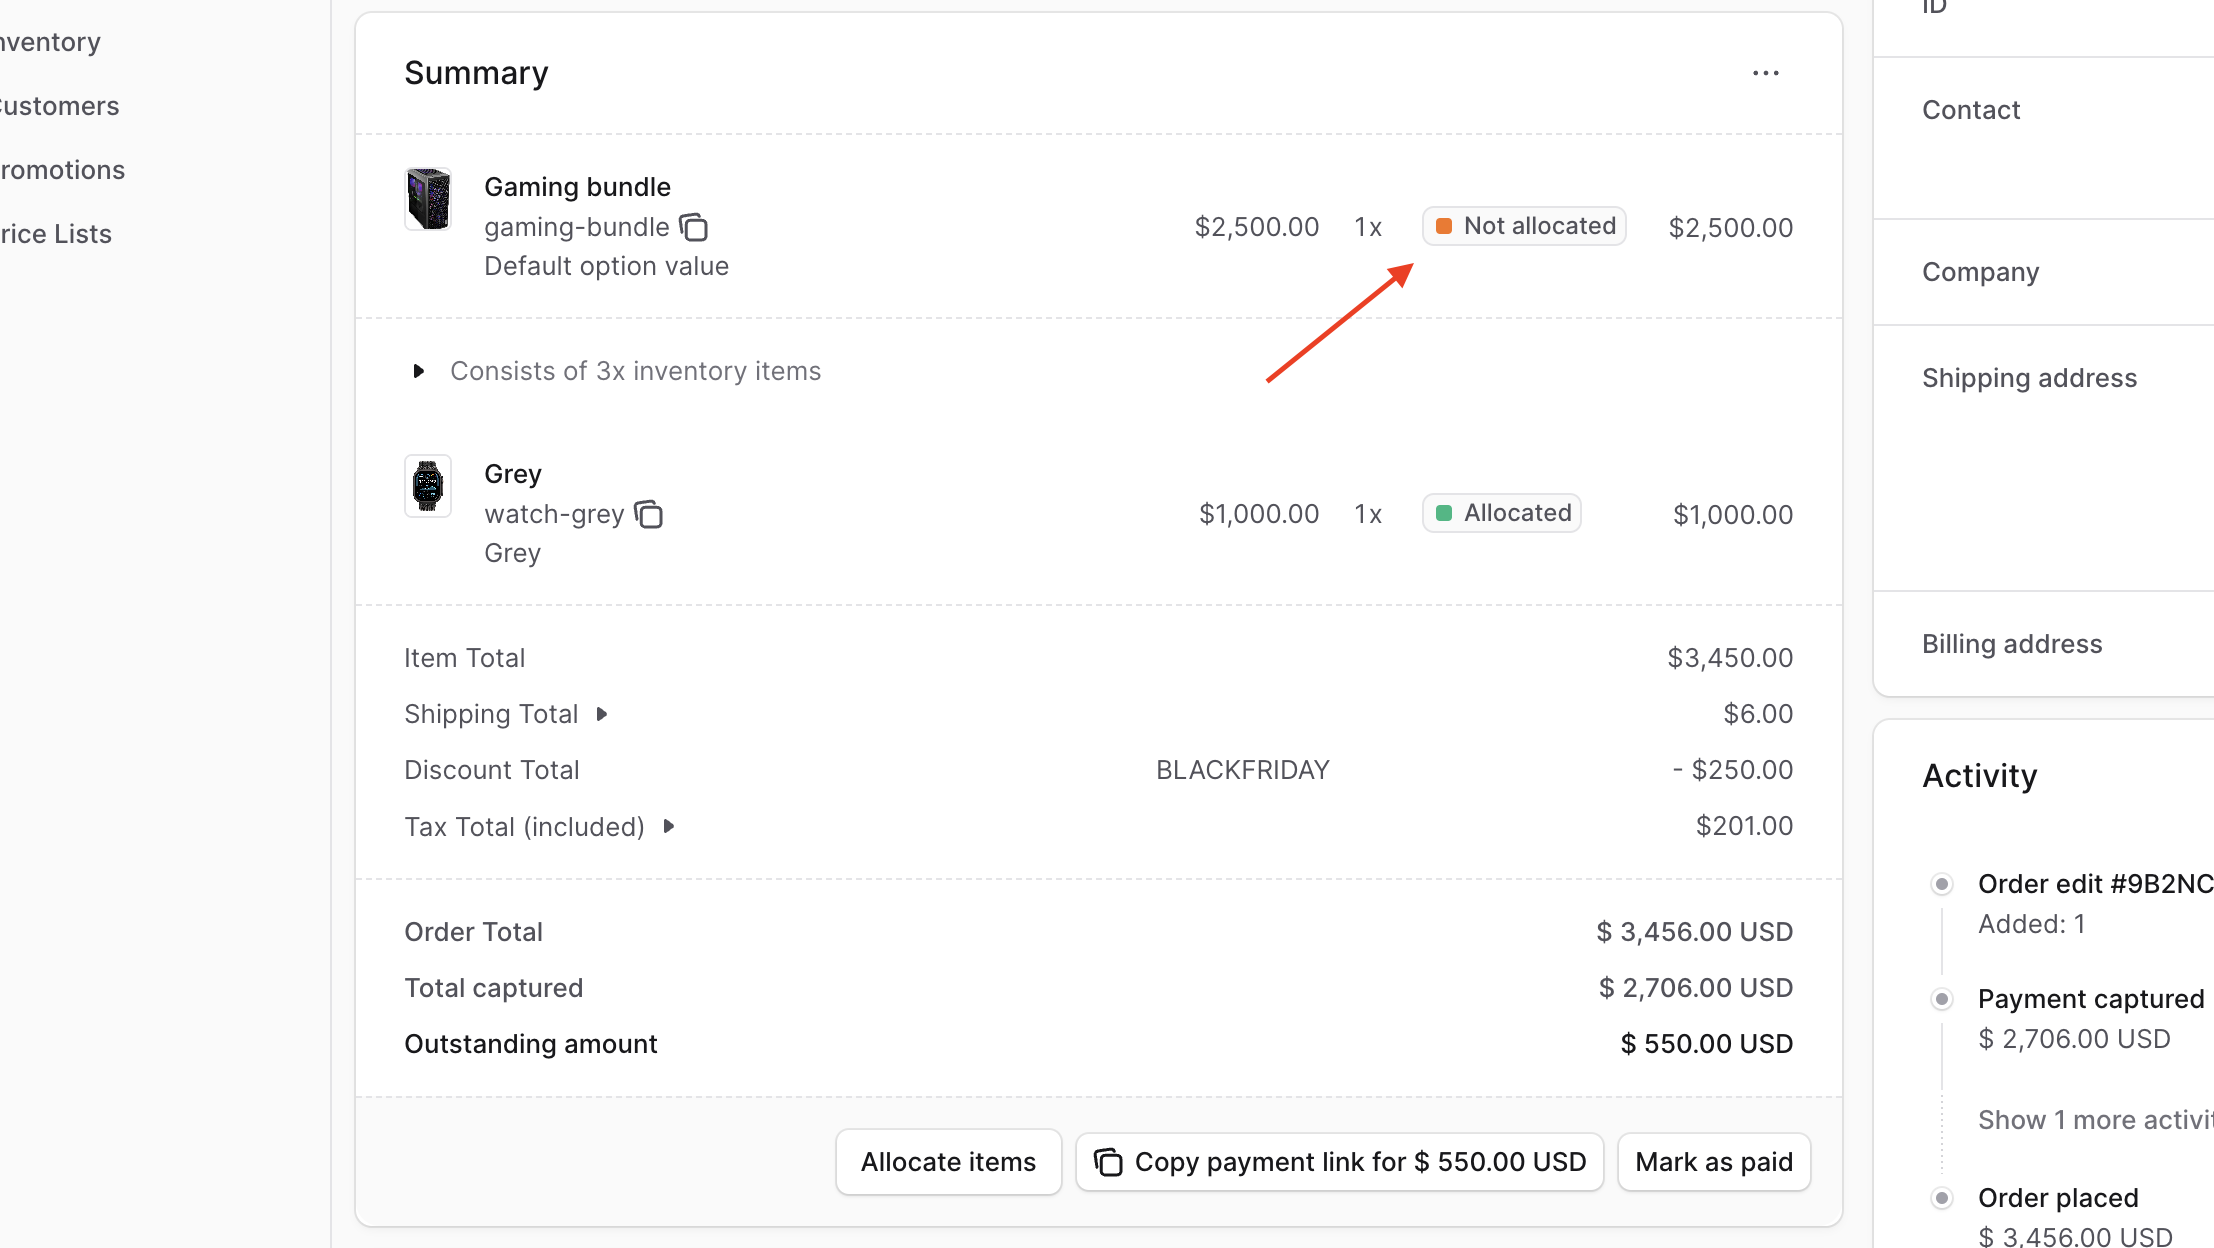
### Order Summary Section
|
||
|
||
The Summary section includes the summary of the items the customer purchased as well as totals related to taxes, shipping, and more. Use this section to get a quick overview of the order, [create returns](../returns/page.mdx), [create exchanges](../exchanges/page.mdx), or manage the order’s details as explained later in this guide.
|
||
|
||
|
||
|
||
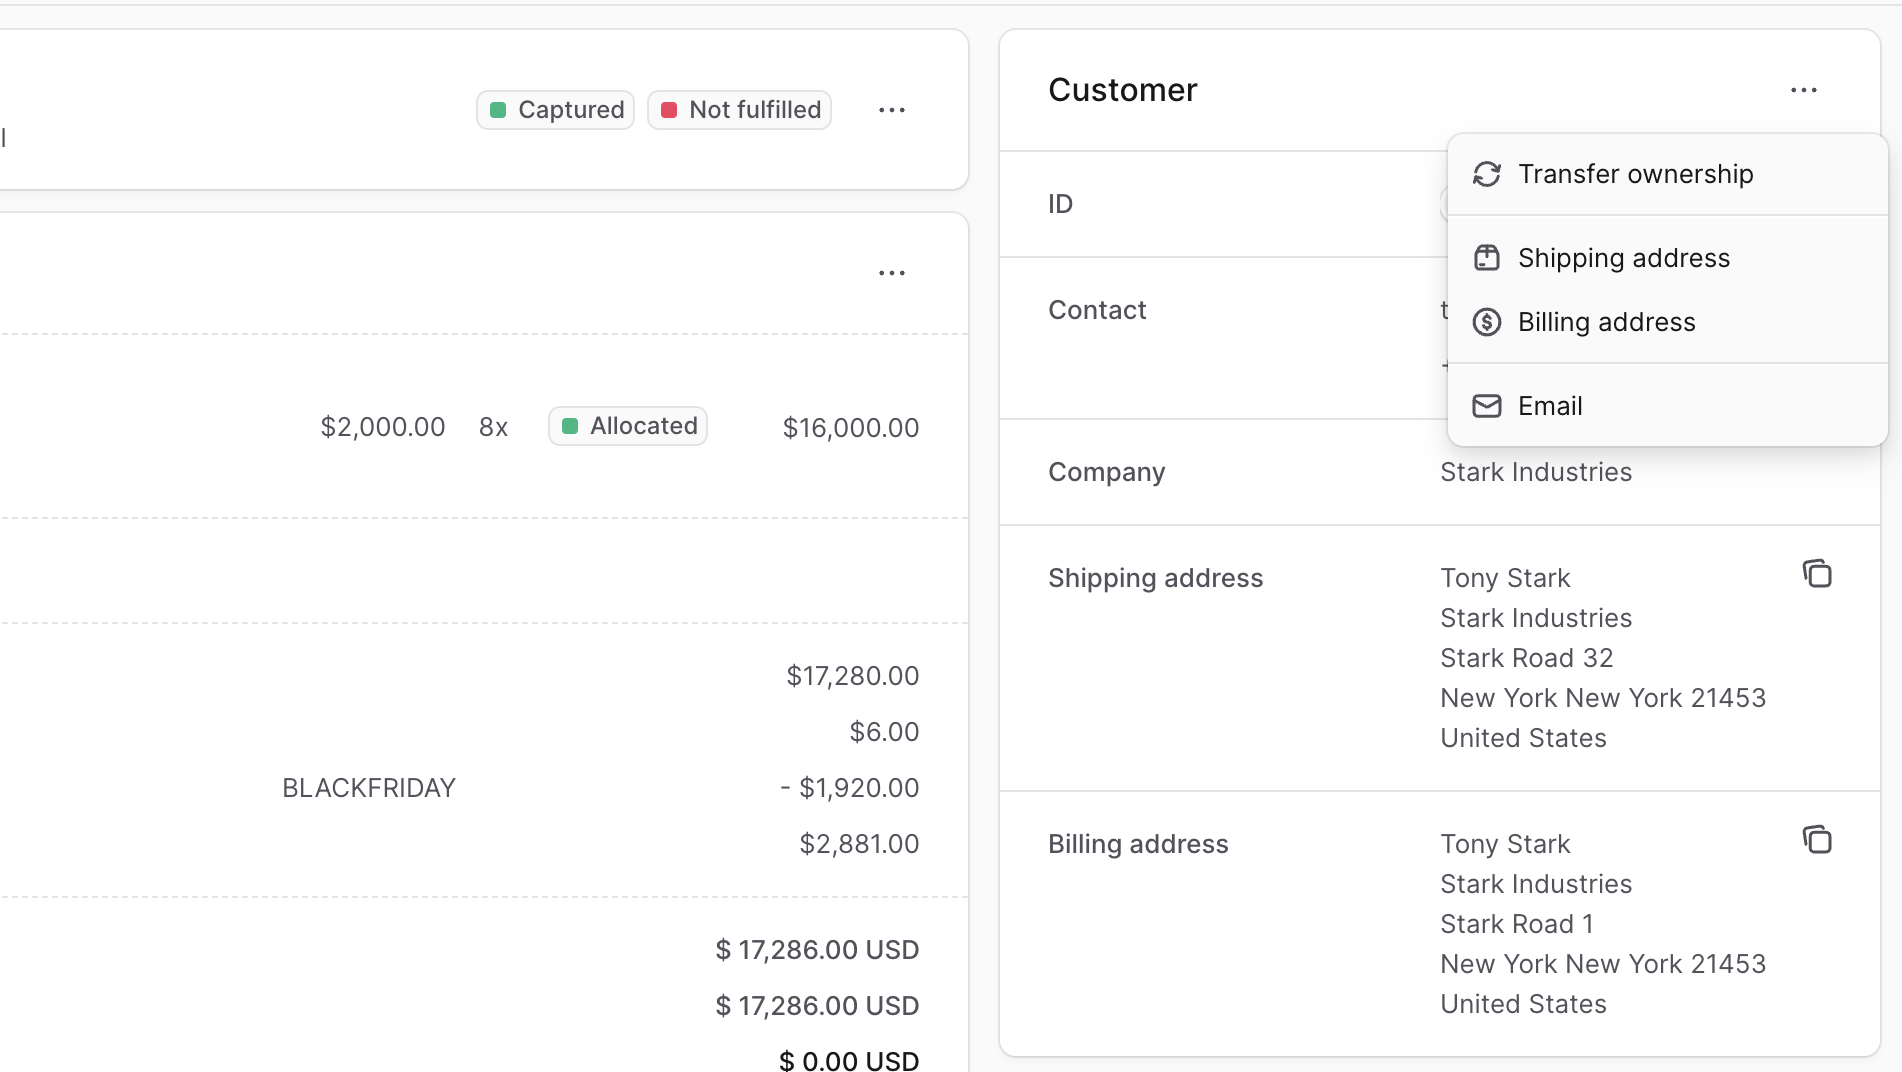
### Customer Section
|
||
|
||
The Customer section includes the customer’s details, including their contact information and shipping address. Use this section to view and edit the customer’s details pertaining to the order as explained later in this guide.
|
||
|
||
|
||
|
||
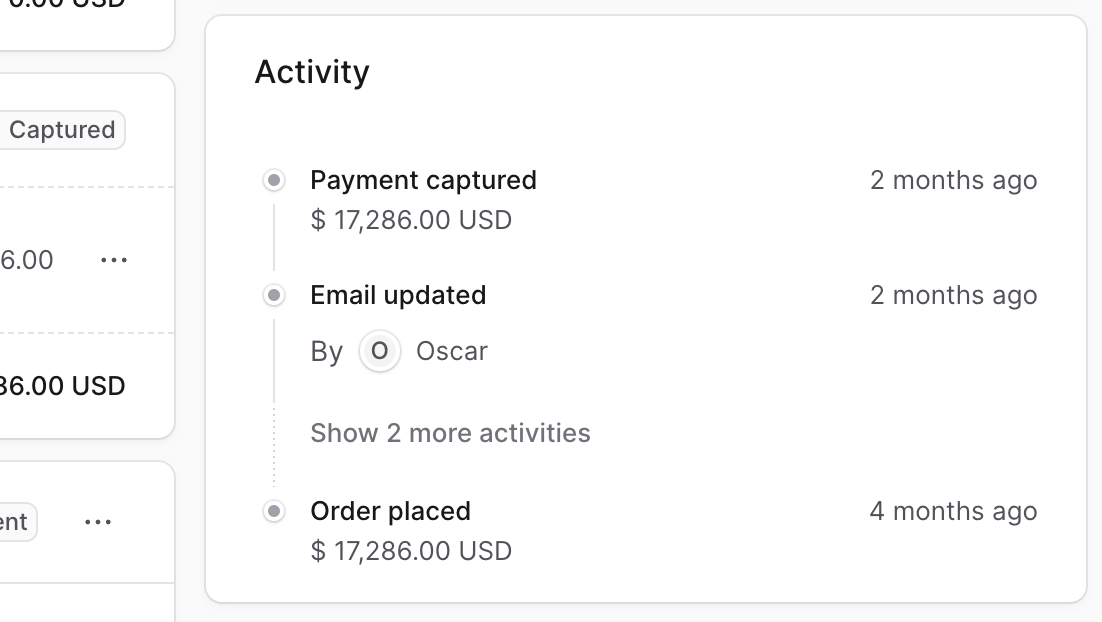
### Activity Section
|
||
|
||
The Activity section of the order details page shows a summary of the changes made on the order. That includes payments captured, returned items, shipped items, and more. Use this section to get a quick overview of the order’s history and actions taken on it.
|
||
|
||
|
||
|
||
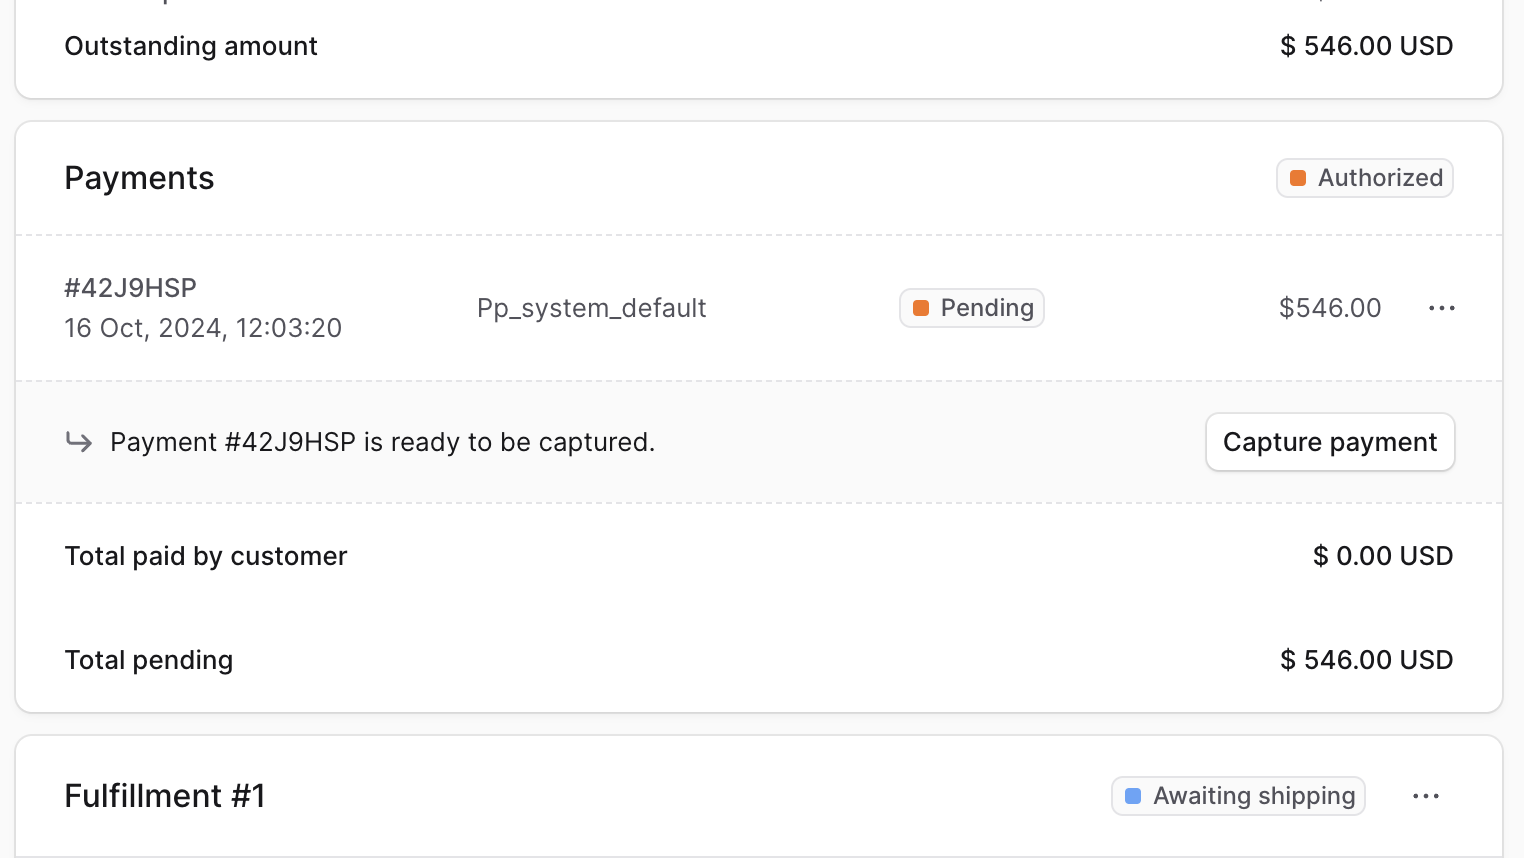
### Payments Section
|
||
|
||
The Payment section of the order details page includes details related to the order’s payments, showing a full history of the changes in the payment's status. Use this section to view and [manage the payments](../payments/page.mdx) related to the order.
|
||
|
||
|
||
|
||
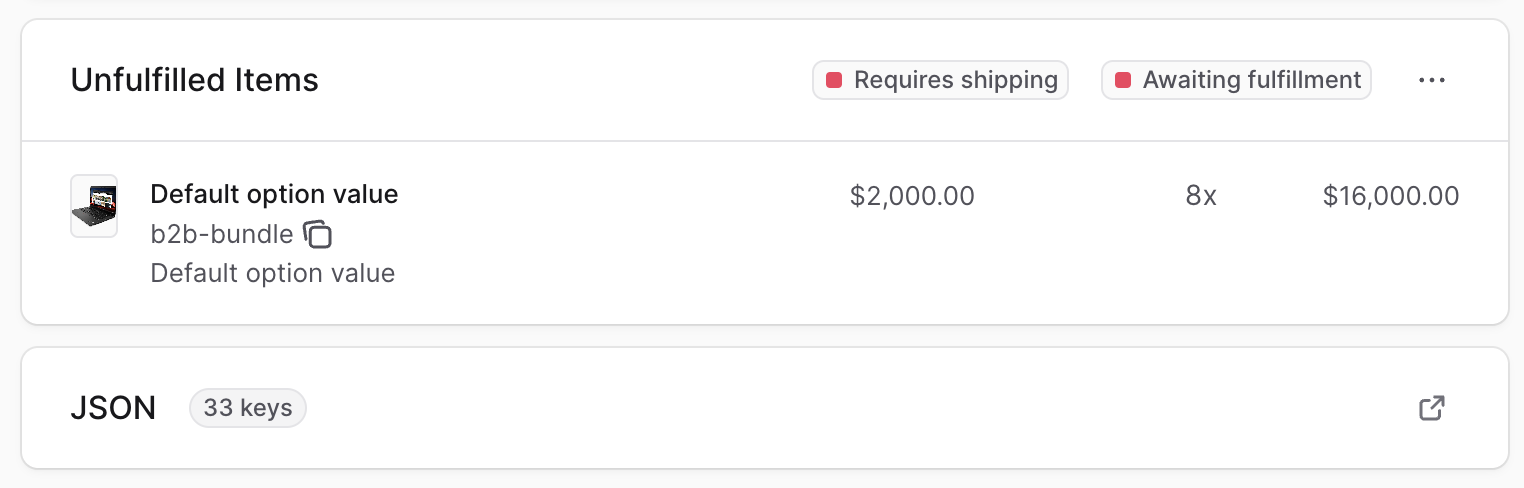
### Unfulfilled Items Section
|
||
|
||
The Unfulfilled Items section of the order details page includes the details of items that haven't been fulfilled yet. Use this section to view the items that need to be fulfilled and [create their fulfillments](../fulfillments/page.mdx).
|
||
|
||
|
||
|
||
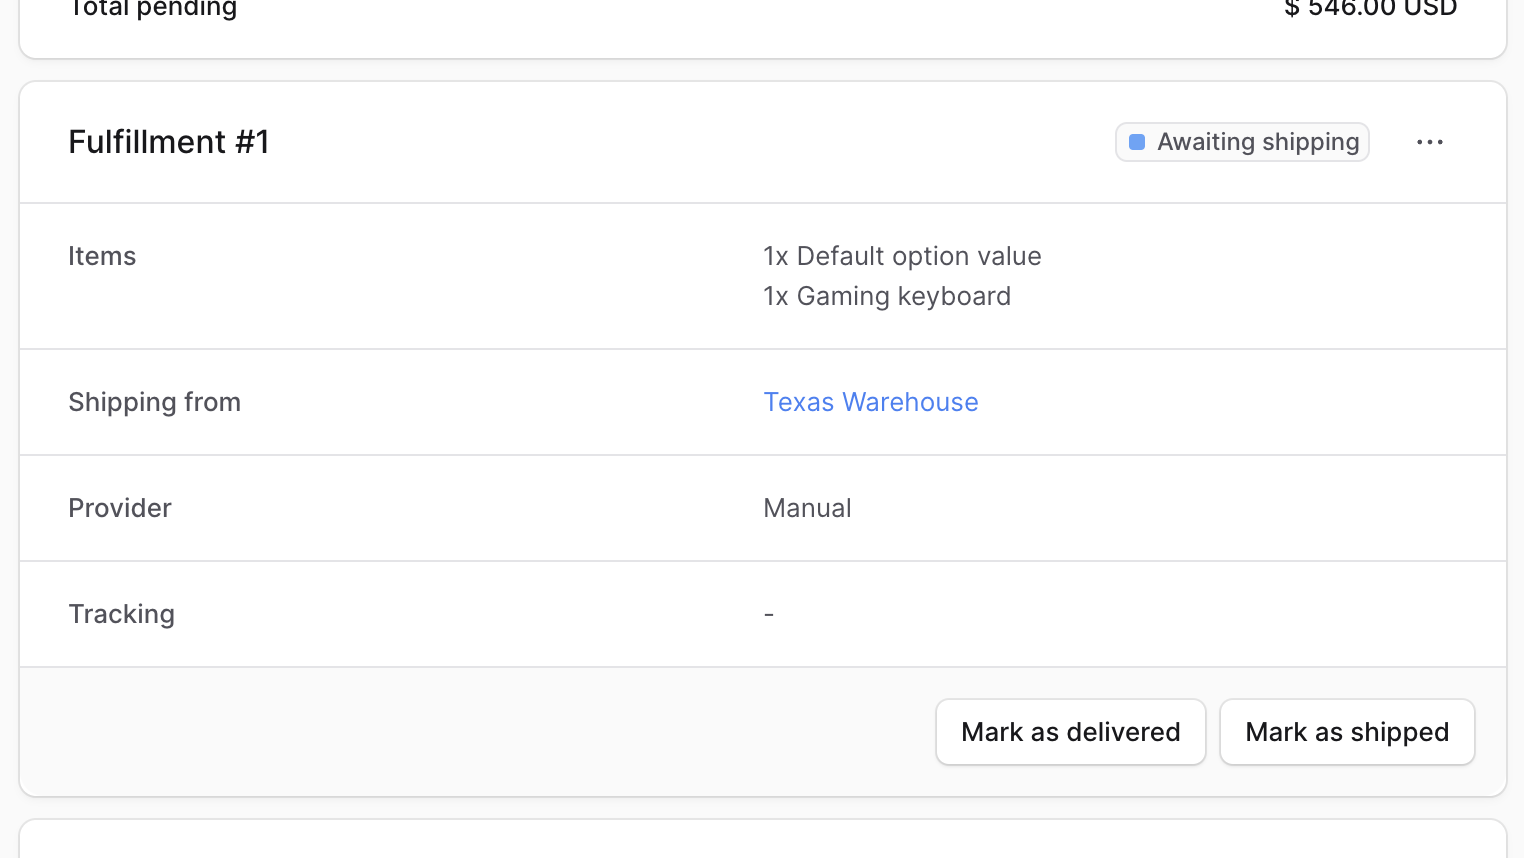
### Fulfillment Sections
|
||
|
||
For every fulfillment you create, a new fulfillment section is added with its number in the title. The section includes details of the fulfillment. Use this section to view and [manage the fulfillment](../fulfillments/page.mdx).
|
||
|
||
|
||
|
||
### JSON Section
|
||
|
||
The JSON section is useful for developers to view the raw order data in JSON structure. Developers can use this section to debug and troubleshoot issues related to the order.
|
||
|
||
To view the JSON structure, click on the <InlineIcon Icon={ArrowUpRightOnBox} alt="Expand" /> icon.
|
||
|
||
---
|
||
|
||
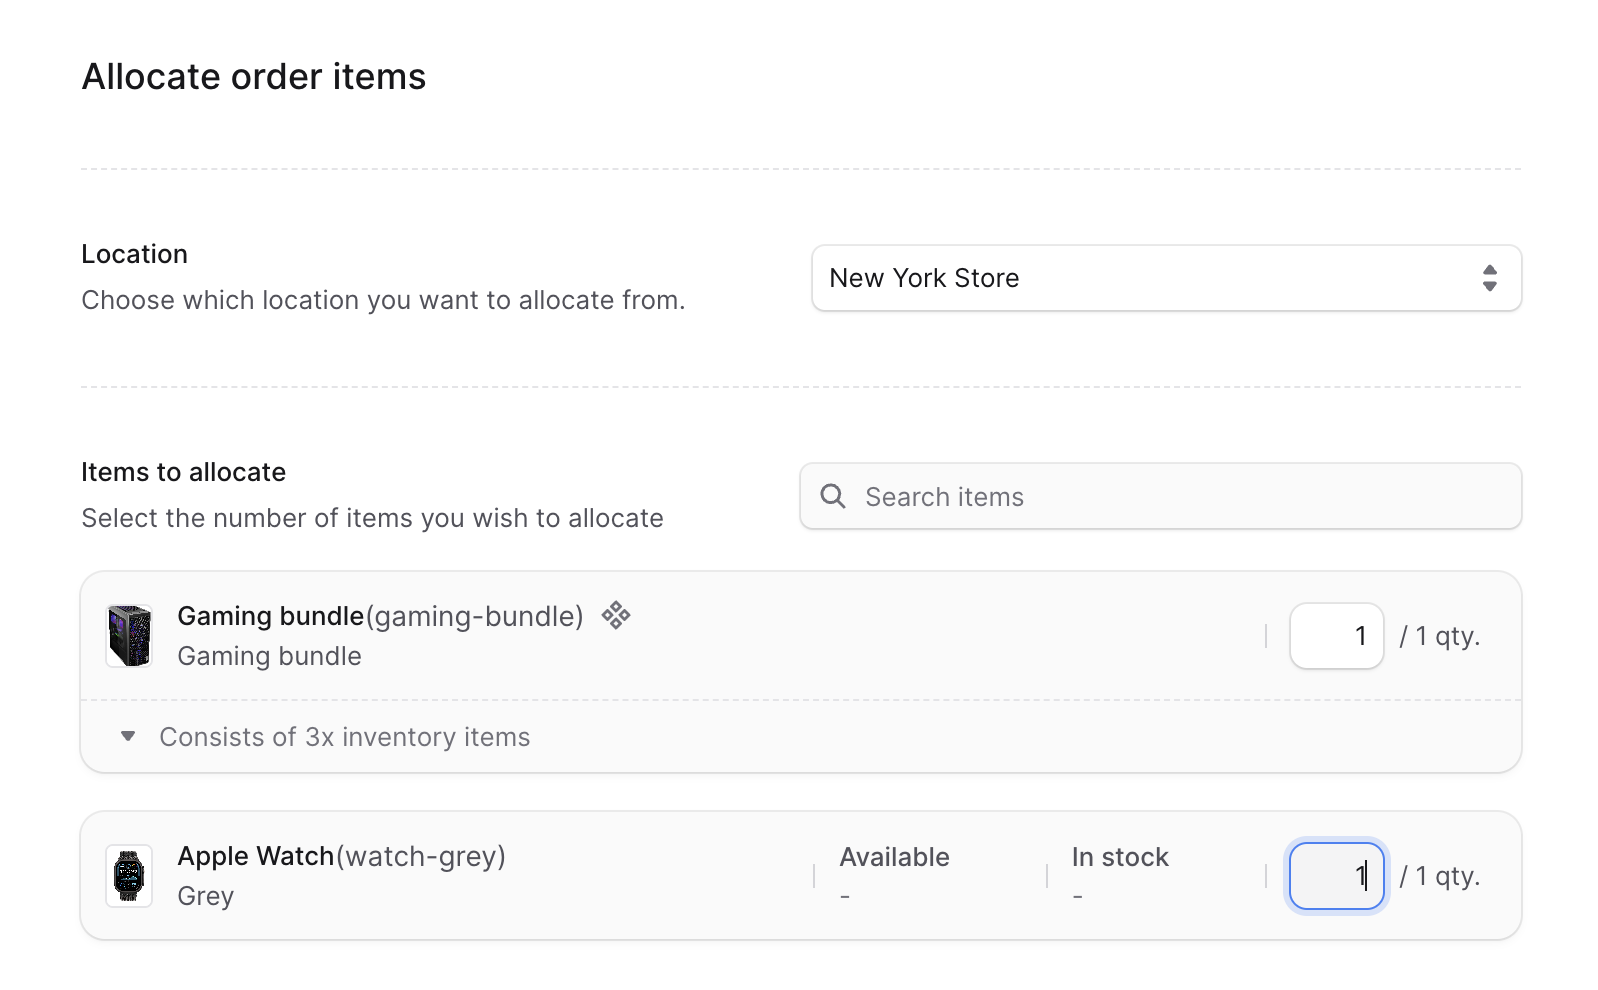
## Allocate Order Items Manually
|
||
|
||
If Medusa manages the inventory of an ordered item, it reserves or allocates the ordered quantity from the inventory. This ensures that the item's available quantity is reduced by the ordered quantity.
|
||
|
||
Medusa allocates the ordered quantity from the stock location of the chosen shipping option in the order. For example, if the customer chooses a shipping option that uses a stock location in the US, Medusa allocates the ordered quantity from that stock location.
|
||
|
||
However, in some cases you may need to allocate an item manually, such as if you [edit the order](../edit/page.mdx) or if you changed the inventory management configurations of the item's product variant. You'll find next to the item's name in the Summary section a "Not allocated" badge.
|
||
|
||
|
||
|
||
To allocate these items manually:
|
||
|
||
1. Go to the Summary section of the order's details page.
|
||
2. If one or more items haven't been allocated, you'll find an "Allocate items" button at the bottom of the section. Click on it.
|
||
3. In the form that opens:
|
||
1. For the Location field, choose the location to allocate the item from.
|
||
2. In the Items to Allocate section, enter the quantity to allocate for each item.
|
||
4. Once you're done, click the "Allocate Items" button.
|
||
|
||
|
||
|
||
---
|
||
|
||
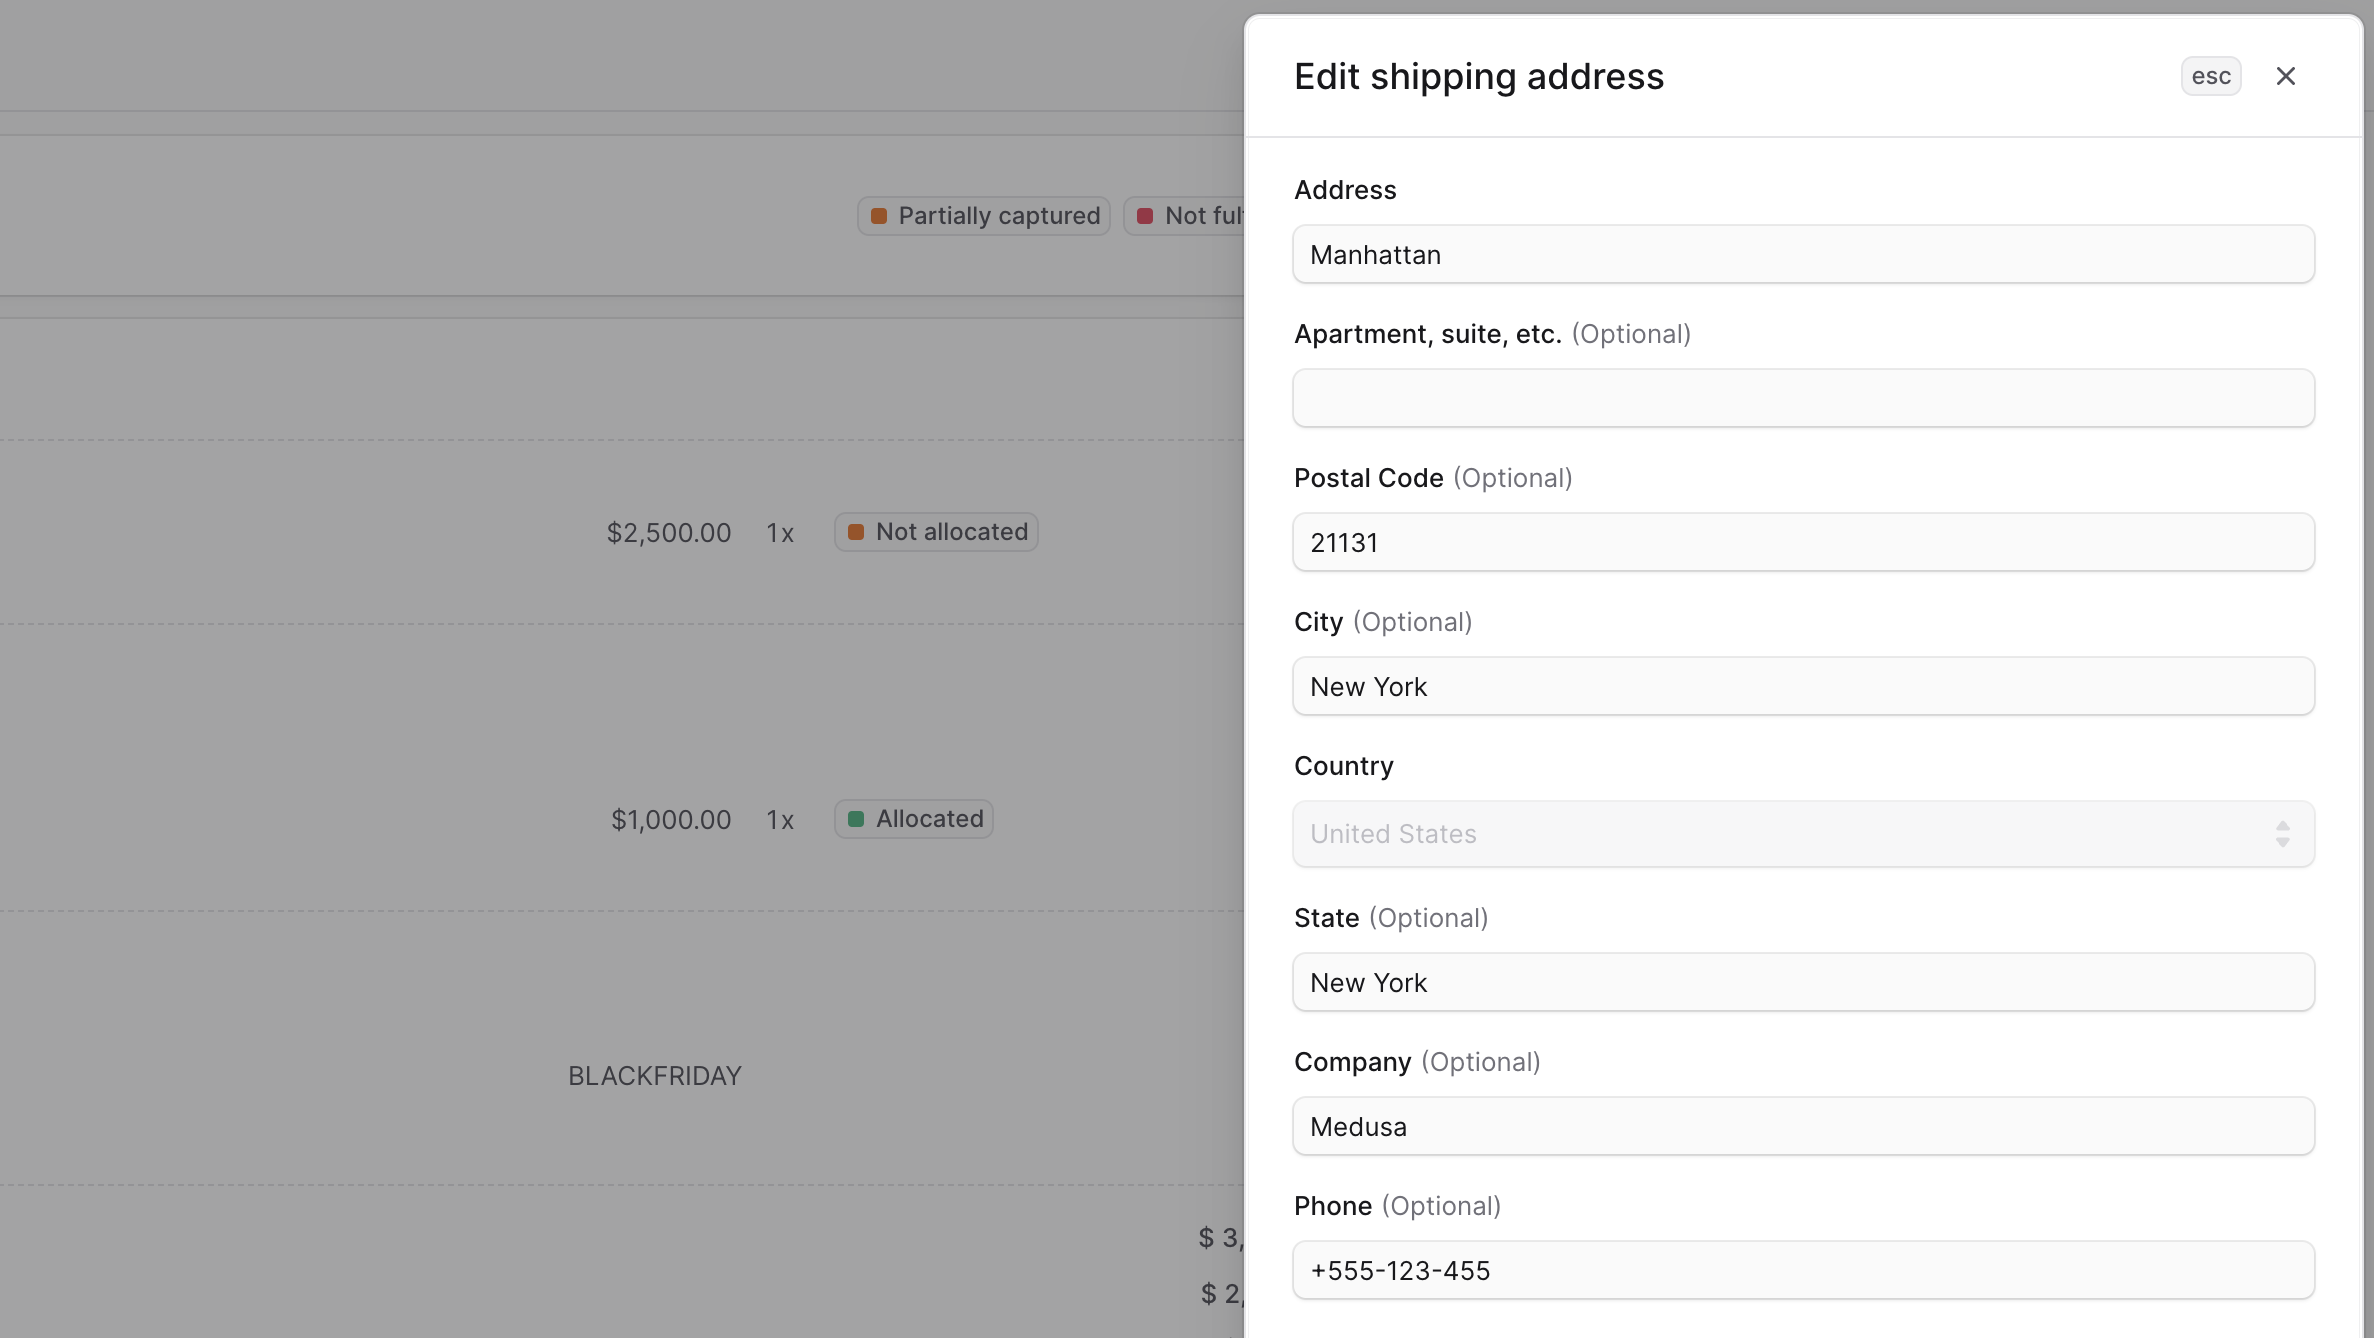
## Edit the Shipping Address
|
||
|
||
To edit the shipping address used for an order:
|
||
|
||
1. Open the order details page.
|
||
2. Click on the <InlineIcon Icon={EllipsisHorizontal} alt="three-dot" /> icon in the Customer section header.
|
||
3. Click on "Shipping address" from the dropdown.
|
||
4. In the side window that opens, update the address details.
|
||
5. Once you’re done, click on the Save button.
|
||
|
||
|
||
|
||
---
|
||
|
||
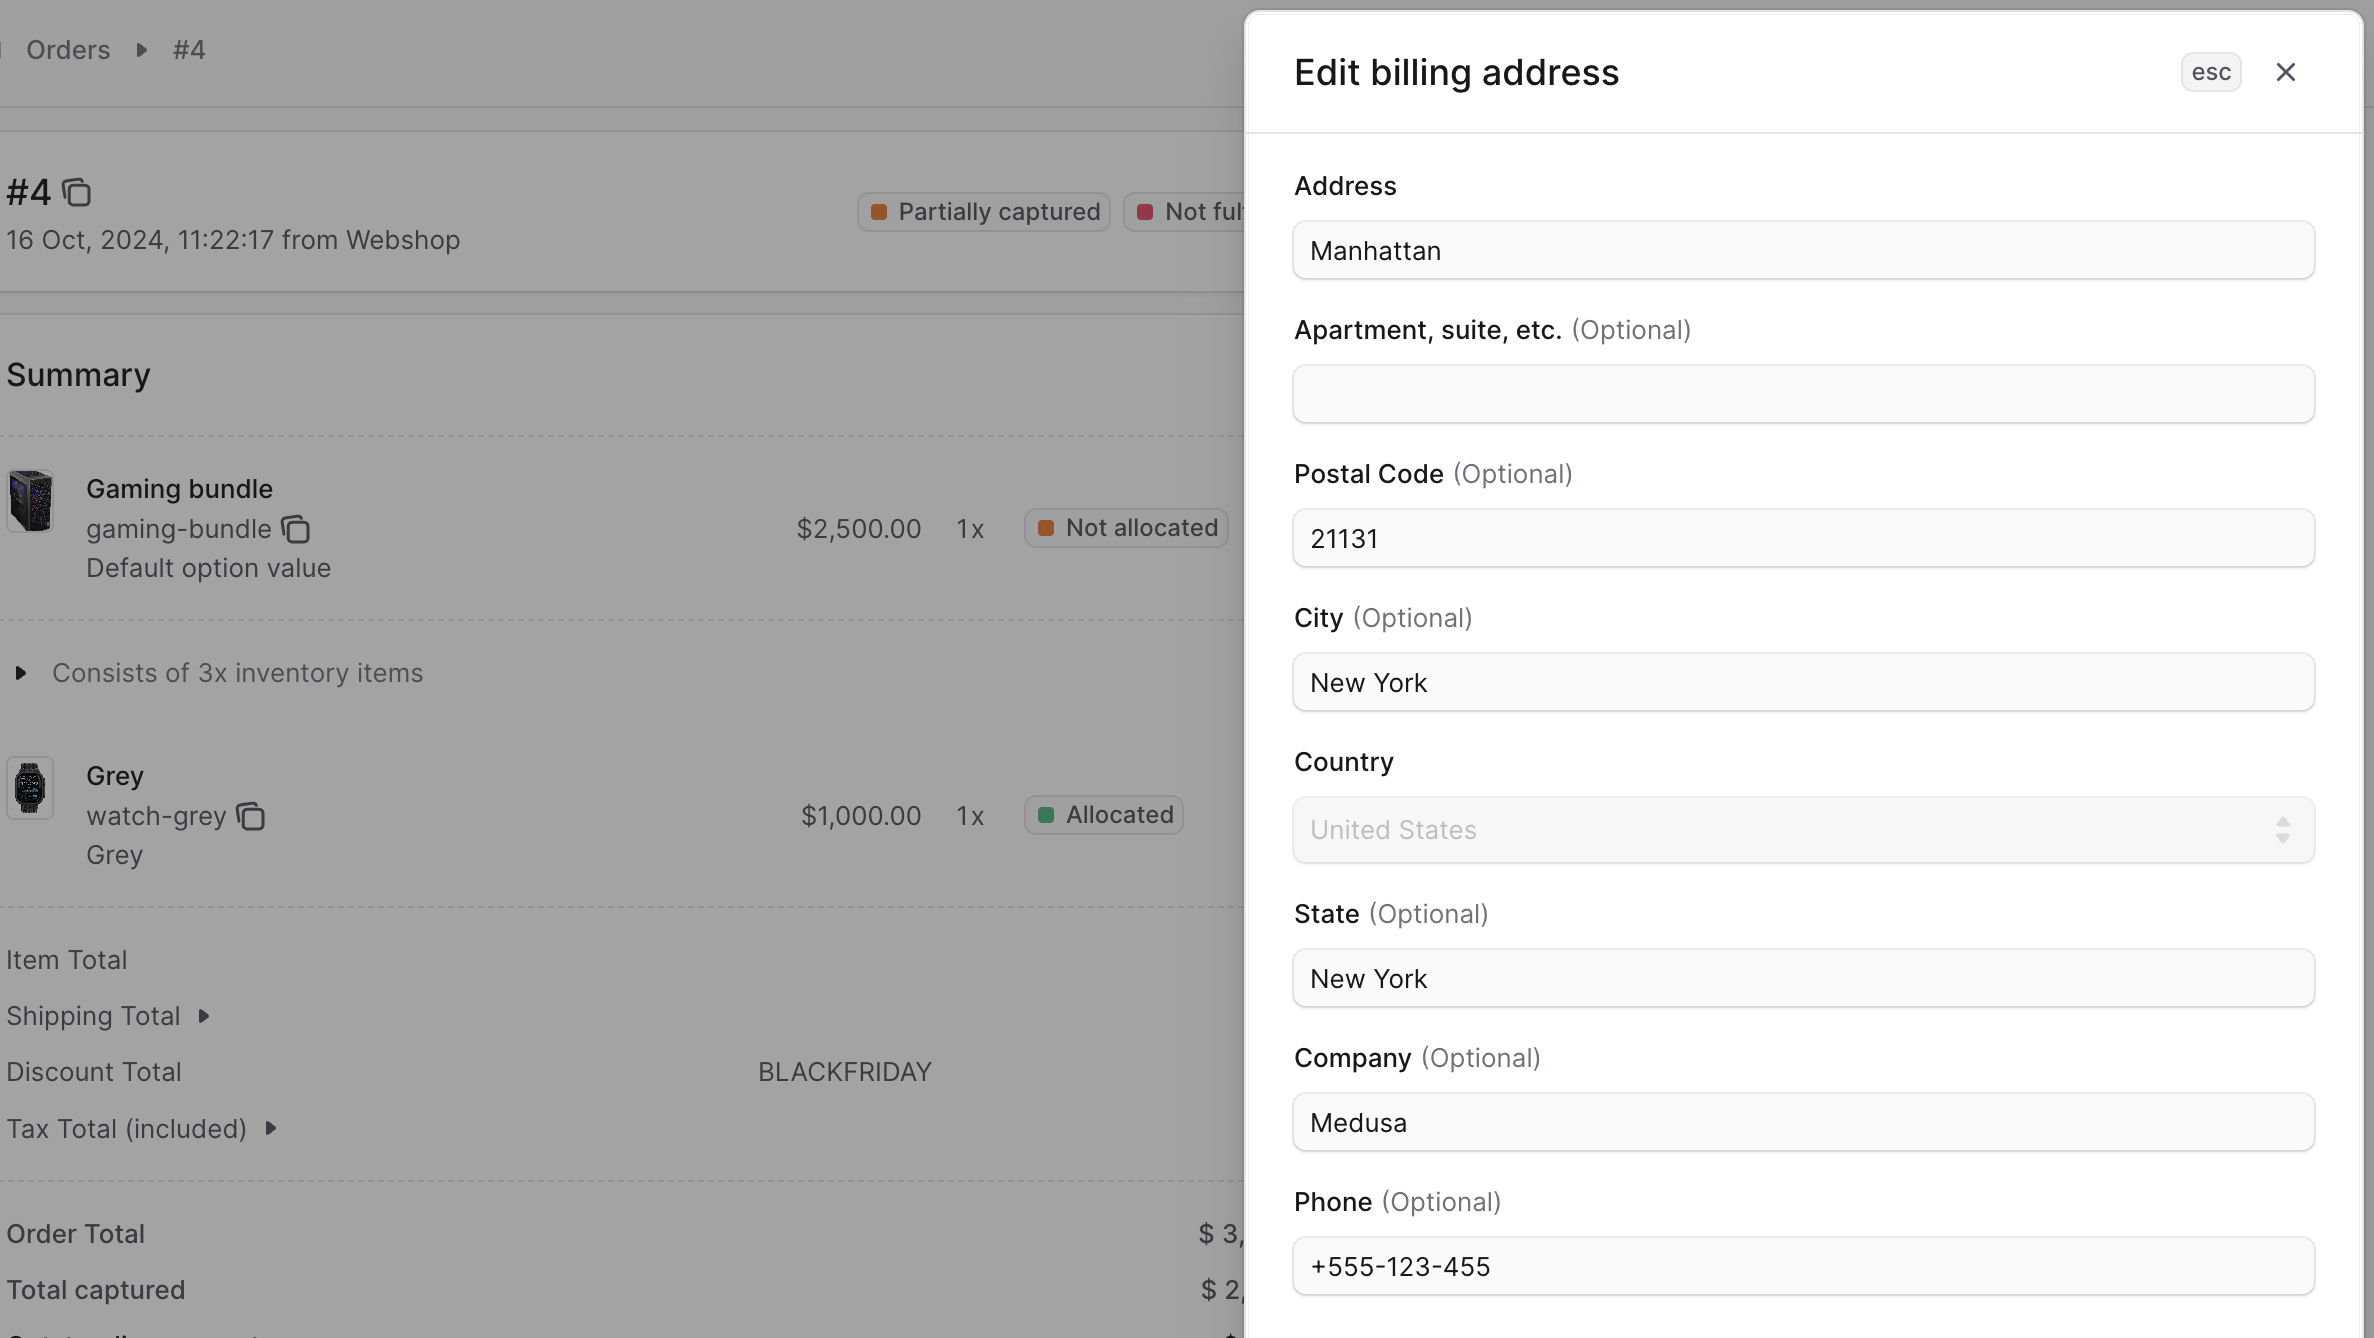
## Edit the Billing Address
|
||
|
||
To edit the billing address used for an order:
|
||
|
||
1. Open the order details page.
|
||
2. Click on the <InlineIcon Icon={EllipsisHorizontal} alt="three-dot" /> icon in the Customer section header.
|
||
3. Click on "Billing address" from the dropdown.
|
||
4. In the side window that opens, update the address details.
|
||
5. Once you’re done, click on the Save button.
|
||
|
||
|
||
|
||
---
|
||
|
||
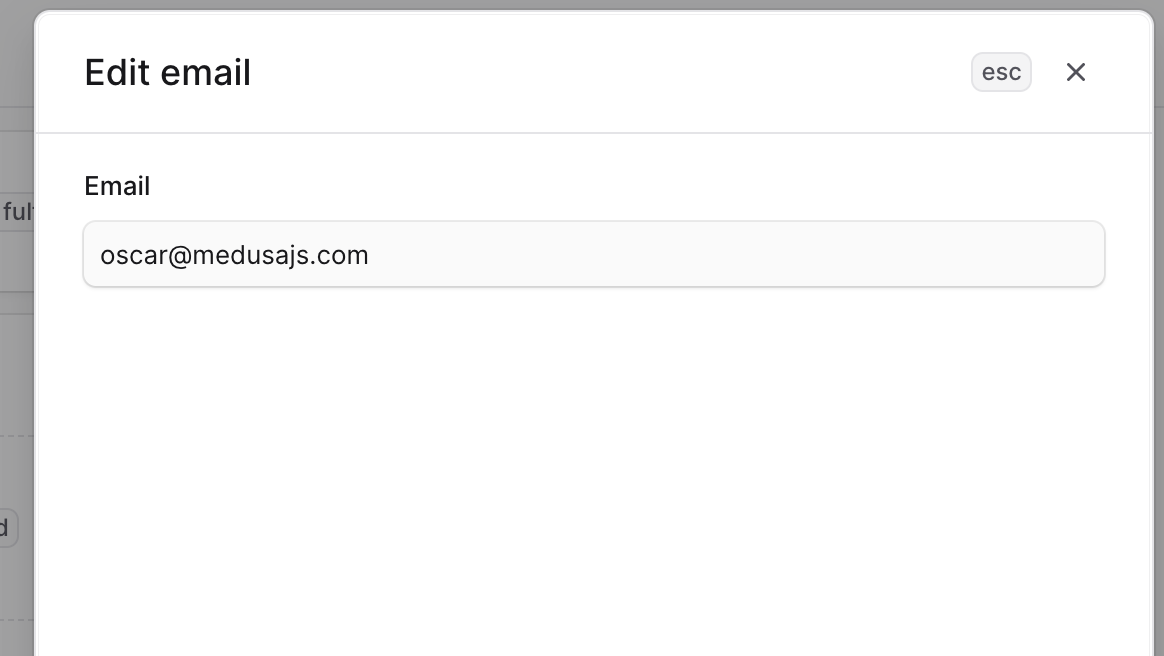
## Edit Email Address
|
||
|
||
You can edit the email address of an order to send order-update notifications to a new email address. This doesn't update the associated customer's email address or transfer the order to a new customer. To transfer the order to a new customer, see the [Transfer Customer Ownership](#transfer-customer-ownership) section.
|
||
|
||
To edit the email address associated with an order:
|
||
|
||
1. Open the order details page.
|
||
2. Click on the <InlineIcon Icon={EllipsisHorizontal} alt="three-dot" /> icon in the Customer section header.
|
||
3. Click on "Email" from the dropdown.
|
||
4. In the side window that opens, edit the email address.
|
||
5. Once you’re done, click on the Save button.
|
||
|
||
|
||
|
||
---
|
||
|
||
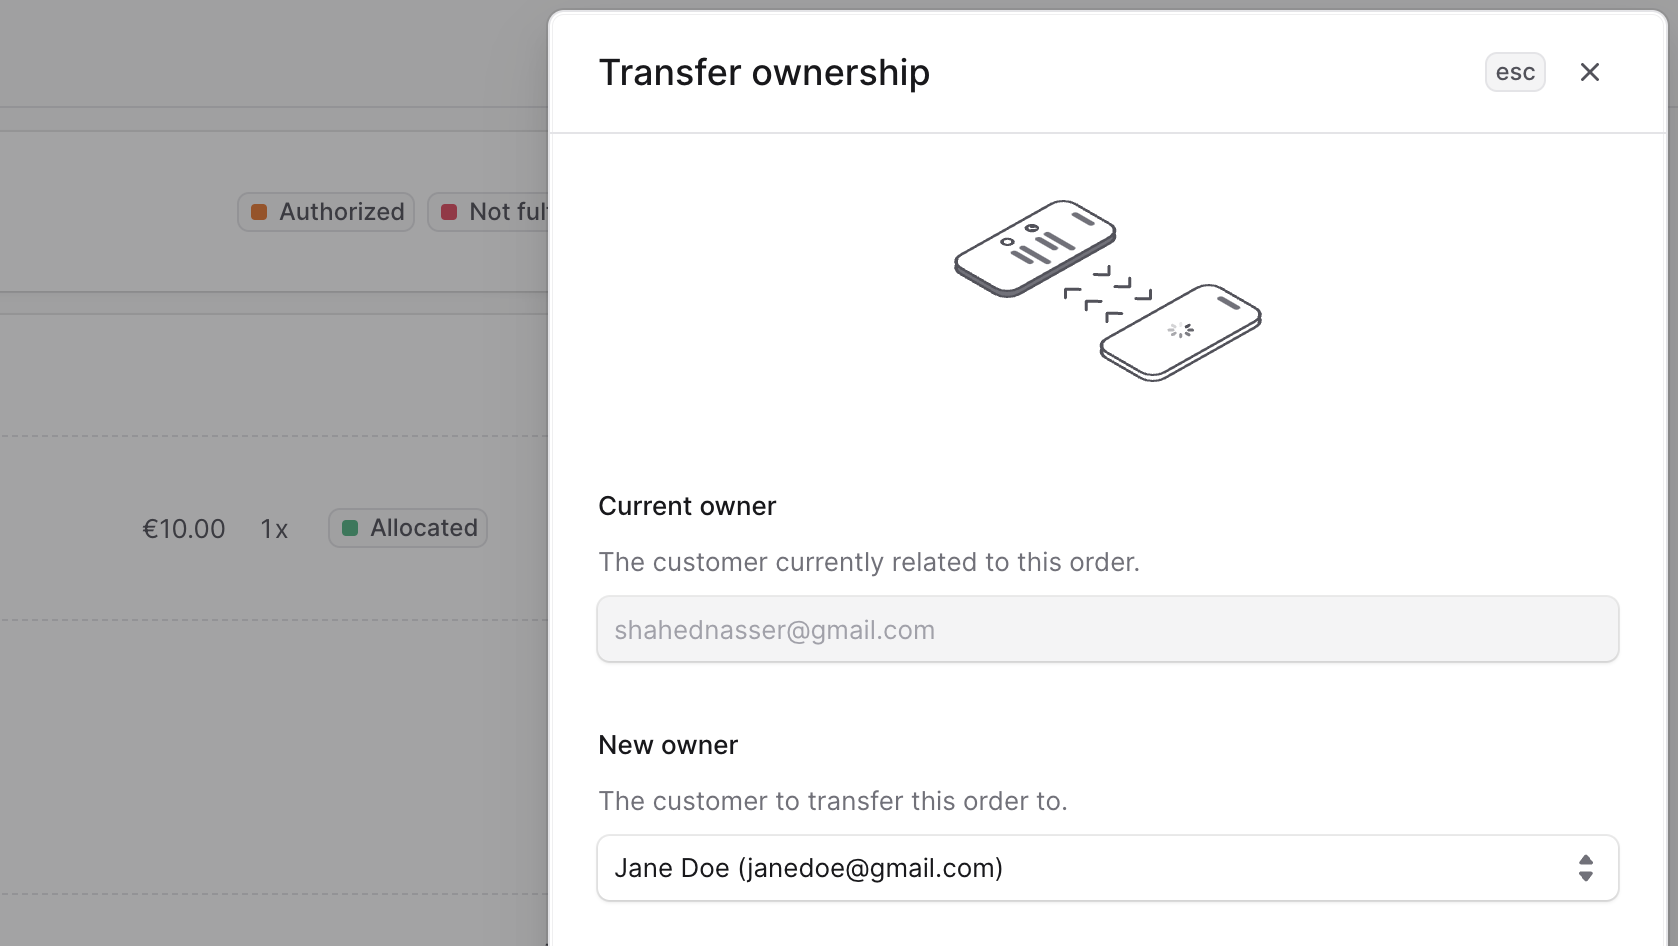
## Transfer Customer Ownership
|
||
|
||
You can transfer the ownership of an order to another registered customer. This changes the customer associated with the order and sends notifications for order updates to the new customer.
|
||
|
||
<Note>
|
||
|
||
You can't transfer ownership to a guest customer, and that includes customers you create through the admin dashboard.
|
||
|
||
</Note>
|
||
|
||
When you transfer the ownership of an order, the original customer will receive a notification, such as an email, requesting their approval for the transfer. The order is transferred to the new customer only after the original customer approves the transfer.
|
||
|
||
To transfer the ownership of an order to another customer:
|
||
|
||
1. Open the order details page.
|
||
2. Click on the <InlineIcon Icon={EllipsisHorizontal} alt="three-dot" /> icon in the Customer section header.
|
||
3. Click on "Transfer ownership" from the dropdown.
|
||
4. In the side window that opens, choose the new customer from the dropdown under the "New owner" section.
|
||
5. Once you're done, click on the Save button.
|
||
|
||
The original customer will then receive a notification requesting their approval for the transfer.
|
||
|
||
<Note>
|
||
|
||
If a notification isn't sent, check with your technical team to debug the [integrated notification service](!resources!/infrastructure-modules/notification).
|
||
|
||
</Note>
|
||
|
||
|
||
|
||
---
|
||
|
||
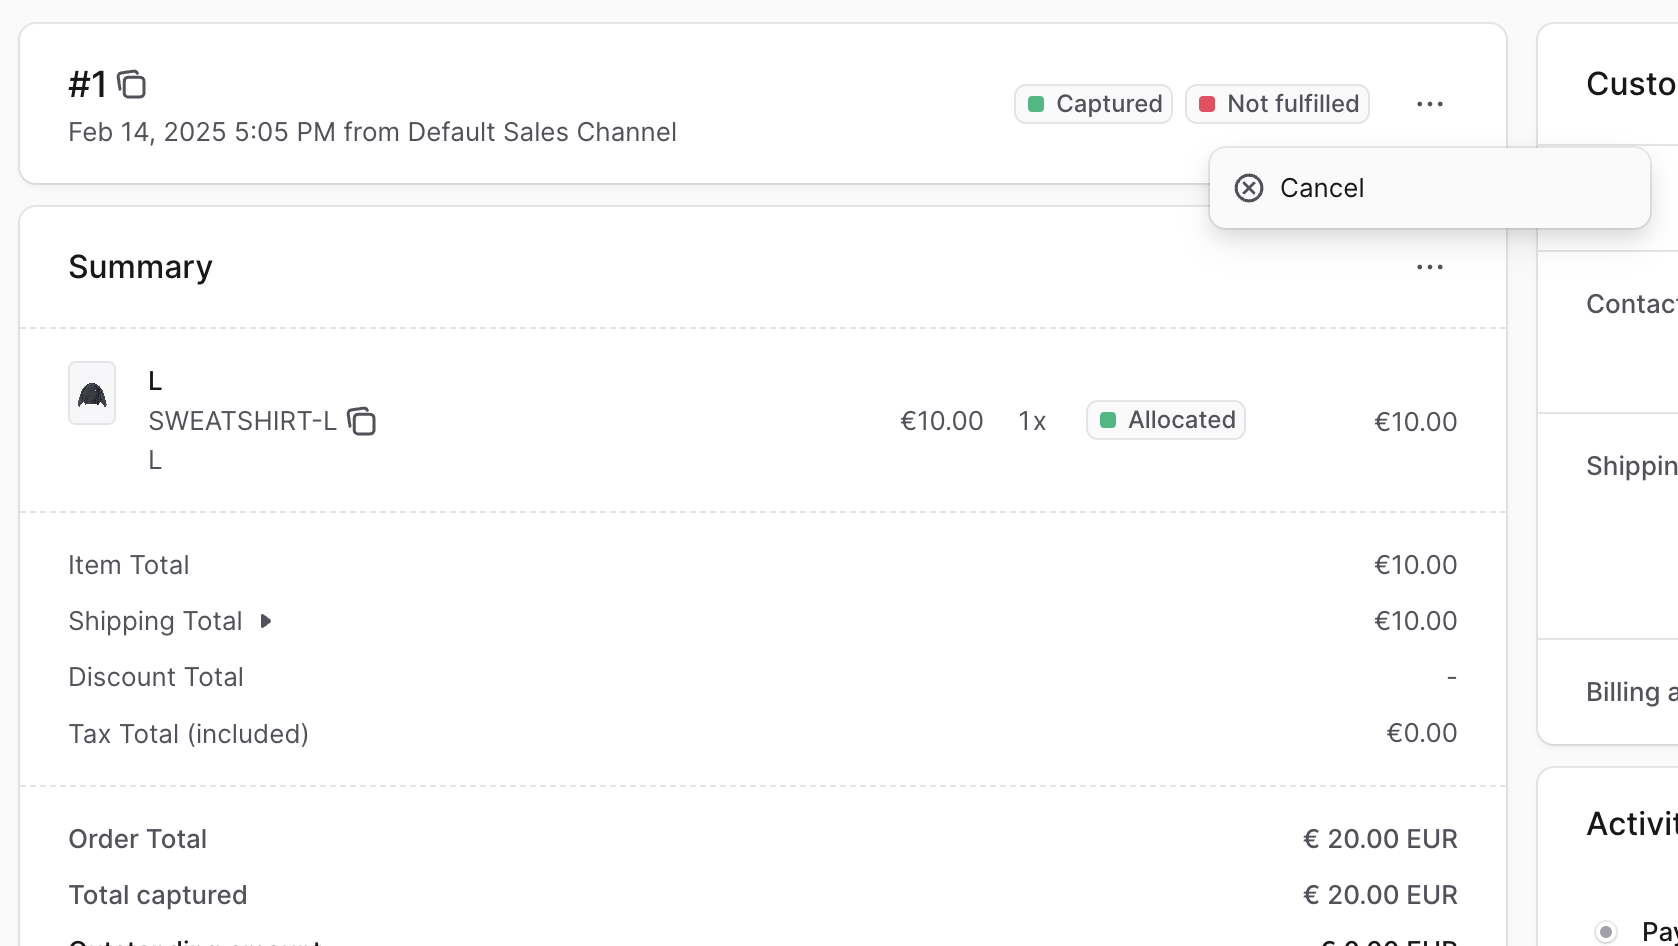
## Cancel an Order
|
||
|
||
You can cancel an order if no items have been fulfilled. Canceling an order will:
|
||
|
||
- Change the order's status to canceled.
|
||
- Refund any captured payments.
|
||
- Cancel any authorized payment.
|
||
- Notify the customer about the cancellation.
|
||
|
||
<Note type="warning">
|
||
|
||
Canceling an order is irreversible.
|
||
|
||
</Note>
|
||
|
||
To cancel an order:
|
||
|
||
1. Open the order details page.
|
||
2. In the first section showing the order’s number, click on the <InlineIcon Icon={EllipsisHorizontal} alt="three-dots" /> next to it.
|
||
3. Click on Cancel from the dropdown.
|
||
4. Confirm canceling the order by clicking the “Continue” button in the pop-up.
|
||
|
||
If the order has been paid for or fulfilled, you'll receive an error message preventing you from canceling the order. Otherwise, the order will be canceled.
|
||
|
||
|