1413 lines
56 KiB
Plaintext
1413 lines
56 KiB
Plaintext
import { Card, Prerequisites, Details } from "docs-ui"
|
|
import { Github } from "@medusajs/icons"
|
|
|
|
export const ogImage = "https://res.cloudinary.com/dza7lstvk/image/upload/v1734607836/Medusa%20Resources/integrations-shipstation_nlabgy.jpg"
|
|
|
|
export const metadata = {
|
|
title: `Integrate Medusa with ShipStation`,
|
|
openGraph: {
|
|
images: [
|
|
{
|
|
url: ogImage,
|
|
width: 1600,
|
|
height: 836,
|
|
type: "image/jpeg"
|
|
}
|
|
],
|
|
},
|
|
twitter: {
|
|
images: [
|
|
{
|
|
url: ogImage,
|
|
width: 1600,
|
|
height: 836,
|
|
type: "image/jpeg"
|
|
}
|
|
]
|
|
}
|
|
}
|
|
|
|
# {metadata.title}
|
|
|
|
In this guide, you'll learn how to integrate Medusa with ShipStation.
|
|
|
|
<Note title="Not a technical user?">
|
|
|
|
Refer your technical team to this guide to integrate ShipStation with your Medusa application. You can then enable it using the Medusa Admin as explained in [this user guide](!user-guide!/settings/locations-and-shipping/locations#manage-fulfillment-providers).
|
|
|
|
</Note>
|
|
|
|
When you install a Medusa application, you get a fully-fledged commerce platform with support for customizations. Medusa's [Fulfillment Module](../../../commerce-modules/fulfillment/page.mdx) provides fulfillment-related resources and functionalities in your store, but it delegates the processing and shipment of order fulfillments to providers that you can integrate.
|
|
|
|
[ShipStation](https://shipstation.com/) is a shipping toolbox that connects all your shipping providers within one platform. By integrating it with Medusa, you can allow customers to choose from different providers like DHL and FedEx and view price rates retrieved from ShipStation. Admin users will also process the order fulfillment using the ShipStation integration.
|
|
|
|
This guide will teach you how to:
|
|
|
|
- Install and set up Medusa.
|
|
- Set up a ShipStation account.
|
|
- Integrate ShipStation as a fulfillment provider in Medusa.
|
|
|
|
You can follow this guide whether you're new to Medusa or an advanced Medusa developer.
|
|
|
|
<Card
|
|
title="Example Repository"
|
|
text="Find the full code of the guide in this repository."
|
|
href="https://github.com/medusajs/examples/tree/main/shipstation-integration"
|
|
icon={Github}
|
|
/>
|
|
|
|
---
|
|
|
|
## Step 1: Install a Medusa Application
|
|
|
|
<Prerequisites items={[
|
|
{
|
|
text: "Node.js v20+",
|
|
link: "https://nodejs.org/en/download"
|
|
},
|
|
{
|
|
text: "Git CLI tool",
|
|
link: "https://git-scm.com/downloads"
|
|
},
|
|
{
|
|
text: "PostgreSQL",
|
|
link: "https://www.postgresql.org/download/"
|
|
}
|
|
]} />
|
|
|
|
Start by installing the Medusa application on your machine with the following command:
|
|
|
|
```bash
|
|
npx create-medusa-app@latest
|
|
```
|
|
|
|
You'll first be asked for the project's name. Then, when you're asked whether you want to install the Next.js storefront, choose `Y` for yes.
|
|
|
|
Afterwards, the installation process will start, which will install the Medusa application in a directory with your project's name, and the Next.js storefront in a directory with the `{project-name}-storefront` name.
|
|
|
|
<Note title="Why is the storefront installed separately?">
|
|
|
|
The Medusa application is composed of a headless Node.js server and an admin dashboard. The storefront is installed or custom-built separately and connects to the Medusa application through its REST endpoints, called [API routes](!docs!/learn/fundamentals/api-routes). Learn more about Medusa's architecture in [this documentation](!docs!/learn/introduction/architecture).
|
|
|
|
</Note>
|
|
|
|
Once the installation finishes successfully, the Medusa Admin dashboard will open with a form to create a new user. Enter the user's credential and submit the form.
|
|
|
|
Afterwards, you can login with the new user and explore the dashboard. The Next.js storefront is also running at `http://localhost:8000`.
|
|
|
|
<Note title="Ran to Errors?">
|
|
|
|
Check out the [troubleshooting guides](../../../troubleshooting/create-medusa-app-errors/page.mdx) for help.
|
|
|
|
</Note>
|
|
|
|
---
|
|
|
|
## Step 2: Prepare ShipStation Account
|
|
|
|
In this step, you'll prepare your ShipStation account before integrating it into Medusa. If you don't have an account, create one [here](https://www.shipstation.com/start-a-free-trial).
|
|
|
|
### Enable Carriers
|
|
|
|
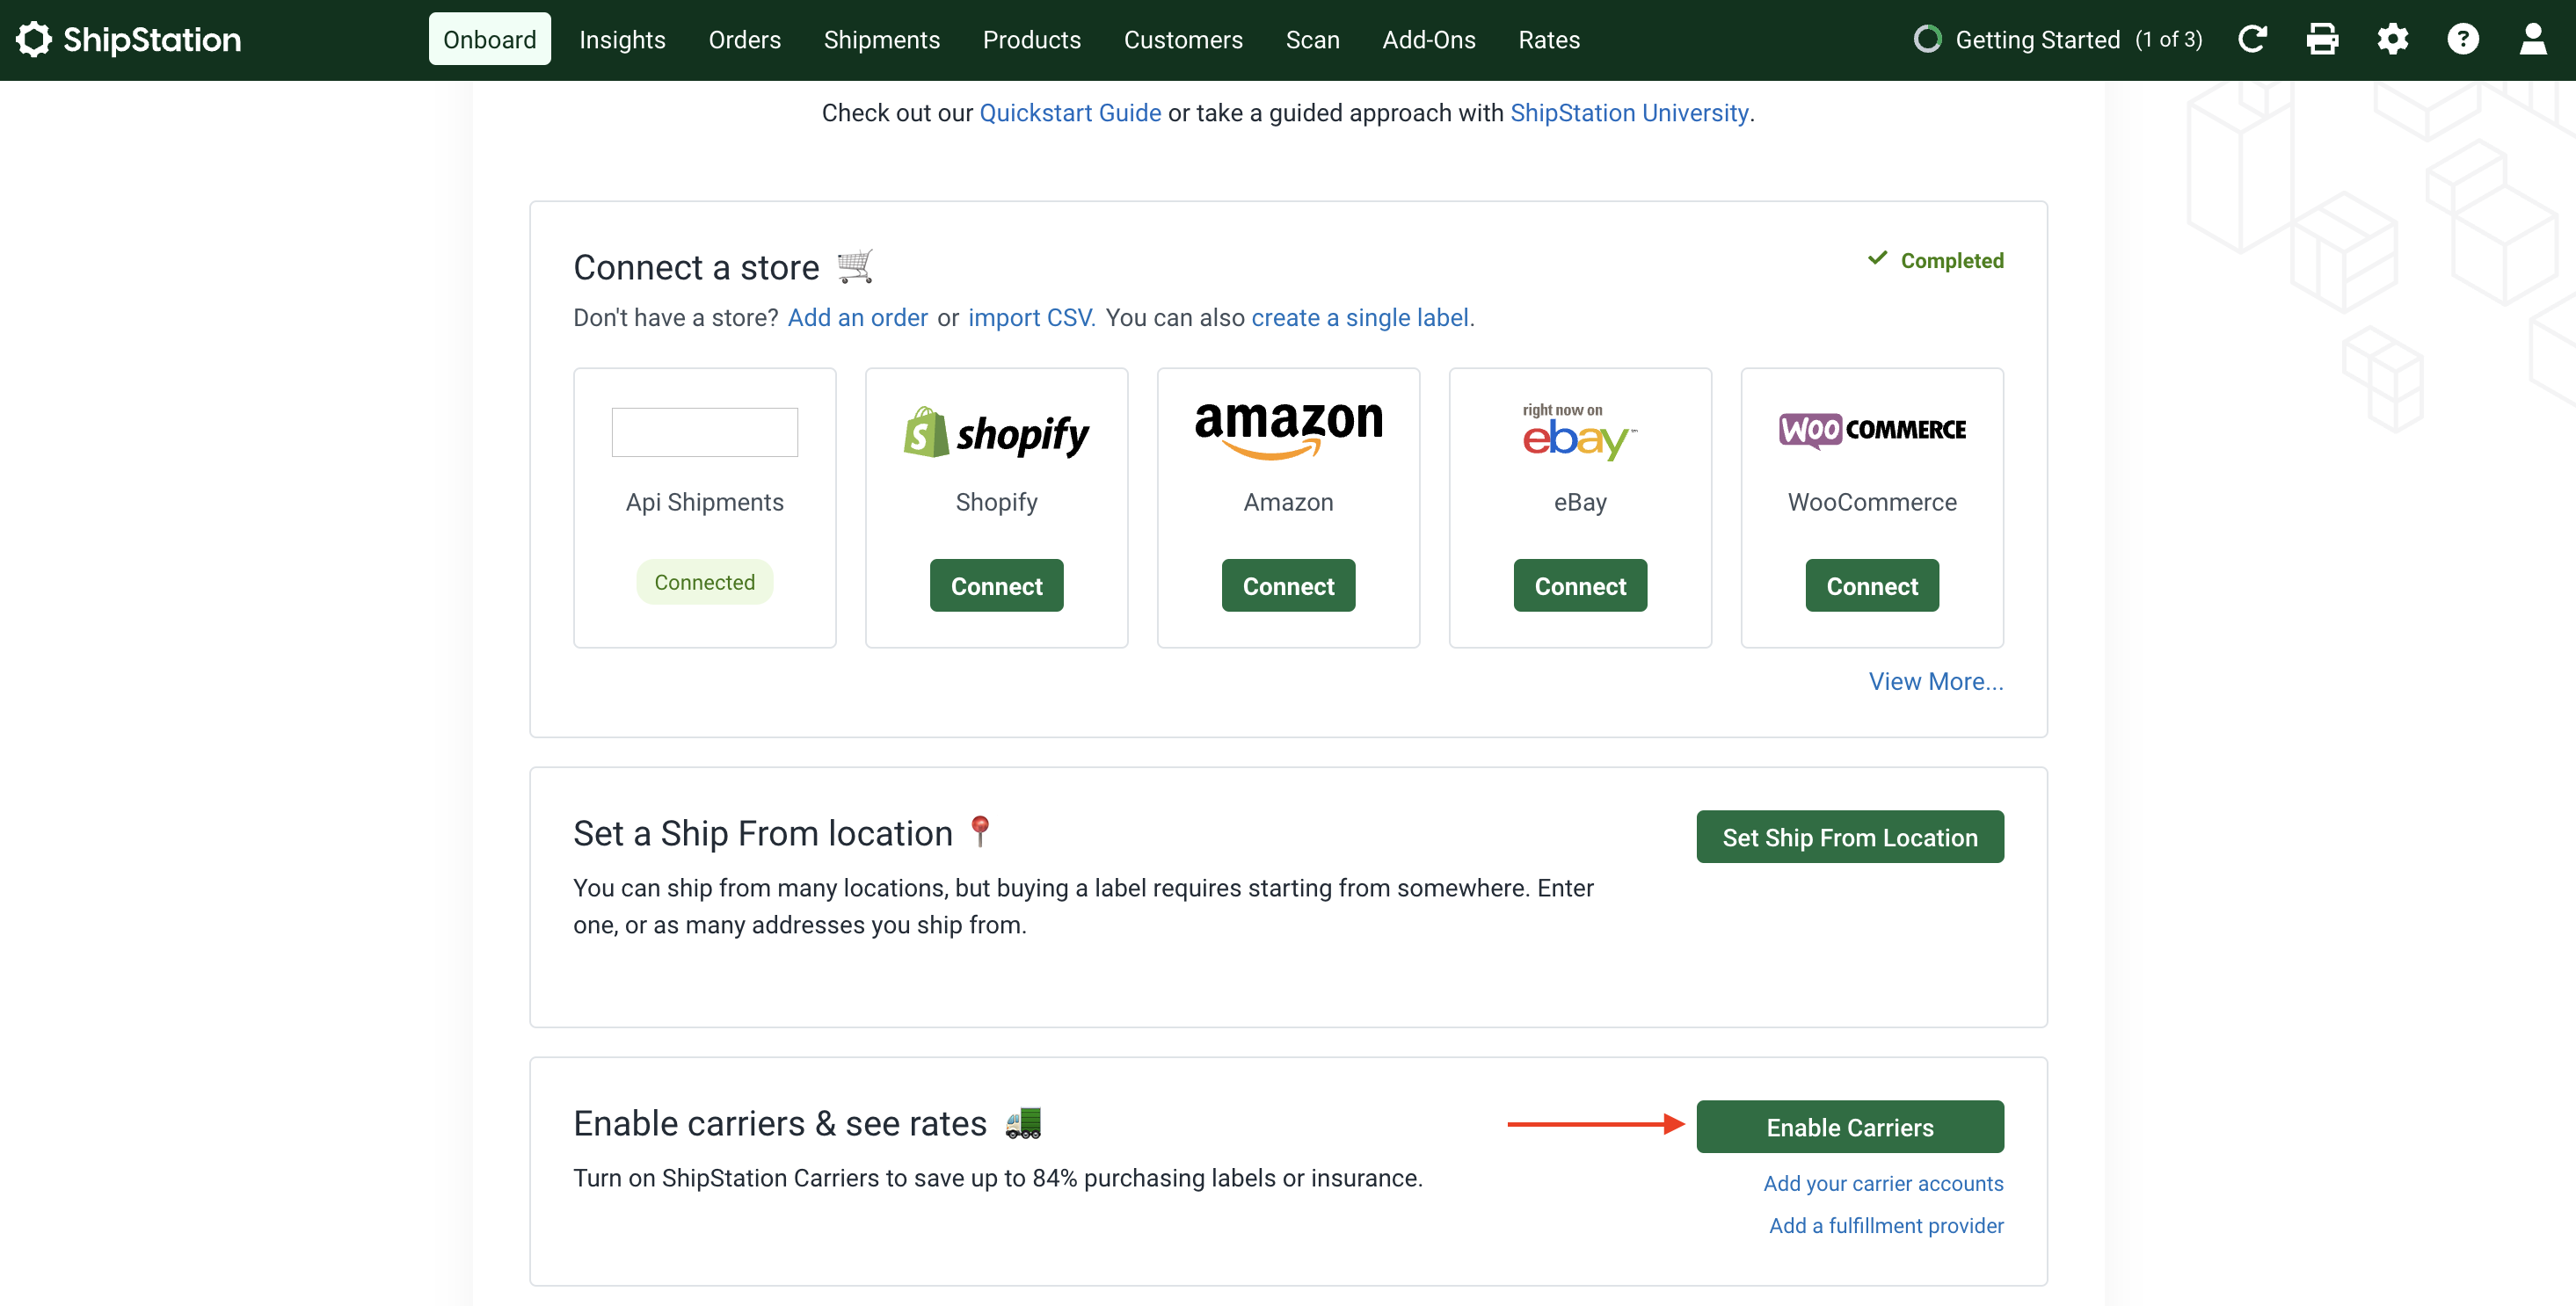
To create labels for your shipments, you need to enable carriers. This requires you to enter payment and address details.
|
|
|
|
To enable carriers:
|
|
|
|
1. On the Onboard page, in the "Enable carriers & see rates" section, click on the "Enable Carriers" button.
|
|
|
|
|
|
|
|
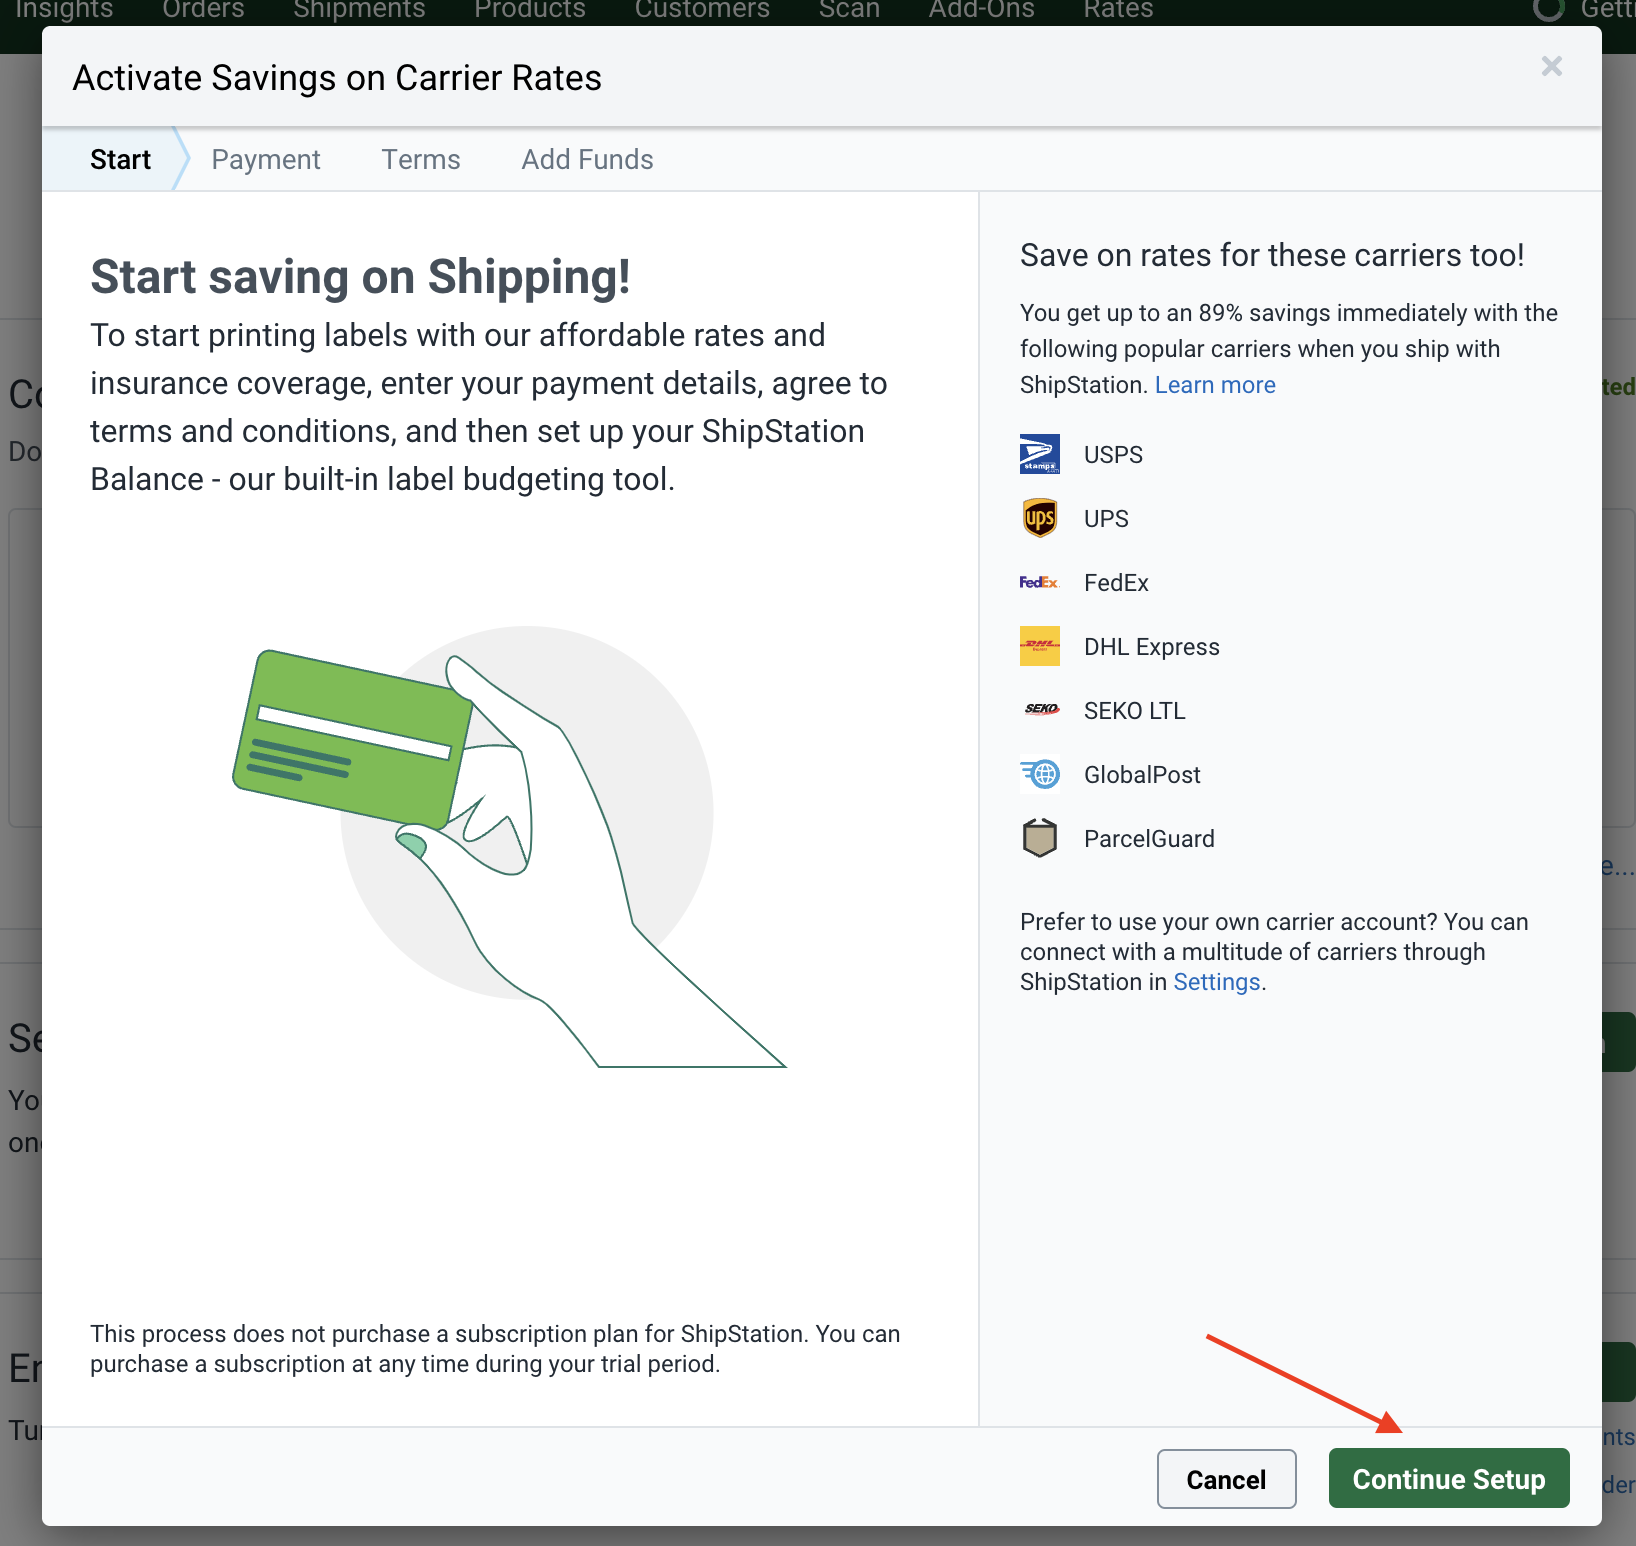
2. In the pop-up that opens, click on Continue Setup.
|
|
|
|
|
|
|
|
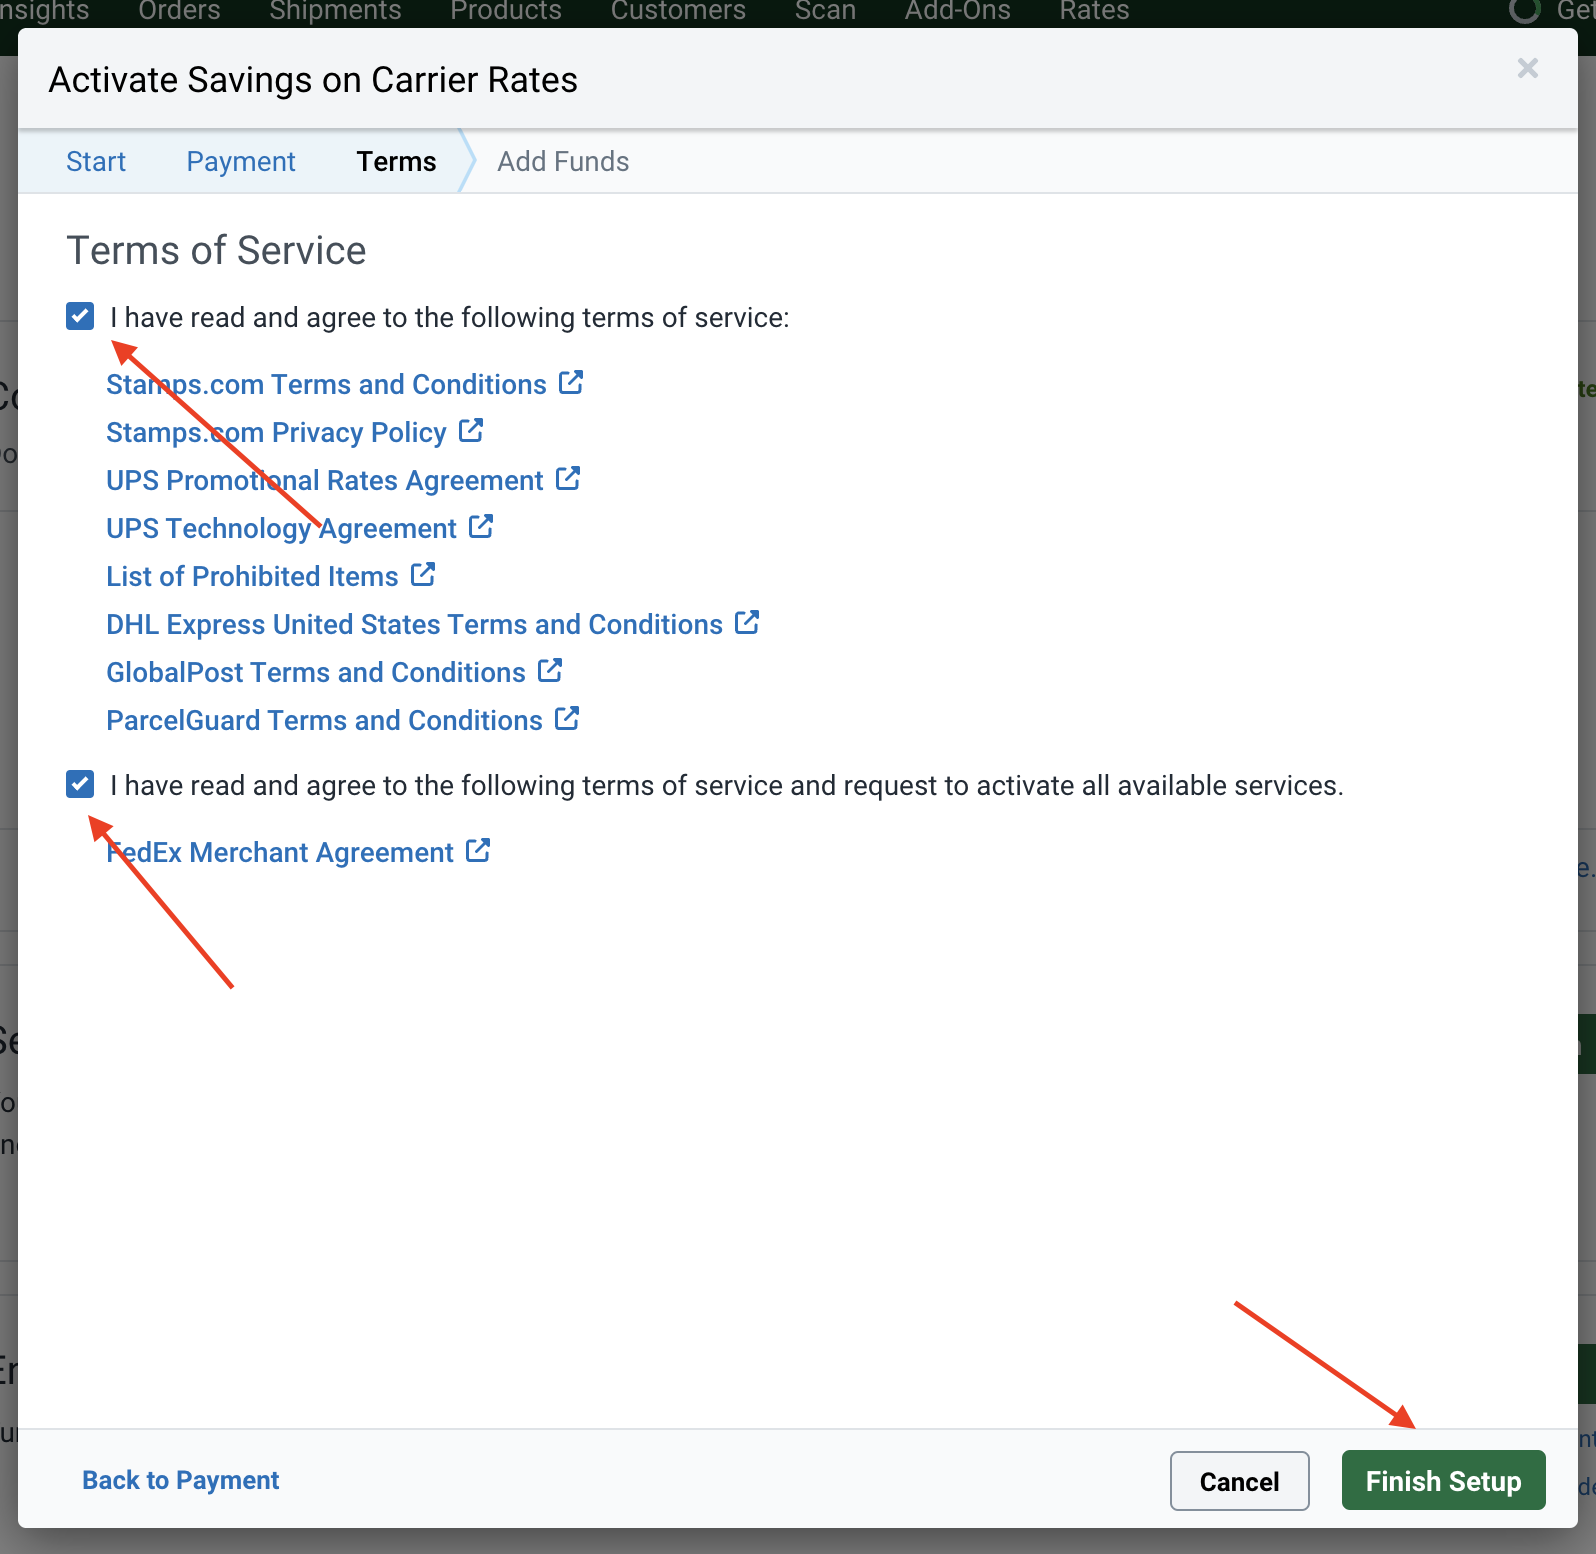
3. In the next section of the form, you have to enter your payment details and billing address. Once done, click on Continue Setup.
|
|
4. After that, click the checkboxes on the Terms of Service section, then click the Finish Setup button.
|
|
|
|
|
|
|
|
5. Once you're done, you can optionally add funds to your account. If you're not US-based, make sure to disable ParcelGuard insurance. Otherwise, an error will occur while retrieving rates later.
|
|
|
|
### Add Carriers
|
|
|
|
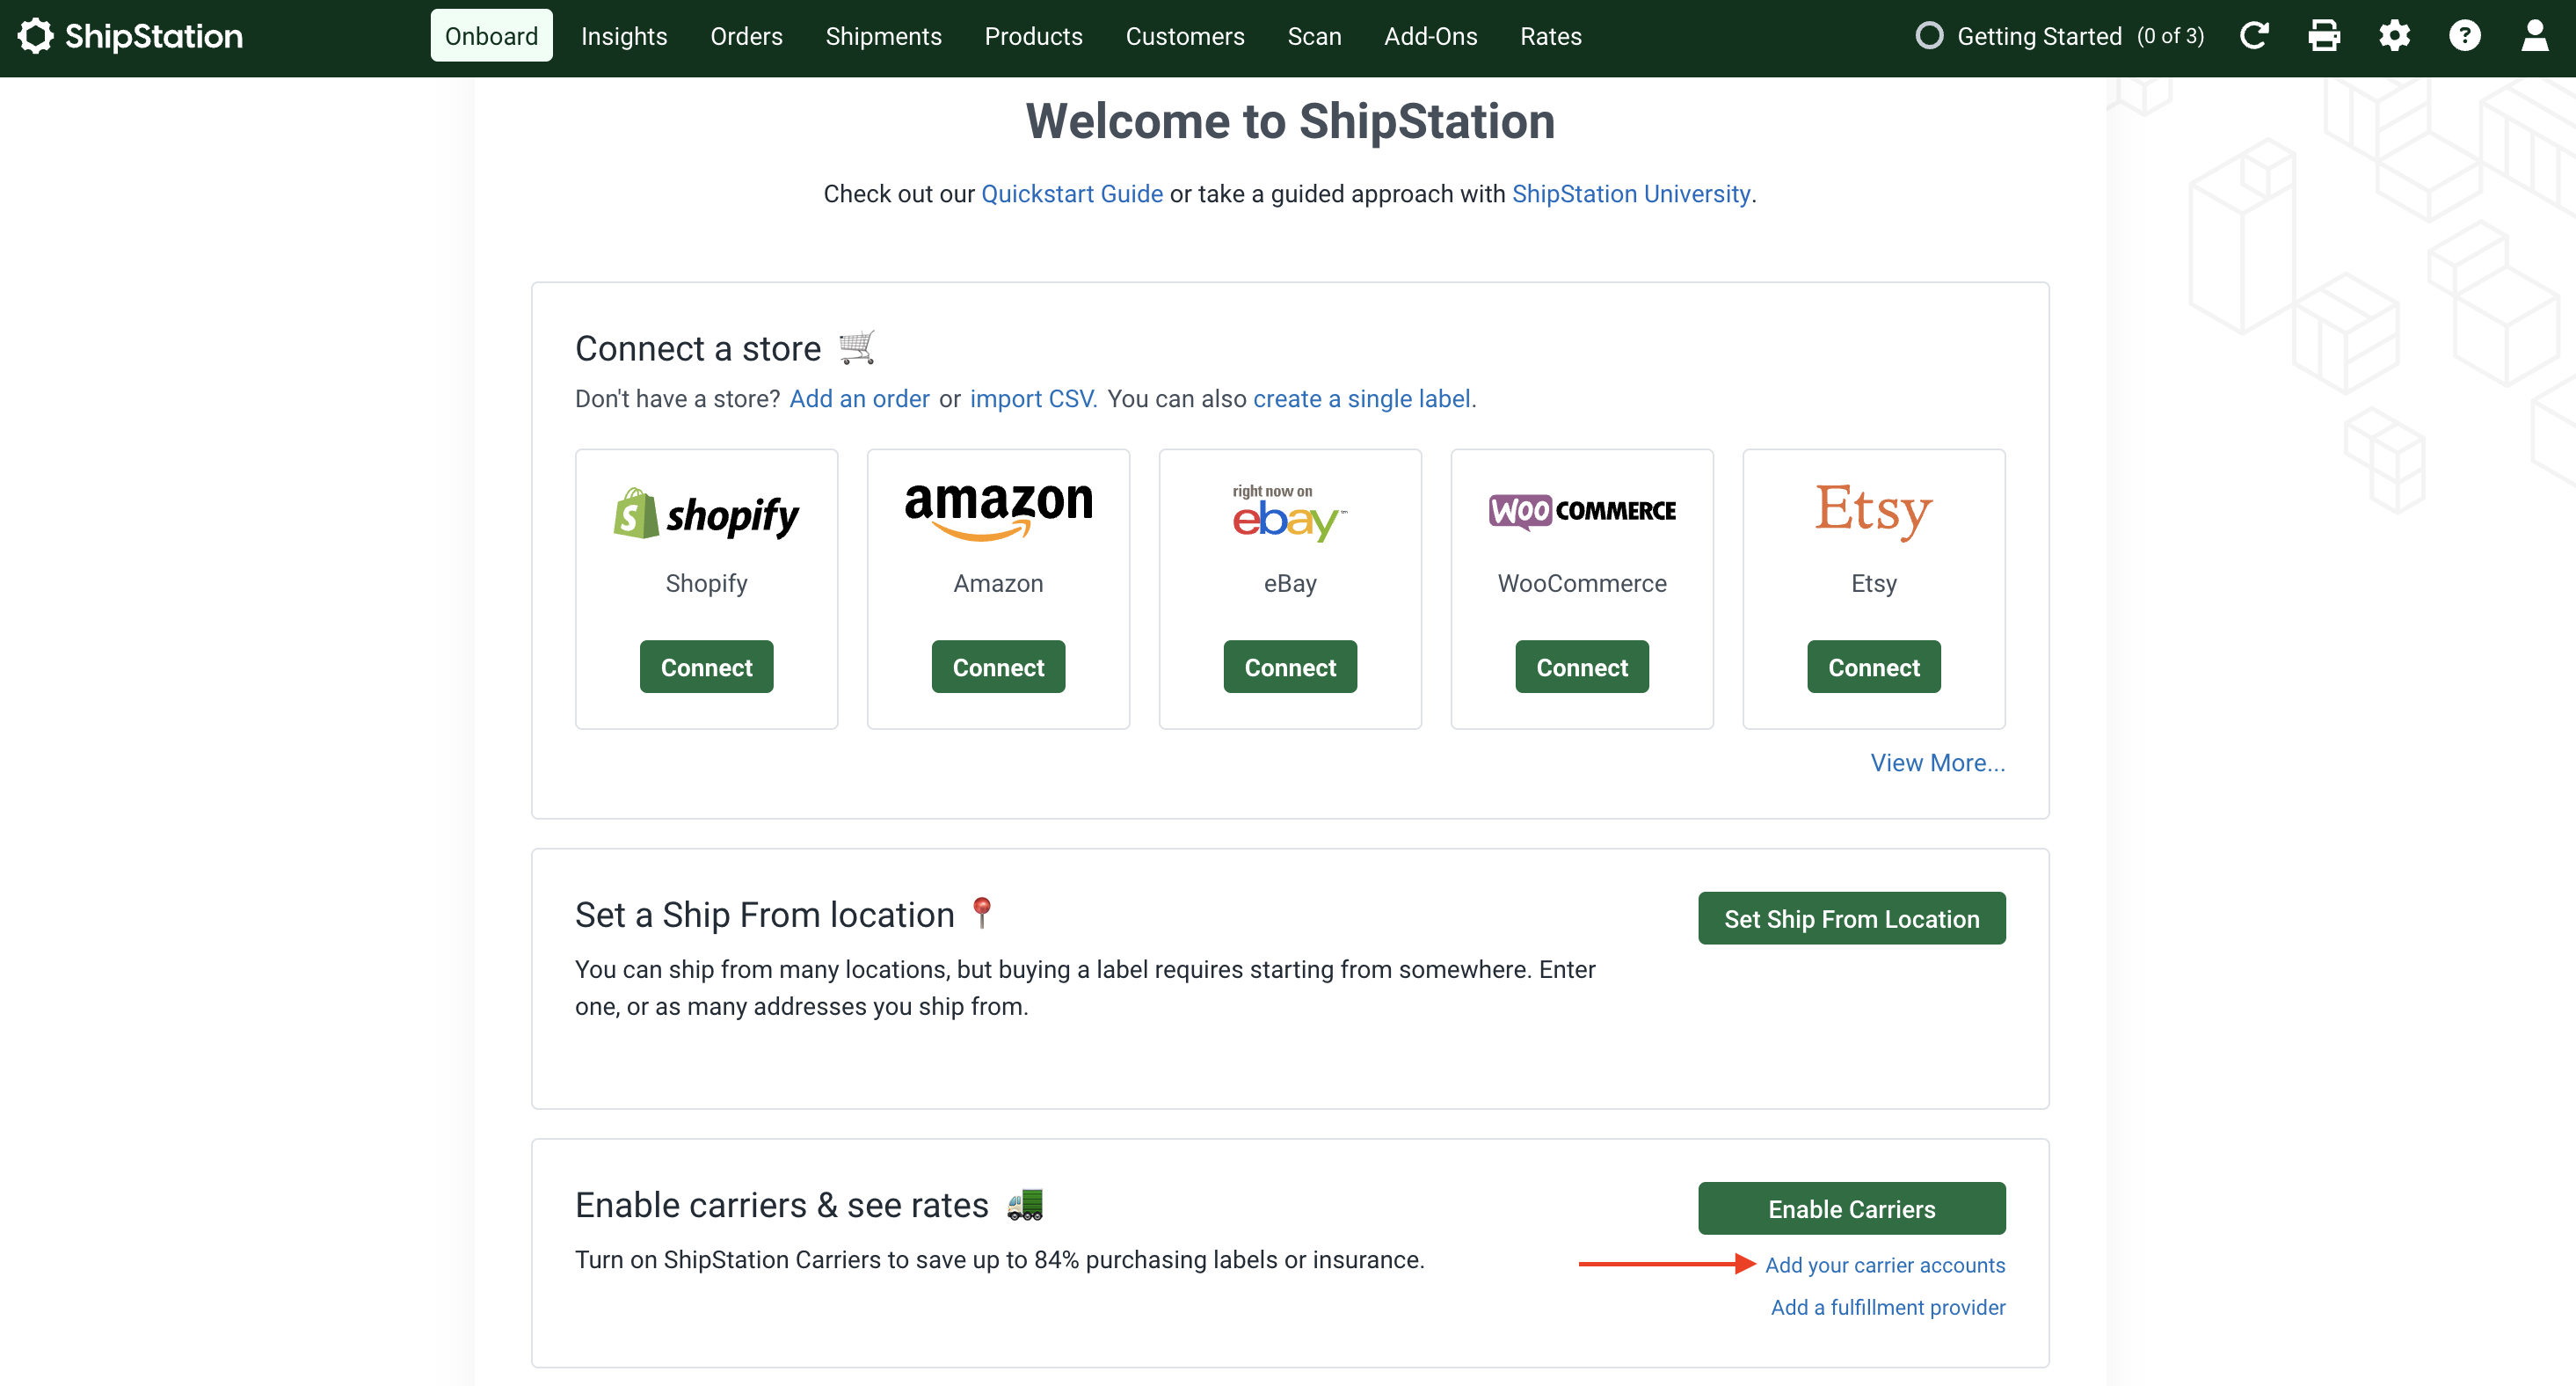
You must have at least one carrier (shipping provider) added in your ShipStation account. You'll later provide shipping options for each of these carriers in your Medusa application.
|
|
|
|
To add carriers:
|
|
|
|
1. On the Onboard page, in the "Enable carriers & see rates" section, click on the "Add your carrier accounts" link.
|
|
|
|
|
|
|
|
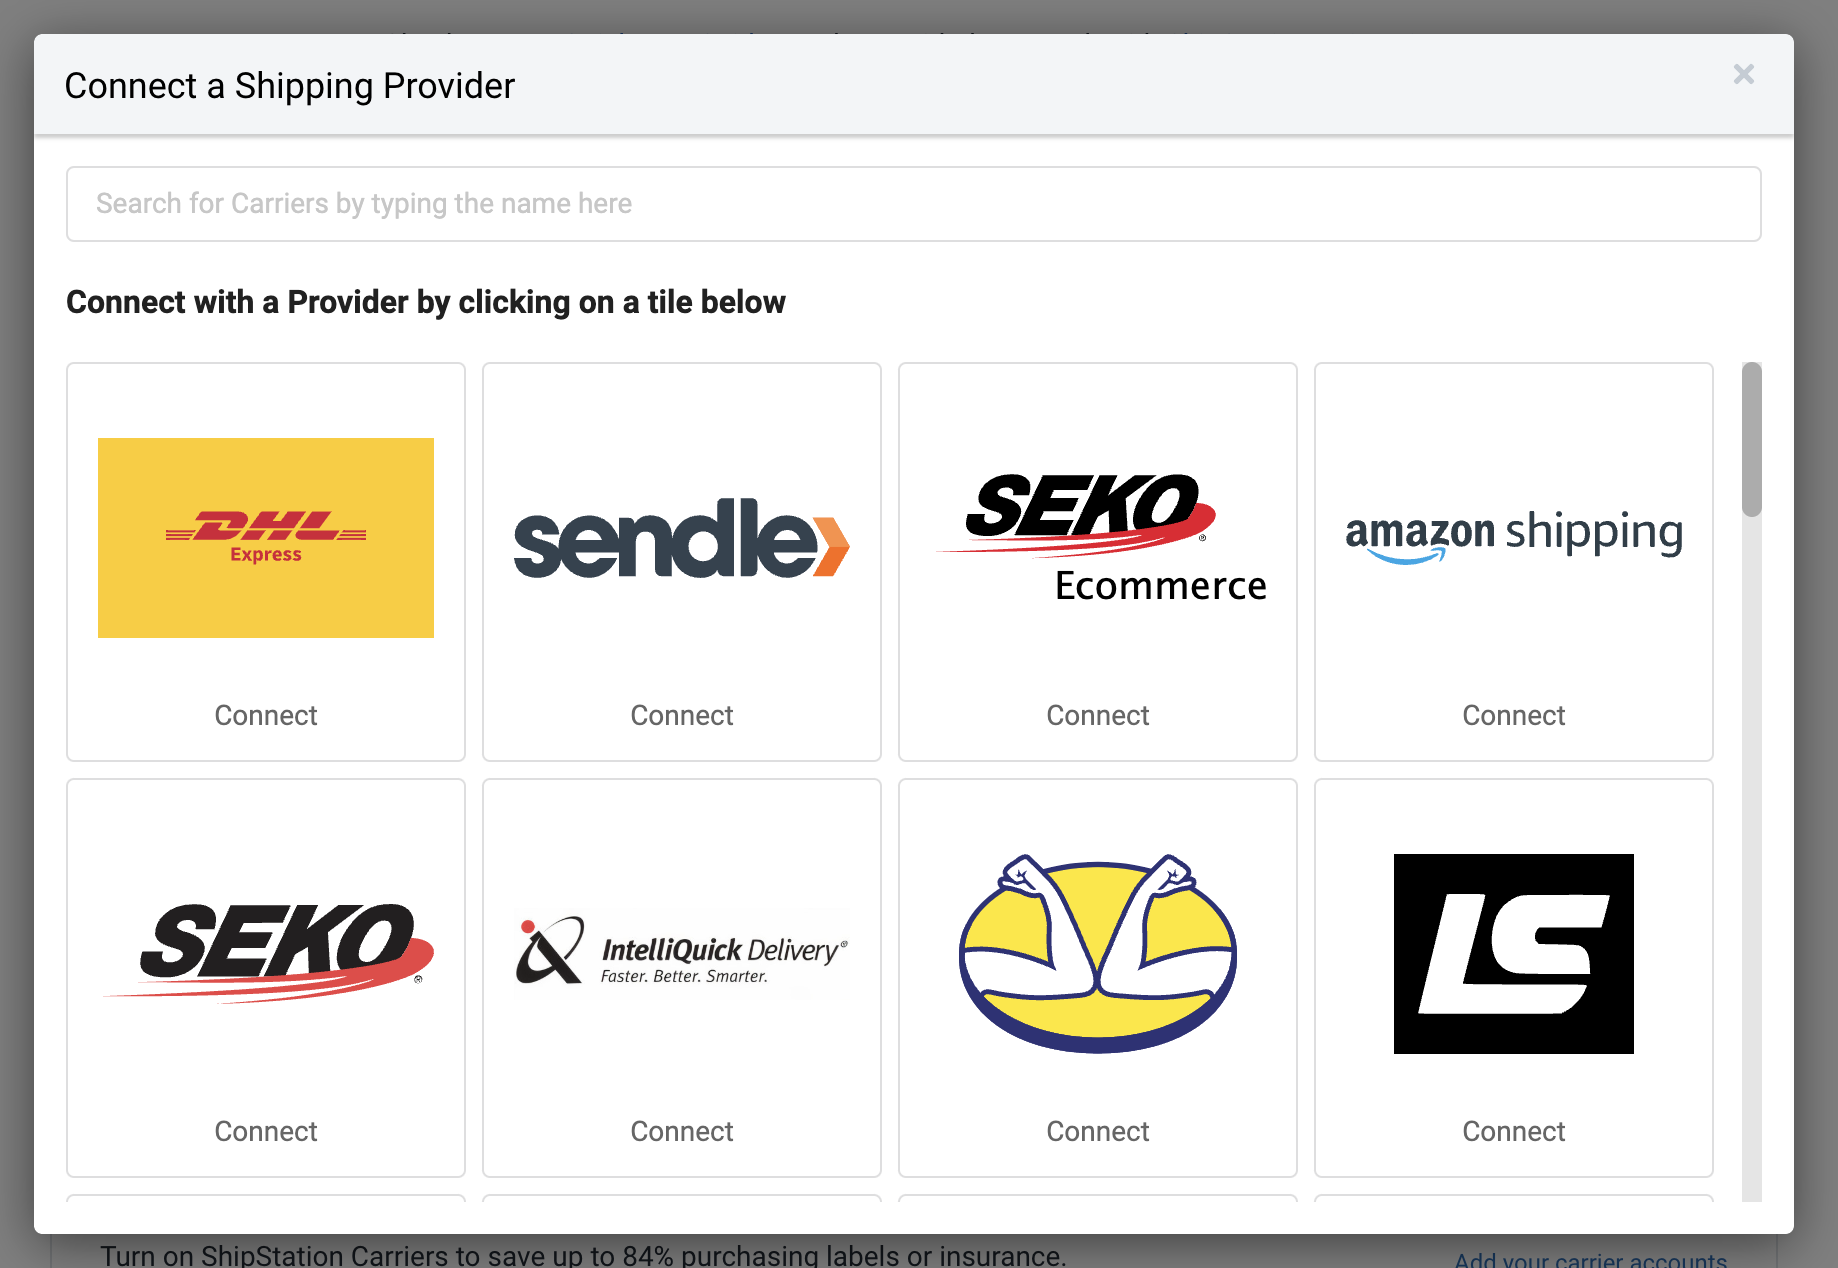
2. Click on a provider from the pop-up window.
|
|
|
|
|
|
|
|
Based on the provider you chose, you'll have to enter your account details, then submit the form.
|
|
|
|
### Activate Shipping API
|
|
|
|
To integrate ShipStation using their API, you must enable the Shipping API Add-On. To do that:
|
|
|
|
1. Go to Add-Ons from the navigation bar.
|
|
2. Find Shipping API and activate it.
|
|
|
|
You'll later retrieve your API key.
|
|
|
|
---
|
|
|
|
## Step 3: Create ShipStation Module Provider
|
|
|
|
To integrate third-party services into Medusa, you create a custom module. A module is a re-usable package with functionalities related to a single feature or domain. Medusa integrates the module into your application without implications or side effects on your setup.
|
|
|
|
Medusa's Fulfillment Module delegates processing fulfillments and shipments to other modules, called module providers. In this step, you'll create a ShipStation Module Provider that implements all functionalities required for fulfillment. In later steps, you'll add into Medusa shipping options for ShipStation, and allow customers to choose it during checkout.
|
|
|
|
<Note>
|
|
|
|
Learn more about modules in [this documentation](!docs!/learn/fundamentals/modules).
|
|
|
|
</Note>
|
|
|
|
### Create Module Directory
|
|
|
|
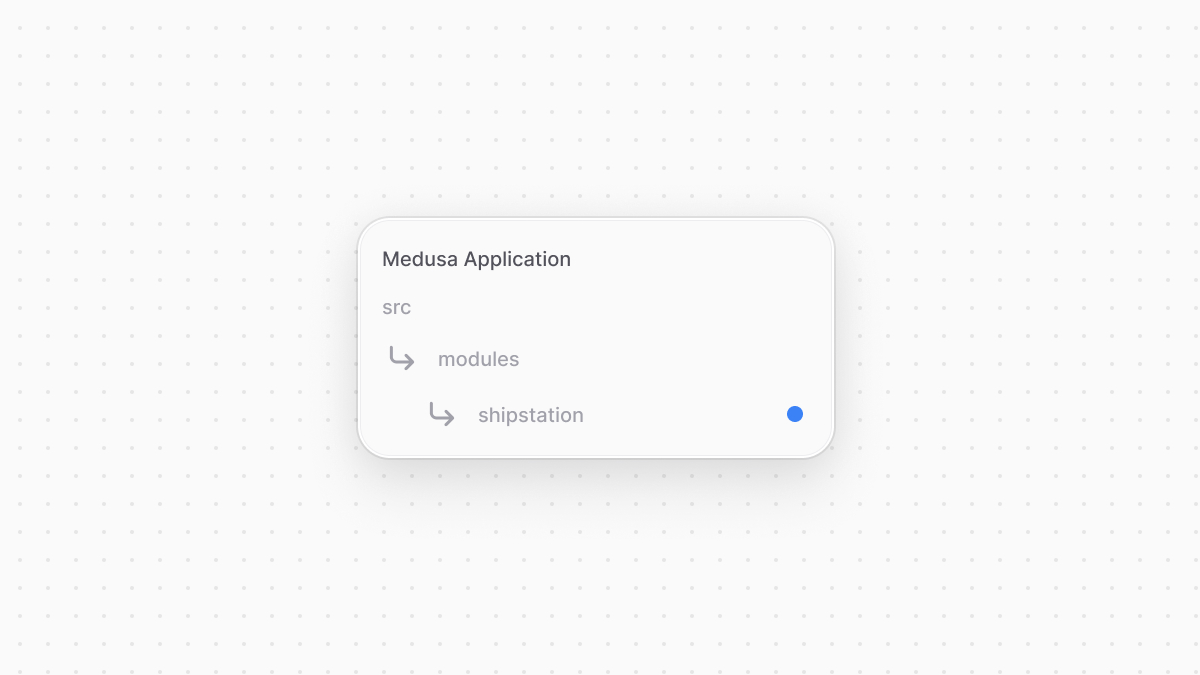
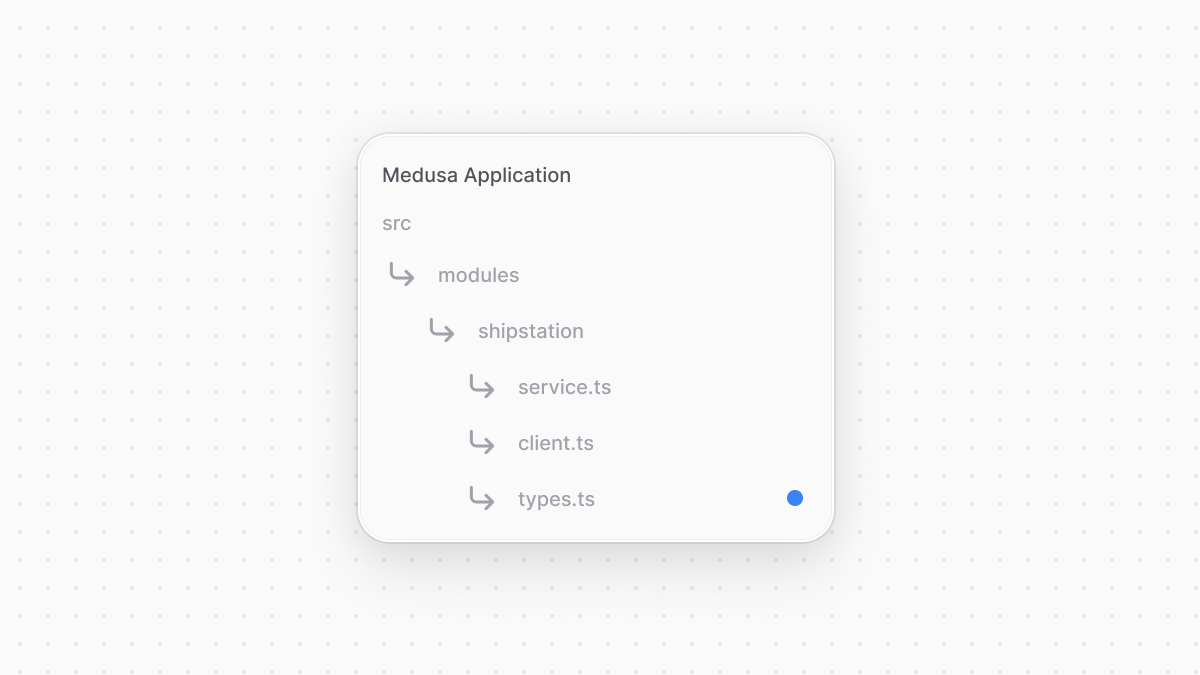
A module is created under the `src/modules` directory of your Medusa application. So, create the directory `src/modules/shipstation`.
|
|
|
|
|
|
|
|
### Create Service
|
|
|
|
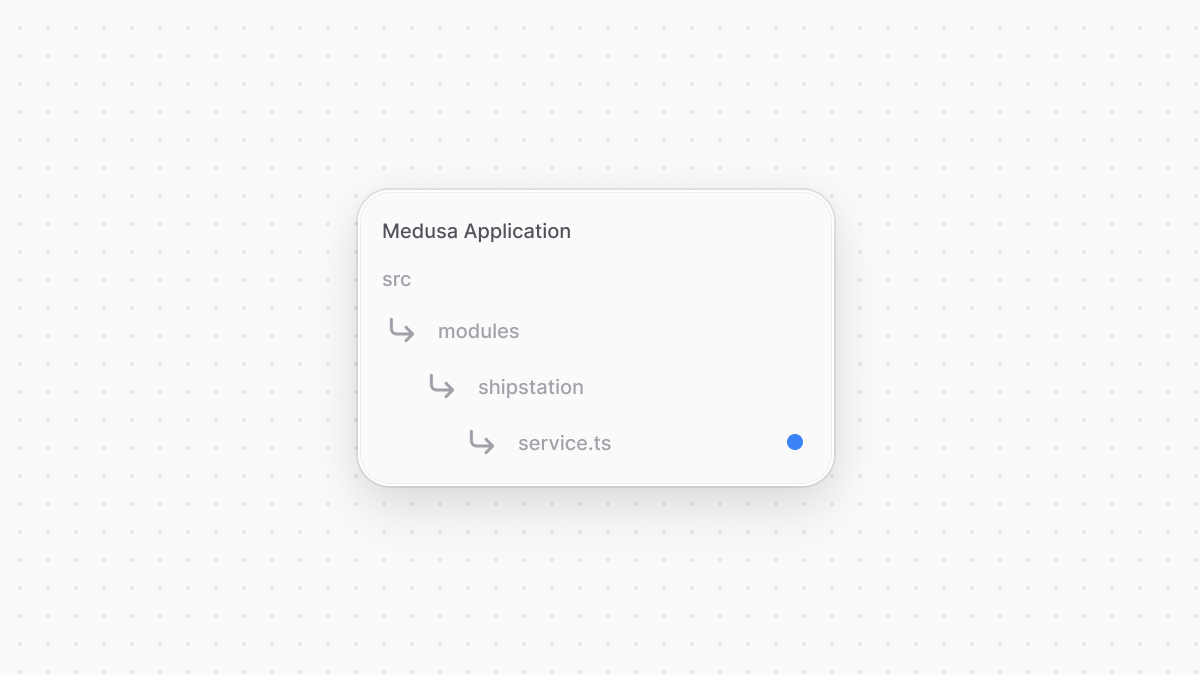
You define a module's functionalities in a service. A service is a TypeScript or JavaScript class that the module exports. In the service's methods, you can connect to the database, which is useful if your module defines tables in the database, or connect to a third-party service.
|
|
|
|
In this section, you'll create the ShipStation Module Provider's service and the methods necessary to handle fulfillment.
|
|
|
|
Start by creating the file `src/modules/shipstation/service.ts` with the following content:
|
|
|
|
|
|
|
|
export const serviceHighlights1 = [
|
|
["3", "ShipStationOptions", "The type of options that the module expects."],
|
|
["7", "AbstractFulfillmentProviderService", "Fulfillment provider service must extend this class."],
|
|
["8", "identifier", "Each fulfillment provider has a unique identifier."],
|
|
["11", "options", "Receive the module's options as a second parameter."]
|
|
]
|
|
|
|
```ts title="src/modules/shipstation/service.ts" highlights={serviceHighlights1}
|
|
import { AbstractFulfillmentProviderService } from "@medusajs/framework/utils"
|
|
|
|
export type ShipStationOptions = {
|
|
api_key: string
|
|
}
|
|
|
|
class ShipStationProviderService extends AbstractFulfillmentProviderService {
|
|
static identifier = "shipstation"
|
|
protected options_: ShipStationOptions
|
|
|
|
constructor({}, options: ShipStationOptions) {
|
|
super()
|
|
|
|
this.options_ = options
|
|
}
|
|
|
|
// TODO add methods
|
|
}
|
|
|
|
export default ShipStationProviderService
|
|
```
|
|
|
|
A Fulfillment Module Provider service must extend the `AbstractFulfillmentProviderService` class. You'll implement the abstract methods of this class in the upcoming sections.
|
|
|
|
The service must have an `identifier` static property, which is a unique identifier for the provider. You set the identifier to `shipstation`.
|
|
|
|
A module can receive options that are set when you later add the module to Medusa's configurations. These options allow you to safely store secret values outside of your code.
|
|
|
|
The ShipStation module requires an `api_key` option, indicating your ShipStation's API key. You receive the options as a second parameter of the service's constructor.
|
|
|
|
### Create Client
|
|
|
|
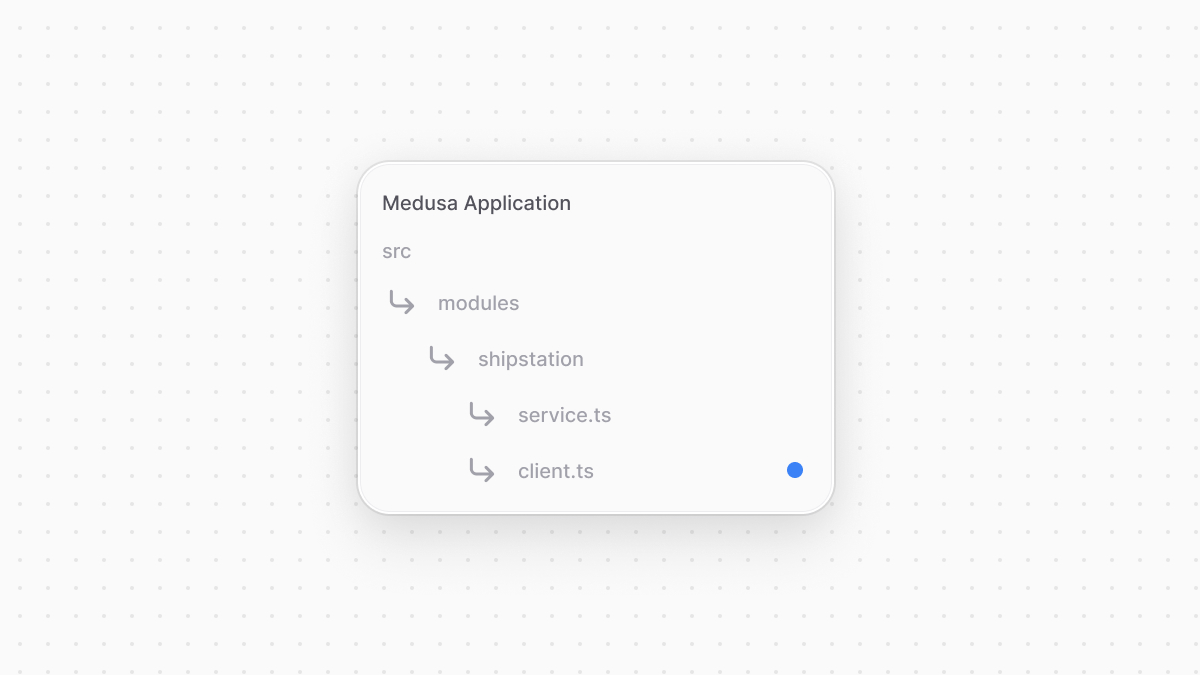
To send requests to ShipStation, you'll create a client class that provides the methods to send requests. You'll then use that class in your service.
|
|
|
|
Create the file `src/modules/shipstation/client.ts` with the following content:
|
|
|
|
|
|
|
|
export const clientHighlights1 = [
|
|
["5", "options", "Add the client options as a class property."],
|
|
["11", "sendRequest", "Send a request to ShipStation."],
|
|
["16", "api_key", "Pass the API key in the request header."],
|
|
["19", "then", "Parse the response based on the content header."],
|
|
["27", "then", "Throw possible errors in the response or return the response."]
|
|
]
|
|
|
|
```ts title="src/modules/shipstation/client.ts" highlights={clientHighlights1}
|
|
import { ShipStationOptions } from "./service"
|
|
import { MedusaError } from "@medusajs/framework/utils"
|
|
|
|
export class ShipStationClient {
|
|
options: ShipStationOptions
|
|
|
|
constructor(options) {
|
|
this.options = options
|
|
}
|
|
|
|
private async sendRequest(url: string, data?: RequestInit): Promise<any> {
|
|
return fetch(`https://api.shipstation.com/v2${url}`, {
|
|
...data,
|
|
headers: {
|
|
...data?.headers,
|
|
"api-key": this.options.api_key,
|
|
"Content-Type": "application/json",
|
|
},
|
|
}).then((resp) => {
|
|
const contentType = resp.headers.get("content-type")
|
|
if (!contentType?.includes("application/json")) {
|
|
return resp.text()
|
|
}
|
|
|
|
return resp.json()
|
|
})
|
|
.then((resp) => {
|
|
if (typeof resp !== "string" && resp.errors?.length) {
|
|
throw new MedusaError(
|
|
MedusaError.Types.INVALID_DATA,
|
|
`An error occured while sending a request to ShipStation: ${
|
|
resp.errors.map((error) => error.message)
|
|
}`
|
|
)
|
|
}
|
|
|
|
return resp
|
|
})
|
|
}
|
|
}
|
|
```
|
|
|
|
The `ShipStationClient` class accepts the ShipStation options in its constructor and sets those options in the `options` property.
|
|
|
|
You also add a private `sendRequest` method that accepts a path to send a request to and the request's configurations. In the method, you send a request using the Fetch API, passing the API key from the options in the request header. You also parse the response body based on its content type, and check if there are any errors to be thrown before returning the parsed response.
|
|
|
|
You'll add more methods to send requests in the upcoming steps.
|
|
|
|
To use the client in `ShipStationProviderService`, add it as a class property and initialize it in the constructor:
|
|
|
|
export const serviceHighlights2 = [
|
|
["2", "", "Import the client."],
|
|
["8", "client", "Add client property."],
|
|
["12", "ShipStationClient", "Initialize the client."]
|
|
]
|
|
|
|
```ts title="src/modules/shipstation/service.ts" highlights={serviceHighlights2}
|
|
// imports...
|
|
import { ShipStationClient } from "./client"
|
|
|
|
// ...
|
|
|
|
class ShipStationProviderService extends AbstractFulfillmentProviderService {
|
|
// properties...
|
|
protected client: ShipStationClient
|
|
|
|
constructor({}, options: ShipStationOptions) {
|
|
// ...
|
|
this.client = new ShipStationClient(options)
|
|
}
|
|
}
|
|
```
|
|
|
|
You import `ShipStationClient` and add a new `client` property in `ShipStationProviderService`. In the class's constructor, you set the `client` property by initializing `ShipStationProviderService`, passing it the module's options.
|
|
|
|
You'll use the `client` property when implementing the service's methods.
|
|
|
|
### Implement Service Methods
|
|
|
|
In this section, you'll go back to the `ShipStationProviderService` method to implement the abstract methods of `AbstractFulfillmentProviderService`.
|
|
|
|
<Note>
|
|
|
|
Refer to [this guide](/references/fulfillment/provider) for a full reference of all methods, their parameters and return types.
|
|
|
|
</Note>
|
|
|
|
#### getFulfillmentOptions
|
|
|
|
The `getFulfillmentOptions` method returns the options that this fulfillment provider supports. When admin users add shipping options later in the Medusa Admin, they'll select one of these options.
|
|
|
|
<Note>
|
|
|
|
Learn more about shipping options in [this guide](../../../commerce-modules/fulfillment/shipping-option/page.mdx).
|
|
|
|
</Note>
|
|
|
|
ShipStation requires that a shipment must be associated with a carrier and one of its services. So, in this method, you'll retrieve the list of carriers from ShipStation and return them as fulfillment options. Shipping options created from these fulfillment options will always have access to the option's carrier and service.
|
|
|
|
Before you start implementing methods, you'll add the expected carrier types returned by ShipStation. Create the file `src/modules/shipstation/types.ts` with the following content:
|
|
|
|
|
|
|
|
```ts title="src/modules/shipstation/types.ts"
|
|
export type Carrier = {
|
|
carrier_id: string
|
|
disabled_by_billing_plan: boolean
|
|
friendly_name: string
|
|
services: {
|
|
service_code: string
|
|
name: string
|
|
}[]
|
|
packages: {
|
|
package_code: string
|
|
}[]
|
|
[k: string]: unknown
|
|
}
|
|
|
|
export type CarriersResponse = {
|
|
carriers: Carrier[]
|
|
}
|
|
```
|
|
|
|
You define a `Carrier` type that holds a carrier's details, and a `CarriersResponse` type, which is the response returned by ShipStation.
|
|
|
|
<Note title="Tip">
|
|
|
|
A carrier has more fields that you can use. Refer to [ShipStation's documentation](https://docs.shipstation.com/openapi/carriers/list_carriers#carriers/list_carriers/t=response&c=200&path=carriers) for all carrier fields.
|
|
|
|
</Note>
|
|
|
|
Next, you'll add in `ShipStationClient` the method to retrieve the carriers from ShipStation. So, add to the class defined in `src/modules/shipstation/client.ts` a new method:
|
|
|
|
export const clientHighlights2 = [
|
|
["8", "getCarriers", "Add a method to get carriers from ShipStation."],
|
|
["9", "sendRequest", "Use this method to send the request."]
|
|
]
|
|
|
|
```ts title="src/modules/shipstation/client.ts" highlights={clientHighlights2}
|
|
// other imports...
|
|
import {
|
|
CarriersResponse,
|
|
} from "./types"
|
|
|
|
export class ShipStationClient {
|
|
// ...
|
|
async getCarriers(): Promise<CarriersResponse> {
|
|
return await this.sendRequest("/carriers")
|
|
}
|
|
}
|
|
```
|
|
|
|
You added a new `getCarriers` method that uses the `sendRequest` method to send a request to the [ShipStation's List Carriers endpoint](https://docs.shipstation.com/openapi/carriers/list_carriers). The method returns `CarriersResponse` that you defined earlier.
|
|
|
|
Finally, add the `getFulfillmentOptions` method to `ShipStationProviderService`:
|
|
|
|
export const serviceHighlights3 = [
|
|
["8", "getFulfillmentOptions", "Method to return the options this fulfillment provider supports."],
|
|
["9", "getCarriers", "Retrieve the carriers from ShipStation."],
|
|
["13", "filter", "Filter out carriers that are disabled by the billing plan."],
|
|
["15", "services", "Loop over the services that the carrier provides."],
|
|
["16", "push", "Add an option for the carrier and service combination."]
|
|
]
|
|
|
|
```ts title="src/modules/shipstation/service.ts" highlights={serviceHighlights3}
|
|
// other imports...
|
|
import {
|
|
FulfillmentOption,
|
|
} from "@medusajs/framework/types"
|
|
|
|
class ShipStationProviderService extends AbstractFulfillmentProviderService {
|
|
// ...
|
|
async getFulfillmentOptions(): Promise<FulfillmentOption[]> {
|
|
const { carriers } = await this.client.getCarriers()
|
|
const fulfillmentOptions: FulfillmentOption[] = []
|
|
|
|
carriers
|
|
.filter((carrier) => !carrier.disabled_by_billing_plan)
|
|
.forEach((carrier) => {
|
|
carrier.services.forEach((service) => {
|
|
fulfillmentOptions.push({
|
|
id: `${carrier.carrier_id}__${service.service_code}`,
|
|
name: service.name,
|
|
carrier_id: carrier.carrier_id,
|
|
carrier_service_code: service.service_code,
|
|
})
|
|
})
|
|
})
|
|
|
|
return fulfillmentOptions
|
|
}
|
|
}
|
|
```
|
|
|
|
In the `getFulfillmentOptions` method, you retrieve the carriers from ShipStation. You then filter out the carriers disabled by your ShipStation billing plan, and loop over the remaining carriers and their services.
|
|
|
|
You return an array of fulfillment-option objects, where each object represents a carrier and service pairing. Each object has the following properties:
|
|
|
|
- an `id` property, which you set to a combination of the carrier ID and the service code.
|
|
- a `name` property, which you set to the service's `name`. The admin user will see this name when they create a shipping option for the ShipStation provider.
|
|
- You can pass other data, such as `carrier_id` and `carrier_service_code`, and Medusa will store the fulfillment option in the `data` property of shipping options created later.
|
|
|
|
<Note>
|
|
|
|
Learn more about the shipping option's `data` property in [this guide](../../../commerce-modules/fulfillment/shipping-option/page.mdx).
|
|
|
|
</Note>
|
|
|
|
You'll see this method in action later when you create a shipping option.
|
|
|
|
#### canCalculate
|
|
|
|
When an admin user creates a shipping option for your provider, they can choose whether the price is flat rate or calculated during checkout.
|
|
|
|
If the user chooses calculated, Medusa validates that your fulfillment provider supports calculated prices using the `canCalculate` method of your provider's service.
|
|
|
|
This method accepts the shipping option's `data` field, which will hold the data of an option returned by `getFulfillmentOptions`. It returns a boolean value indicating whether the shipping option can have a calculated price.
|
|
|
|
Add the method to `ShipStationProviderService` in `src/modules/shipstation/service.ts`:
|
|
|
|
```ts title="src/modules/shipstation/service.ts"
|
|
// other imports...
|
|
import {
|
|
// ...
|
|
CreateShippingOptionDTO,
|
|
} from "@medusajs/framework/types"
|
|
|
|
class ShipStationProviderService extends AbstractFulfillmentProviderService {
|
|
// ...
|
|
async canCalculate(data: CreateShippingOptionDTO): Promise<boolean> {
|
|
return true
|
|
}
|
|
}
|
|
```
|
|
|
|
Since all shipping option prices can be calculated with ShipStation based on the chosen carrier and service zone, you always return `true` in this method.
|
|
|
|
You'll implement the calculation mechanism in a later method.
|
|
|
|
#### calculatePrice
|
|
|
|
When the customer views available shipping options during checkout, the Medusa application requests the calculated price from your fulfillment provider using its `calculatePrice` method.
|
|
|
|
To retrieve shipping prices with ShipStation, you create a shipment first then get its rates. So, in the `calculatePrice` method, you'll either:
|
|
|
|
- Send a request to [ShipStation's get shipping rates endpoint](https://docs.shipstation.com/openapi/rates/calculate_rates) that creates a shipment and returns its prices;
|
|
- Or, if a shipment was already created before, you'll retrieve its prices using [ShipStation's get shipment rates endpoint](https://docs.shipstation.com/openapi/shipments/list_shipment_rates).
|
|
|
|
First, add the following types to `src/modules/shipstation/types.ts`:
|
|
|
|
export const typesHighlights1 = [
|
|
["1", "ShipStationAddress", "An address to ship from or to."],
|
|
["21", "Rate", "A price rate for a specified carrier and service zone."],
|
|
["45", "RateResponse", "The response when retrieving rates."],
|
|
["49", "GetShippingRatesRequest", "The request body data for ShipStation's get shipping rates endpoint."],
|
|
["59", "GetShippingRatesResponse", "The response of the ShipStation's get shipping rates endpoint."],
|
|
["67", "Shipment", "A shipment's details."]
|
|
]
|
|
|
|
```ts title="src/modules/shipstation/types.ts" highlights={typesHighlights1}
|
|
export type ShipStationAddress = {
|
|
name: string
|
|
phone: string
|
|
email?: string | null
|
|
company_name?: string | null
|
|
address_line1: string
|
|
address_line2?: string | null
|
|
address_line3?: string | null
|
|
city_locality: string
|
|
state_province: string
|
|
postal_code: string
|
|
country_code: string
|
|
address_residential_indicator: "unknown" | "yes" | "no"
|
|
instructions?: string | null
|
|
geolocation?: {
|
|
type?: string
|
|
value?: string
|
|
}[]
|
|
}
|
|
|
|
export type Rate = {
|
|
rate_id: string
|
|
shipping_amount: {
|
|
currency: string
|
|
amount: number
|
|
}
|
|
insurance_amount: {
|
|
currency: string
|
|
amount: number
|
|
}
|
|
confirmation_amount: {
|
|
currency: string
|
|
amount: number
|
|
}
|
|
other_amount: {
|
|
currency: string
|
|
amount: number
|
|
}
|
|
tax_amount: {
|
|
currency: string
|
|
amount: number
|
|
}
|
|
}
|
|
|
|
export type RateResponse = {
|
|
rates: Rate[]
|
|
}
|
|
|
|
export type GetShippingRatesRequest = {
|
|
shipment_id?: string
|
|
shipment?: Omit<Shipment, "shipment_id" | "shipment_status">
|
|
rate_options: {
|
|
carrier_ids: string[]
|
|
service_codes: string[]
|
|
preferred_currency: string
|
|
}
|
|
}
|
|
|
|
export type GetShippingRatesResponse = {
|
|
shipment_id: string
|
|
carrier_id?: string
|
|
service_code?: string
|
|
external_order_id?: string
|
|
rate_response: RateResponse
|
|
}
|
|
|
|
export type Shipment = {
|
|
shipment_id: string
|
|
carrier_id: string
|
|
service_code: string
|
|
ship_to: ShipStationAddress
|
|
return_to?: ShipStationAddress
|
|
is_return?: boolean
|
|
ship_from: ShipStationAddress
|
|
items?: [
|
|
{
|
|
name?: string
|
|
quantity?: number
|
|
sku?: string
|
|
}
|
|
]
|
|
warehouse_id?: string
|
|
shipment_status: "pending" | "processing" | "label_purchased" | "cancelled"
|
|
[k: string]: unknown
|
|
}
|
|
|
|
```
|
|
|
|
You add the following types:
|
|
|
|
- `ShipStationAddress`: an address to ship from or to.
|
|
- `Rate`: a price rate for a specified carrier and service zone.
|
|
- `RateResponse`: The response when retrieving rates.
|
|
- `GetShippingRatesRequest`: The request body data for [ShipStation's get shipping rates endpoint](https://docs.shipstation.com/openapi/rates/calculate_rates). You can refer to their API reference for other accepted parameters.
|
|
- `GetShippingRatesResponse`: The response of the [ShipStation's get shipping rates endpoint](https://docs.shipstation.com/openapi/rates/calculate_rates). You can refer to their API reference for other response fields.
|
|
- `Shipment`: A shipment's details.
|
|
|
|
Then, add the following methods to `ShipStationClient`:
|
|
|
|
export const serviceHighlights7 = [
|
|
["11", "getShippingRates", "Create a shipment and retrieve its rates."],
|
|
["31", "getShipmentRates", "Get the rates of a shipment."]
|
|
]
|
|
|
|
```ts title="src/modules/shipstation/client.ts" highlights={serviceHighlights7}
|
|
// other imports...
|
|
import {
|
|
// ...
|
|
GetShippingRatesRequest,
|
|
GetShippingRatesResponse,
|
|
RateResponse,
|
|
} from "./types"
|
|
|
|
export class ShipStationClient {
|
|
// ...
|
|
async getShippingRates(
|
|
data: GetShippingRatesRequest
|
|
): Promise<GetShippingRatesResponse> {
|
|
return await this.sendRequest("/rates", {
|
|
method: "POST",
|
|
body: JSON.stringify(data),
|
|
}).then((resp) => {
|
|
if (resp.rate_response.errors?.length) {
|
|
throw new MedusaError(
|
|
MedusaError.Types.INVALID_DATA,
|
|
`An error occured while retrieving rates from ShipStation: ${
|
|
resp.rate_response.errors.map((error) => error.message)
|
|
}`
|
|
)
|
|
}
|
|
|
|
return resp
|
|
})
|
|
}
|
|
|
|
async getShipmentRates(id: string): Promise<RateResponse[]> {
|
|
return await this.sendRequest(`/shipments/${id}/rates`)
|
|
}
|
|
}
|
|
```
|
|
|
|
The `getShippingRates` method accepts as a parameter the data to create a shipment and retrieve its rate. In the method, you send the request using the `sendRequest` method, and throw any errors in the rate retrieval before returning the response.
|
|
|
|
The `getShipmentRates` method accepts the ID of the shipment as a parameter, sends the request using the `sendRequest` method and returns its response holding the shipment's rates.
|
|
|
|
Next, add to `ShipStationProviderService` a private method that'll be used to create a shipment in ShipStation and get its rates:
|
|
|
|
export const serviceHighlights8 = [
|
|
["17", "createShipment", "Add method to create a shipment and get its rate."],
|
|
["45", "ship_from", "Prepare the address to ship items from."],
|
|
["62", "ship_to", "Prepare the address to ship items to."]
|
|
]
|
|
|
|
```ts title="src/modules/shipstation/service.ts" highlights={serviceHighlights8}
|
|
// other imports...
|
|
import {
|
|
// ...
|
|
MedusaError,
|
|
} from "@medusajs/framework/utils"
|
|
import {
|
|
// ...
|
|
CalculateShippingOptionPriceDTO,
|
|
} from "@medusajs/framework/types"
|
|
import {
|
|
GetShippingRatesResponse,
|
|
ShipStationAddress,
|
|
} from "./types"
|
|
|
|
class ShipStationProviderService extends AbstractFulfillmentProviderService {
|
|
// ...
|
|
private async createShipment({
|
|
carrier_id,
|
|
carrier_service_code,
|
|
from_address,
|
|
to_address,
|
|
items,
|
|
currency_code,
|
|
}: {
|
|
carrier_id: string
|
|
carrier_service_code: string
|
|
from_address?: {
|
|
name?: string
|
|
address?: Omit<
|
|
StockLocationAddressDTO, "created_at" | "updated_at" | "deleted_at"
|
|
>
|
|
},
|
|
to_address?: Omit<
|
|
CartAddressDTO, "created_at" | "updated_at" | "deleted_at" | "id"
|
|
>,
|
|
items: CartLineItemDTO[] | OrderLineItemDTO[],
|
|
currency_code: string
|
|
}): Promise<GetShippingRatesResponse> {
|
|
if (!from_address?.address) {
|
|
throw new MedusaError(
|
|
MedusaError.Types.INVALID_DATA,
|
|
"from_location.address is required to calculate shipping rate"
|
|
)
|
|
}
|
|
const ship_from: ShipStationAddress = {
|
|
name: from_address?.name || "",
|
|
phone: from_address?.address?.phone || "",
|
|
address_line1: from_address?.address?.address_1 || "",
|
|
city_locality: from_address?.address?.city || "",
|
|
state_province: from_address?.address?.province || "",
|
|
postal_code: from_address?.address?.postal_code || "",
|
|
country_code: from_address?.address?.country_code || "",
|
|
address_residential_indicator: "unknown",
|
|
}
|
|
if (!to_address) {
|
|
throw new MedusaError(
|
|
MedusaError.Types.INVALID_DATA,
|
|
"shipping_address is required to calculate shipping rate"
|
|
)
|
|
}
|
|
|
|
const ship_to: ShipStationAddress = {
|
|
name: `${to_address.first_name} ${to_address.last_name}`,
|
|
phone: to_address.phone || "",
|
|
address_line1: to_address.address_1 || "",
|
|
city_locality: to_address.city || "",
|
|
state_province: to_address.province || "",
|
|
postal_code: to_address.postal_code || "",
|
|
country_code: to_address.country_code || "",
|
|
address_residential_indicator: "unknown",
|
|
}
|
|
|
|
// TODO create shipment
|
|
}
|
|
}
|
|
```
|
|
|
|
The `createShipment` method accepts as a parameter an object having the following properties:
|
|
|
|
- `carrier_id`: The ID of the carrier to create the shipment for.
|
|
- `carrier_service_code`: The code of the carrier's service.
|
|
- `from_address`: The address to ship items from, which is the address of the stock location associated with a shipping option.
|
|
- `to_address`: The address to ship items to, which is the customer's address.
|
|
- `items`: An array of the items in the cart or order (for fulfilling the order later).
|
|
- `currency_code`: The currency code of the cart or order.
|
|
|
|
In the `createShipment` method, so far you only prepare the data to be sent to ShipStation. ShipStation requires the addresses to ship the items from and to.
|
|
|
|
To send the request, replace the `TODO` with the following:
|
|
|
|
```ts title="src/modules/shipstation/service.ts"
|
|
// Sum the package's weight
|
|
// You can instead create different packages for each item
|
|
const packageWeight = items.reduce((sum, item) => {
|
|
// @ts-ignore
|
|
return sum + (item.variant.weight || 0)
|
|
}, 0)
|
|
|
|
return await this.client.getShippingRates({
|
|
shipment: {
|
|
carrier_id: carrier_id,
|
|
service_code: carrier_service_code,
|
|
ship_to,
|
|
ship_from,
|
|
validate_address: "no_validation",
|
|
items: items?.map((item) => ({
|
|
name: item.title,
|
|
quantity: item.quantity,
|
|
sku: item.variant_sku || "",
|
|
})),
|
|
packages: [{
|
|
weight: {
|
|
value: packageWeight,
|
|
unit: "kilogram",
|
|
},
|
|
}],
|
|
customs: {
|
|
contents: "merchandise",
|
|
non_delivery: "return_to_sender",
|
|
},
|
|
},
|
|
rate_options: {
|
|
carrier_ids: [carrier_id],
|
|
service_codes: [carrier_service_code],
|
|
preferred_currency: currency_code as string,
|
|
},
|
|
})
|
|
```
|
|
|
|
You create a shipment and get its rates using the `getShippingRates` method you added to the client. You pass the method the expected request body parameters by [ShipStation's get shipping rates endpoint](https://docs.shipstation.com/openapi/rates/calculate_rates), including the carrier ID, the items to be shipped, and more.
|
|
|
|
<Note title="Tip">
|
|
|
|
The above snippet assumes all items are sent in a single package. You can instead pass a package for each item, specifying its weight and optionally its height, width, and length.
|
|
|
|
</Note>
|
|
|
|
Finally, add the `calculatePrice` method to `ShipStationProviderService`:
|
|
|
|
export const serviceHighlights5 = [
|
|
["14", "shipment_id", "Retrieve the shipping method's shipment ID."],
|
|
["20", "createShipment", "If a shipment isn't already created, create the shipment and get its rates."],
|
|
["23", "getShipmentRates", "If a shipment is already created, retrieve its rates."],
|
|
["27", "calculatedPrice", "Calculate the price from the specified rate."],
|
|
["34", "is_calculated_price_tax_inclusive", "Return whether the price includes taxes."]
|
|
]
|
|
|
|
```ts title="src/modules/shipstation/service.ts" highlights={serviceHighlights5}
|
|
// other imports...
|
|
import {
|
|
// ...
|
|
CalculatedShippingOptionPrice,
|
|
} from "@medusajs/framework/types"
|
|
|
|
class ShipStationProviderService extends AbstractFulfillmentProviderService {
|
|
// ...
|
|
async calculatePrice(
|
|
optionData: CalculateShippingOptionPriceDTO["optionData"],
|
|
data: CalculateShippingOptionPriceDTO["data"],
|
|
context: CalculateShippingOptionPriceDTO["context"]
|
|
): Promise<CalculatedShippingOptionPrice> {
|
|
const { shipment_id } = data as {
|
|
shipment_id?: string
|
|
} || {}
|
|
const { carrier_id, carrier_service_code } = optionData as {
|
|
carrier_id: string
|
|
carrier_service_code: string
|
|
}
|
|
let rate: Rate | undefined
|
|
|
|
if (!shipment_id) {
|
|
const shipment = await this.createShipment({
|
|
carrier_id,
|
|
carrier_service_code,
|
|
from_address: {
|
|
name: context.from_location?.name,
|
|
address: context.from_location?.address,
|
|
},
|
|
to_address: context.shipping_address,
|
|
items: context.items || [],
|
|
currency_code: context.currency_code as string,
|
|
})
|
|
rate = shipment.rate_response.rates[0]
|
|
} else {
|
|
const rateResponse = await this.client.getShipmentRates(shipment_id)
|
|
rate = rateResponse[0].rates[0]
|
|
}
|
|
|
|
const calculatedPrice = !rate ? 0 : rate.shipping_amount.amount + rate.insurance_amount.amount +
|
|
rate.confirmation_amount.amount + rate.other_amount.amount +
|
|
(rate.tax_amount?.amount || 0)
|
|
|
|
return {
|
|
calculated_amount: calculatedPrice,
|
|
is_calculated_price_tax_inclusive: !!rate?.tax_amount,
|
|
}
|
|
}
|
|
}
|
|
```
|
|
|
|
The `calculatePrice` method accepts the following parameters:
|
|
|
|
1. The `data` property of the chosen shipping option during checkout.
|
|
2. The `data` property of the shipping method, which will hold the ID of the shipment in ShipStation.
|
|
3. An object of the checkout's context, including the cart's items, the location associated with the shipping option, and more.
|
|
|
|
In the method, you first check if a `shipment_id` is already stored in the shipping method's `data` property. If so, you retrieve the shipment's rates using the client's `getShipmentRates` method. Otherwise, you use the `createShipment` method to create the shipment and get its rates.
|
|
|
|
A rate returned by ShipStation has four properties that, when added up, make up the full price: `shipping_amount`, `insurance_amount`, `confirmation_amount`, and `other_amount`. It may have a `tax_amount` property, which is the amount for applied taxes.
|
|
|
|
<Note>
|
|
|
|
Learn more about these fields in [ShipStation's documentation](https://docs.shipstation.com/rate-shopping#about-the-response).
|
|
|
|
</Note>
|
|
|
|
The method returns an object having the following properties:
|
|
|
|
- `calculated_amount`: The shipping method's price calculated by adding the four rate properties with the tax property, if available.
|
|
- `is_calculated_price_tax_inclusive`: Whether the price includes taxes, which is inferred from whether the `tax_amount` property is set in the rate.
|
|
|
|
Customers will now see the calculated price of a ShipStation shipping option during checkout.
|
|
|
|
#### validateFulfillmentData
|
|
|
|
When a customer chooses a shipping option during checkout, Medusa creates a shipping method from that option. A shipping method has a `data` property to store data relevant for later processing of the method and its fulfillments.
|
|
|
|
So, in the `validateFulfillmentData` method of your provider, you'll create a shipment in ShipStation if it wasn't already created using their [get shipping rates endpoint](https://docs.shipstation.com/openapi/rates/calculate_rates), and store the ID of that shipment in the created shipping method's `data` property.
|
|
|
|
Add the `validateFulfillmentData` method to `ShipStationProviderService`:
|
|
|
|
export const serviceHighlights4 = [
|
|
["8", "shipment_id", "Get the ID of an already created shipment, if available."],
|
|
["14", "createShipment", "Create a shipment if it doesn't already exist."],
|
|
["20", "shipment_id", "Store the shipment ID in the shipping method's `data`."]
|
|
]
|
|
|
|
```ts title="src/modules/shipstation/service.ts" highlights={serviceHighlights4}
|
|
class ShipStationProviderService extends AbstractFulfillmentProviderService {
|
|
// ...
|
|
async validateFulfillmentData(
|
|
optionData: Record<string, unknown>,
|
|
data: Record<string, unknown>,
|
|
context: Record<string, unknown>
|
|
): Promise<any> {
|
|
let { shipment_id } = data as {
|
|
shipment_id?: string
|
|
}
|
|
|
|
if (!shipment_id) {
|
|
const { carrier_id, carrier_service_code } = optionData as {
|
|
carrier_id: string
|
|
carrier_service_code: string
|
|
}
|
|
const shipment = await this.createShipment({
|
|
carrier_id,
|
|
carrier_service_code,
|
|
from_address: {
|
|
// @ts-ignore
|
|
name: context.from_location?.name,
|
|
// @ts-ignore
|
|
address: context.from_location?.address,
|
|
},
|
|
// @ts-ignore
|
|
to_address: context.shipping_address,
|
|
// @ts-ignore
|
|
items: context.items || [],
|
|
// @ts-ignore
|
|
currency_code: context.currency_code,
|
|
})
|
|
shipment_id = shipment.shipment_id
|
|
}
|
|
|
|
return {
|
|
...data,
|
|
shipment_id,
|
|
}
|
|
}
|
|
}
|
|
```
|
|
|
|
The `validateFulfillmentData` method accepts the following parameters:
|
|
|
|
1. The `data` property of the chosen shipping option during checkout. It will hold the carrier ID and its service code.
|
|
2. The `data` property of the shipping method to be created. This can hold custom data sent in the [Add Shipping Method API route](!api!/store#carts_postcartsidshippingmethods).
|
|
3. An object of the checkout's context, including the cart's items, the location associated with the shipping option, and more.
|
|
|
|
In the method, you try to retrieve the shipment ID from the shipping method's `data` parameter if it was already created. If not, you create the shipment in ShipStation using the `createShipment` method.
|
|
|
|
Finally, you return the object to be stored in the shipping method's `data` property. You include in it the ID of the shipment in ShipStation.
|
|
|
|
#### createFulfillment
|
|
|
|
After the customer places the order, the admin user can manage its fulfillments. When the admin user creates a fulfillment for the order, Medusa uses the `createFulfillment` method of the associated provider to handle any processing in the third-party provider.
|
|
|
|
This method supports creating split fulfillments, meaning you can partially fulfill and order's items. So, you'll create a new shipment, then purchase a label for that shipment. You'll use the existing shipment to retrieve details like the address to ship from and to.
|
|
|
|
First, add a new type to `src/modules/shipstation/types.ts`:
|
|
|
|
```ts title="src/modules/shipstation/types.ts"
|
|
export type Label = {
|
|
label_id: string
|
|
status: "processing" | "completed" | "error" | "voided"
|
|
shipment_id: string
|
|
ship_date: Date
|
|
shipment_cost: {
|
|
currency: string
|
|
amount: number
|
|
}
|
|
insurance_cost: {
|
|
currency: string
|
|
amount: number
|
|
}
|
|
confirmation_amount: {
|
|
currency: string
|
|
amount: number
|
|
}
|
|
tracking_number: string
|
|
is_return_label: boolean
|
|
carrier_id: string
|
|
service_code: string
|
|
trackable: string
|
|
tracking_status: "unknown" | "in_transit" | "error" | "delivered"
|
|
label_download: {
|
|
href: string
|
|
pdf: string
|
|
png: string
|
|
zpl: string
|
|
}
|
|
}
|
|
```
|
|
|
|
You add the `Label` type for the details in a label object. You can find more properties in [ShipStation's documentation](https://docs.shipstation.com/openapi/labels/create_label#labels/create_label/response&c=200/body).
|
|
|
|
Then, add the following methods to the `ShipStationClient`:
|
|
|
|
```ts title="src/modules/shipstation/client.ts"
|
|
// other imports...
|
|
import {
|
|
// ...
|
|
Label,
|
|
Shipment,
|
|
} from "./types"
|
|
|
|
export class ShipStationClient {
|
|
// ...
|
|
|
|
async getShipment(id: string): Promise<Shipment> {
|
|
return await this.sendRequest(`/shipments/${id}`)
|
|
}
|
|
|
|
async purchaseLabelForShipment(id: string): Promise<Label> {
|
|
return await this.sendRequest(`/labels/shipment/${id}`, {
|
|
method: "POST",
|
|
body: JSON.stringify({}),
|
|
})
|
|
}
|
|
}
|
|
```
|
|
|
|
You add the `getShipment` method to retrieve a shipment's details, and the `purchaseLabelForShipment` method to purchase a label in ShipStation for a shipment by its ID.
|
|
|
|
Finally, add the `createFulfillment` method in `ShipStationProviderService`:
|
|
|
|
export const serviceHighlights6 = [
|
|
["9", "shipment_id", "Retrieve the shipping method's shipment ID."],
|
|
["13", "originalShipment", "Retrieve the original shipment associated with the order's shipping method."],
|
|
["15", "orderItemsToFulfill", "Get the order items to fulfill."],
|
|
["29", "quantity", "Set the quantity based on the quantity to be fulfilled."],
|
|
["33", "newShipment", "Create a new shipment for the fulfillment."],
|
|
["56", "label", "Purchase a label for the new shipment."],
|
|
["59", "data", "Store the ID of the label and its shipment in the fulfillment's data property."]
|
|
]
|
|
|
|
```ts title="src/modules/shipstation/service.ts" highlights={serviceHighlights6}
|
|
class ShipStationProviderService extends AbstractFulfillmentProviderService {
|
|
// ...
|
|
async createFulfillment(
|
|
data: object,
|
|
items: object[],
|
|
order: object | undefined,
|
|
fulfillment: Record<string, unknown>
|
|
): Promise<any> {
|
|
const { shipment_id } = data as {
|
|
shipment_id: string
|
|
}
|
|
|
|
const originalShipment = await this.client.getShipment(shipment_id)
|
|
|
|
const orderItemsToFulfill = []
|
|
|
|
items.map((item) => {
|
|
// @ts-ignore
|
|
const orderItem = order.items.find((i) => i.id === item.line_item_id)
|
|
|
|
if (!orderItem) {
|
|
return
|
|
}
|
|
|
|
// @ts-ignore
|
|
orderItemsToFulfill.push({
|
|
...orderItem,
|
|
// @ts-ignore
|
|
quantity: item.quantity,
|
|
})
|
|
})
|
|
|
|
const newShipment = await this.createShipment({
|
|
carrier_id: originalShipment.carrier_id,
|
|
carrier_service_code: originalShipment.service_code,
|
|
from_address: {
|
|
name: originalShipment.ship_from.name,
|
|
address: {
|
|
...originalShipment.ship_from,
|
|
address_1: originalShipment.ship_from.address_line1,
|
|
city: originalShipment.ship_from.city_locality,
|
|
province: originalShipment.ship_from.state_province,
|
|
},
|
|
},
|
|
to_address: {
|
|
...originalShipment.ship_to,
|
|
address_1: originalShipment.ship_to.address_line1,
|
|
city: originalShipment.ship_to.city_locality,
|
|
province: originalShipment.ship_to.state_province,
|
|
},
|
|
items: orderItemsToFulfill as OrderLineItemDTO[],
|
|
// @ts-ignore
|
|
currency_code: order.currency_code,
|
|
})
|
|
|
|
const label = await this.client.purchaseLabelForShipment(newShipment.shipment_id)
|
|
|
|
return {
|
|
data: {
|
|
...(fulfillment.data as object || {}),
|
|
label_id: label.label_id,
|
|
shipment_id: label.shipment_id,
|
|
},
|
|
}
|
|
}
|
|
}
|
|
```
|
|
|
|
This method accepts the following parameters:
|
|
|
|
- `data`: The `data` property of the associated shipping method, which holds the ID of the shipment.
|
|
- `items`: The items to fulfill.
|
|
- `order`: The order's details.
|
|
- `fulfillment`: The details of the fulfillment to be created.
|
|
|
|
In the method, you:
|
|
|
|
- Retrieve the details of the shipment originally associated with the fulfillment's shipping method.
|
|
- Filter out the order items to retrieve the items to fulfill.
|
|
- Create a new shipment for the items to fulfill. You use the original shipment for details like the carrier ID or the addresses to ship from and to.
|
|
- Purchase a label for the new shipment.
|
|
|
|
You return an object whose `data` property will be stored in the created fulfillment's `data` property. You store in it the ID of the purchased label and the ID of its associated shipment.
|
|
|
|
#### cancelFulfillment
|
|
|
|
The last method you'll implement is the `cancelFulfillment` method. When an admin user cancels a fulfillment, Medusa uses the associated provider's `cancelFulfillment` method to perform any necessary actions in the third-party provider.
|
|
|
|
You'll use this method to void the label in ShipStation that was purchased in the `createFulfillment` method and cancel its associated shipment.
|
|
|
|
Start by adding the following type to `src/modules/shipstation/types.ts`:
|
|
|
|
```ts title="src/modules/shipstation/types.ts"
|
|
export type VoidLabelResponse = {
|
|
approved: boolean
|
|
message: string
|
|
reason_code?: string
|
|
}
|
|
```
|
|
|
|
`VoidLabelResponse` is the response type of [ShipStation's void label endpoint](https://docs.shipstation.com/openapi/labels/void_label).
|
|
|
|
Next, add two methods to `ShipStationClient`:
|
|
|
|
export const clientHighlights4 = [
|
|
["9", "voidLabel", "Void a label in ShipStation."],
|
|
["15", "cancelShipment", "Cancel a shipment in ShipStation."]
|
|
]
|
|
|
|
```ts title="src/modules/shipstation/client.ts" highlights={clientHighlights4}
|
|
// other imports...
|
|
import {
|
|
// ...
|
|
VoidLabelResponse,
|
|
} from "./types"
|
|
|
|
export class ShipStationClient {
|
|
// ...
|
|
async voidLabel(id: string): Promise<VoidLabelResponse> {
|
|
return await this.sendRequest(`/labels/${id}/void`, {
|
|
method: "PUT",
|
|
})
|
|
}
|
|
|
|
async cancelShipment(id: string): Promise<void> {
|
|
return await this.sendRequest(`/shipments/${id}/cancel`, {
|
|
method: "PUT",
|
|
})
|
|
}
|
|
}
|
|
```
|
|
|
|
You added two methods:
|
|
|
|
- `voidLabel` that accepts the ID of a label to void using [ShipStation's endpoint](https://docs.shipstation.com/openapi/labels/void_label).
|
|
- `cancelShipment` that accepts the ID of a shipment to cancel using [ShipStation's endpoint](https://docs.shipstation.com/openapi/shipments/cancel_shipments).
|
|
|
|
Finally, in `ShipStationProviderService`, add the `cancelFulfillment` method:
|
|
|
|
```ts title="src/modules/shipstation/service.ts"
|
|
class ShipStationProviderService extends AbstractFulfillmentProviderService {
|
|
// ...
|
|
async cancelFulfillment(data: Record<string, unknown>): Promise<any> {
|
|
const { label_id, shipment_id } = data as {
|
|
label_id: string
|
|
shipment_id: string
|
|
}
|
|
|
|
await this.client.voidLabel(label_id)
|
|
await this.client.cancelShipment(shipment_id)
|
|
}
|
|
}
|
|
```
|
|
|
|
This method accepts the fulfillment's `data` property as a parameter. You get the ID of the label and shipment from the `data` parameter.
|
|
|
|
Then, you use the client's `voidLabel` method to void the label, and `cancelShipment` to cancel the shipment.
|
|
|
|
<Note>
|
|
|
|
Refer to [this guide](/references/fulfillment/provider) for a full reference of all methods, their parameters and return types.
|
|
|
|
</Note>
|
|
|
|
### Export Module Definition
|
|
|
|
The `ShipStationProviderService` class now has the methods necessary to handle fulfillments.
|
|
|
|
Next, you must export the module provider's definition, which lets Medusa know what module this provider belongs to and its service.
|
|
|
|
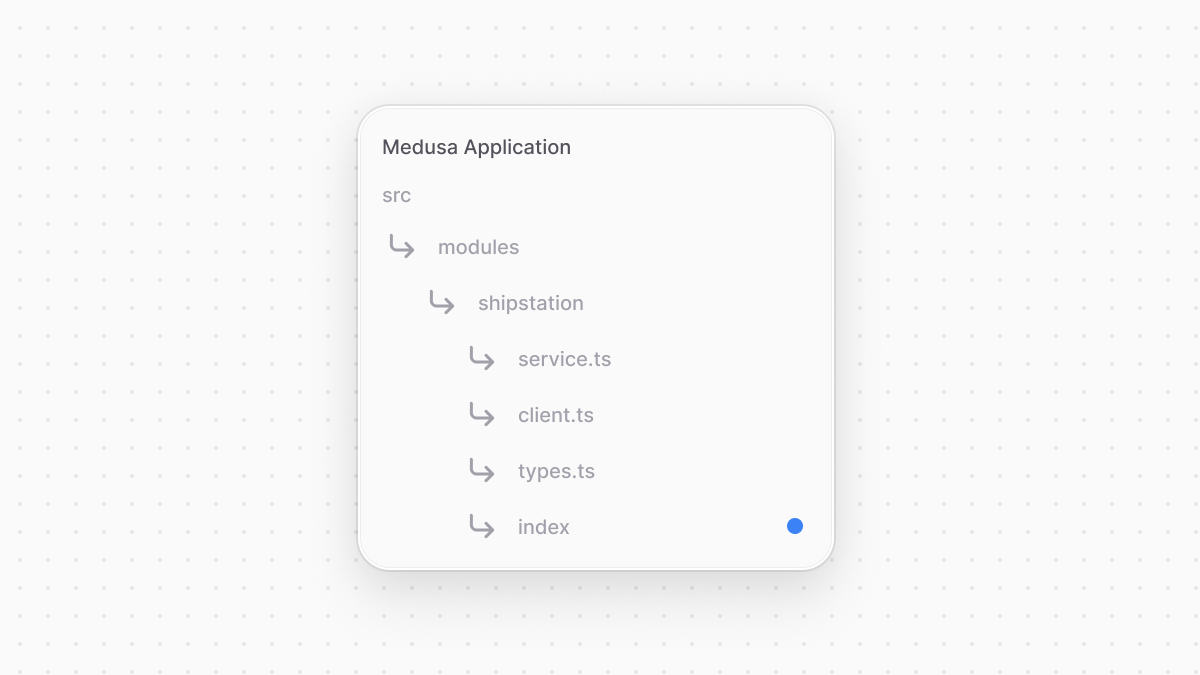
Create the file `src/modules/shipstation/index.ts` with the following content:
|
|
|
|
|
|
|
|
```ts title="src/modules/shipstation/index.ts"
|
|
import ShipStationProviderService from "./service"
|
|
import {
|
|
ModuleProvider,
|
|
Modules,
|
|
} from "@medusajs/framework/utils"
|
|
|
|
export default ModuleProvider(Modules.FULFILLMENT, {
|
|
services: [ShipStationProviderService],
|
|
})
|
|
```
|
|
|
|
You export the module provider's definition using `ModuleProvider` from the Modules SDK. It accepts as a first parameter the name of the module that this provider belongs to, which is the Fulfillment Module. It also accepts as a second parameter an object having a `service` property indicating the provider's service.
|
|
|
|
### Add Module to Configurations
|
|
|
|
Finally, to register modules and module providers in Medusa, you must add them to Medusa's configurations.
|
|
|
|
Medusa's configurations are set in the `medusa-config.ts` file, which is at the root directory of your Medusa application. The configuration object accepts a `modules` array, whose value is an array of modules to add to the application.
|
|
|
|
Add the `modules` property to the exported configurations in `medusa-config.ts`:
|
|
|
|
```ts title="medusa-config.ts"
|
|
module.exports = defineConfig({
|
|
// ...
|
|
modules: [
|
|
{
|
|
resolve: "@medusajs/medusa/fulfillment",
|
|
options: {
|
|
providers: [
|
|
// default provider
|
|
{
|
|
resolve: "@medusajs/medusa/fulfillment-manual",
|
|
id: "manual",
|
|
},
|
|
{
|
|
resolve: "./src/modules/shipstation",
|
|
id: "shipstation",
|
|
options: {
|
|
api_key: process.env.SHIPSTATION_API_KEY,
|
|
},
|
|
},
|
|
],
|
|
},
|
|
},
|
|
],
|
|
})
|
|
```
|
|
|
|
In the `modules` array, you pass a module object having the following properties:
|
|
|
|
- `resolve`: The NPM package of the Fulfillment Module. Since the ShipStation Module is a Fulfillment Module Provider, it'll be passed in the options of the Fulfillment Module.
|
|
- `options`: An object of options to pass to the module. It has a `providers` property which is an array of module providers to register. Each module provider object has the following properties:
|
|
- `resolve`: The path to the module provider to register in the application. It can also be the name of an NPM package.
|
|
- `id`: A unique ID, which Medusa will use along with the `identifier` static property that you set earlier in the class to identify this module provider.
|
|
- `options`: An object of options to pass to the module provider. These are the options you expect and use in the module provider's service.
|
|
|
|
The values of the ShipStation Module's options are set in environment variables. So, add the following environment variables to `.env`:
|
|
|
|
```shell
|
|
SHIPSTATION_API_KEY=123...
|
|
```
|
|
|
|
Where `SHIPSTATION_API_KEY` is the ShipStation API key, which you can retrieve on the ShipStation dashboard:
|
|
|
|
- Click on the cog icon in the navigation bar to go to Settings.
|
|
|
|

|
|
|
|
- In the sidebar, expand Account and click on API Settings
|
|
|
|
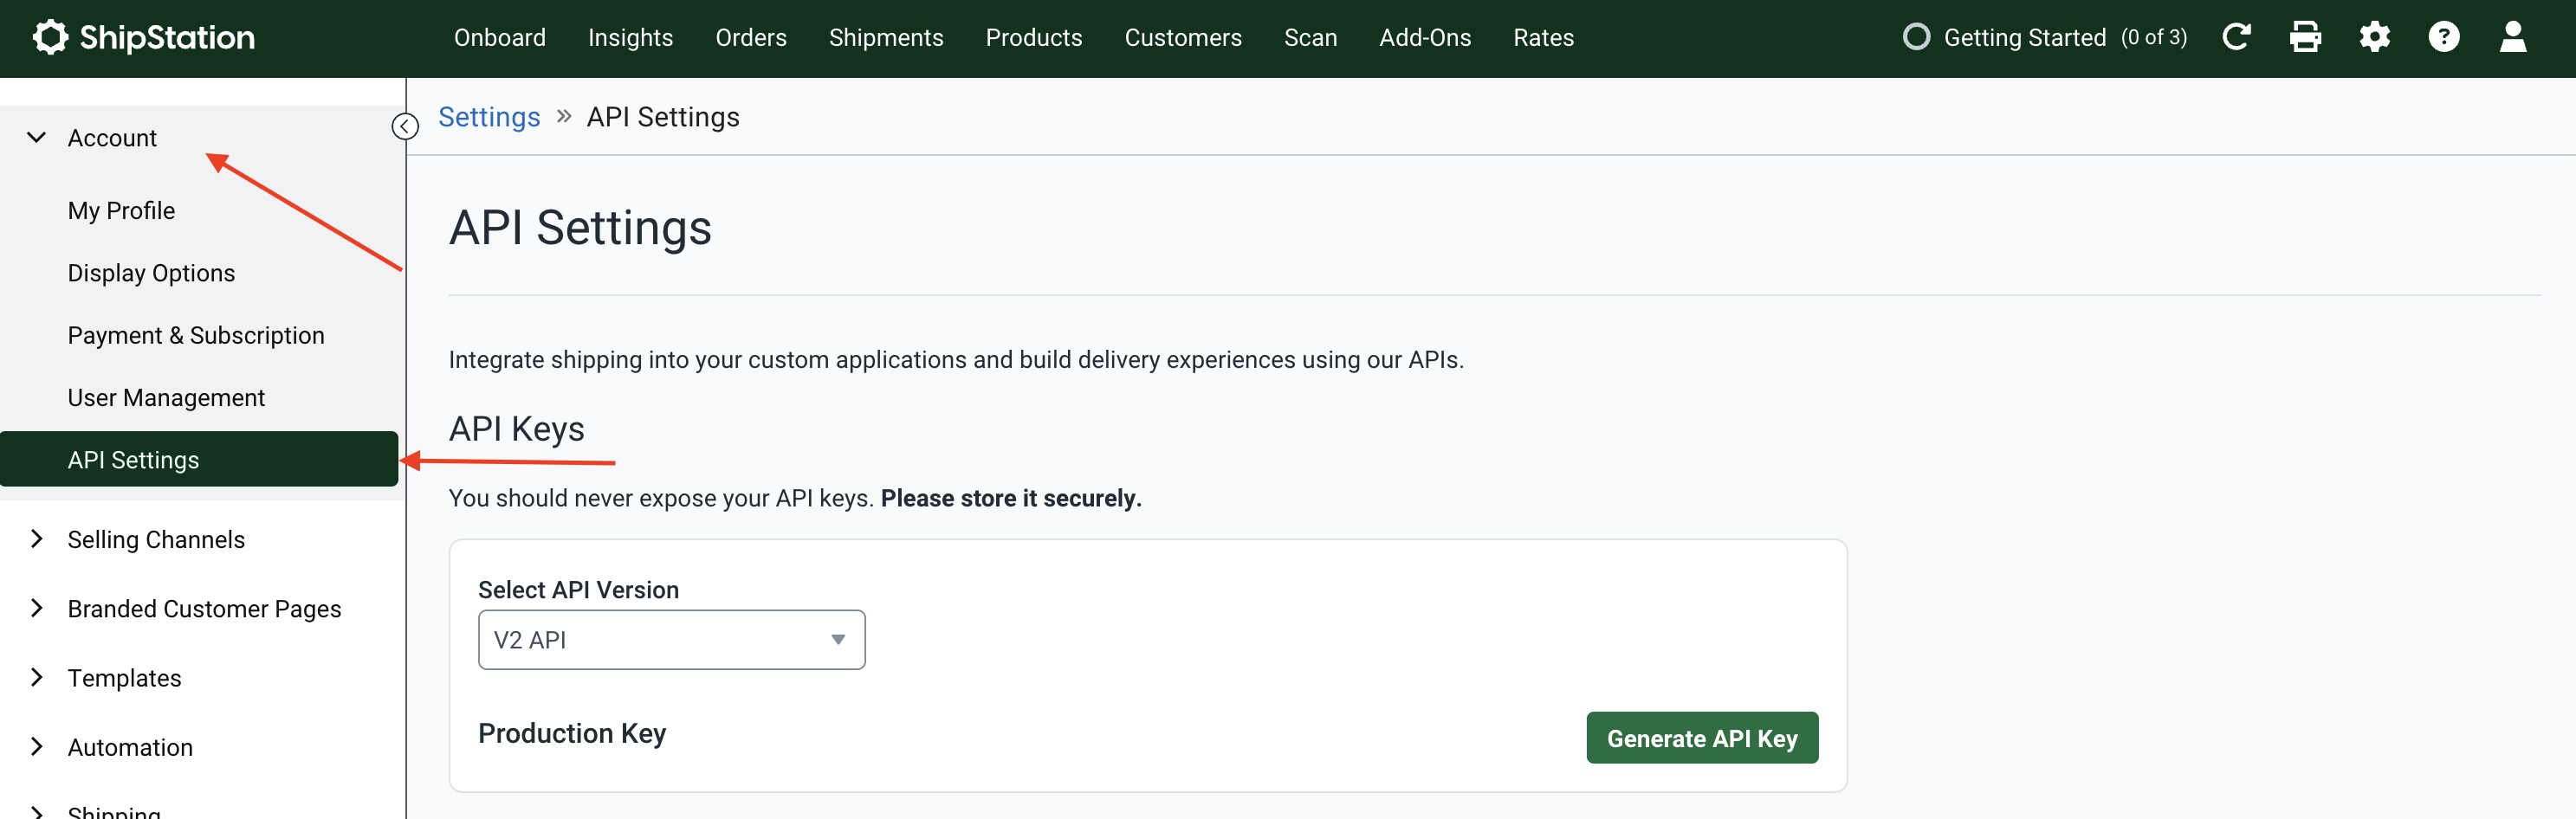.
|
|
|
|
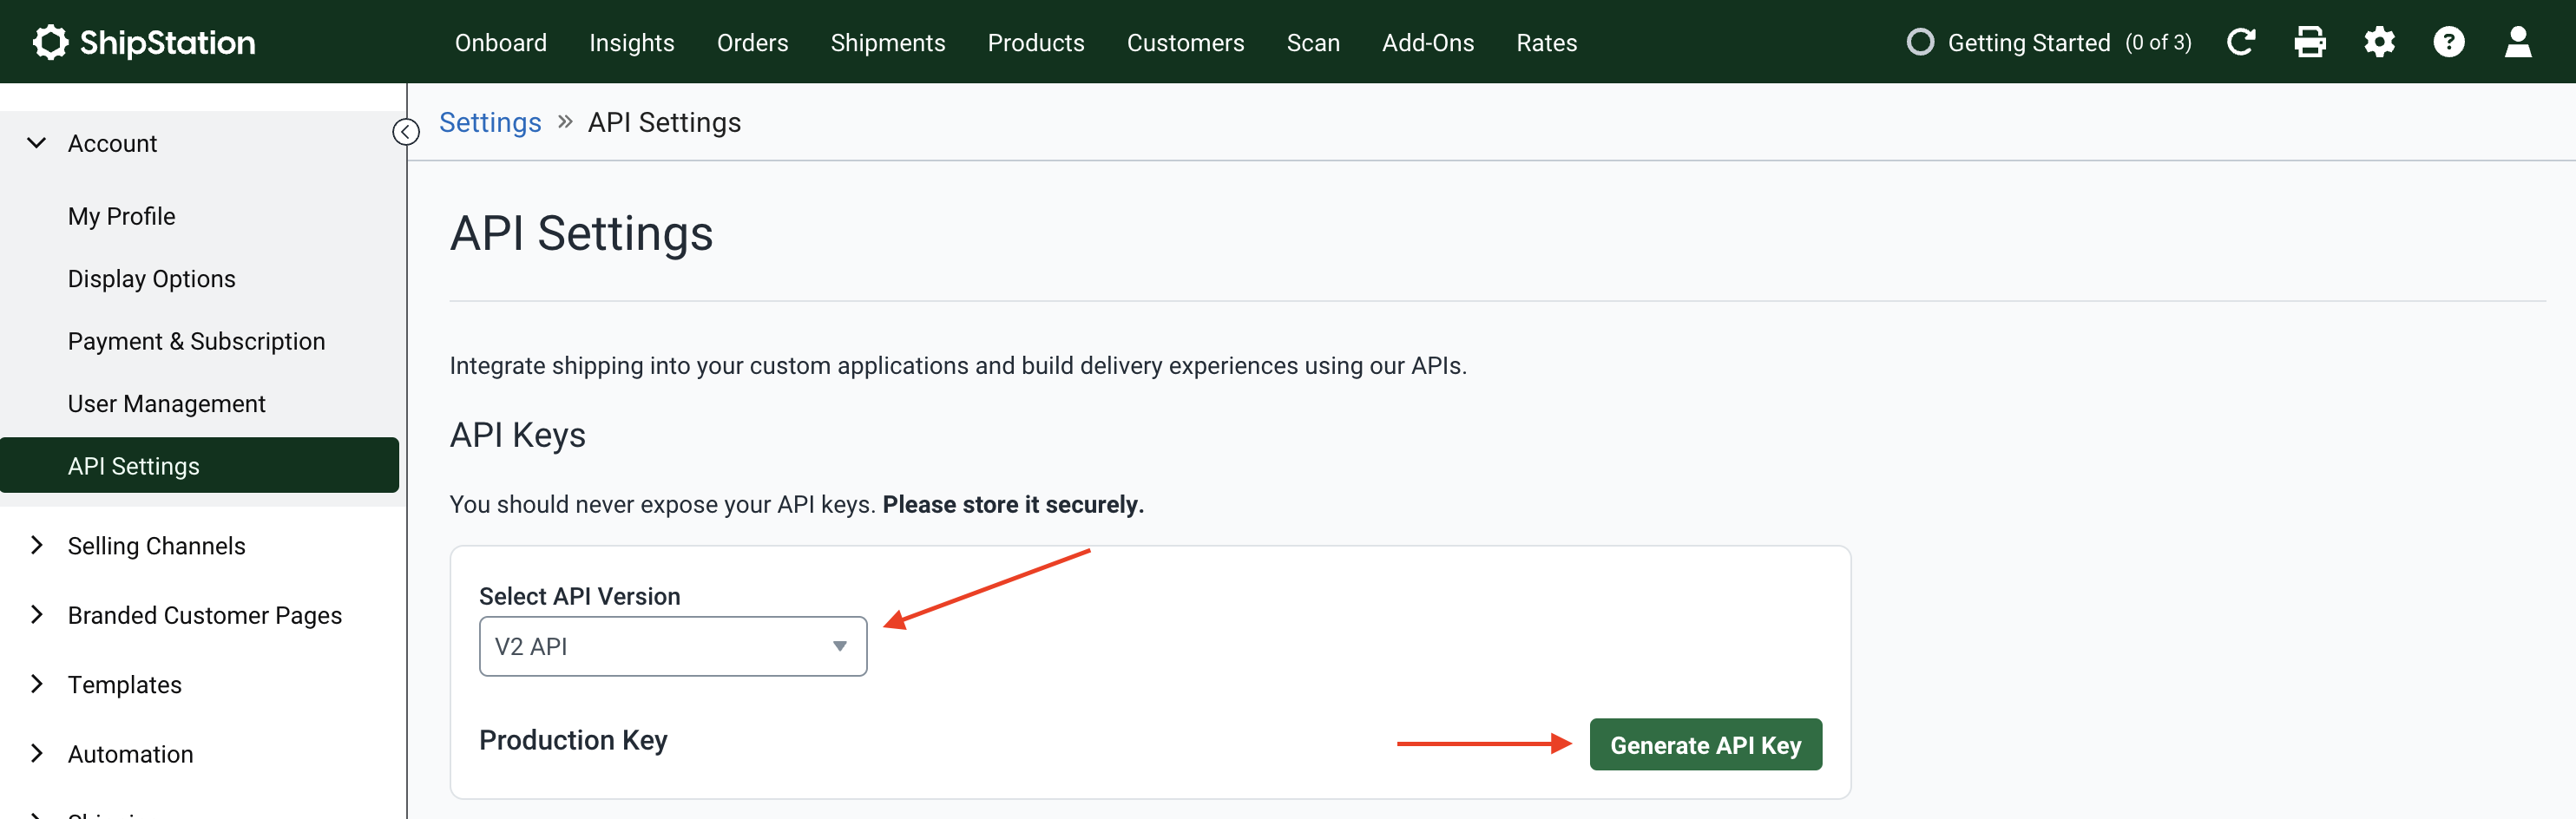
- On the API Settings page, make sure V2 API is selected for "Select API Verion" field, then click the "Generate API Key" button.
|
|
|
|
|
|
|
|
- Copy the generated API key and use it as the value of the `SHIPSTATION_API_KEY` environment variable.
|
|
|
|
---
|
|
|
|
## Step 4: Add Shipping Options for ShipStation
|
|
|
|
Now that you've integrated ShipStation, you need to create its shipping options so that customers can choose from them during checkout.
|
|
|
|
First, start the Medusa application:
|
|
|
|
```bash npm2yarn
|
|
npm run dev
|
|
```
|
|
|
|
Then:
|
|
|
|
1. Open the Medusa Admin at `http://localhost:9000/app` and log in.
|
|
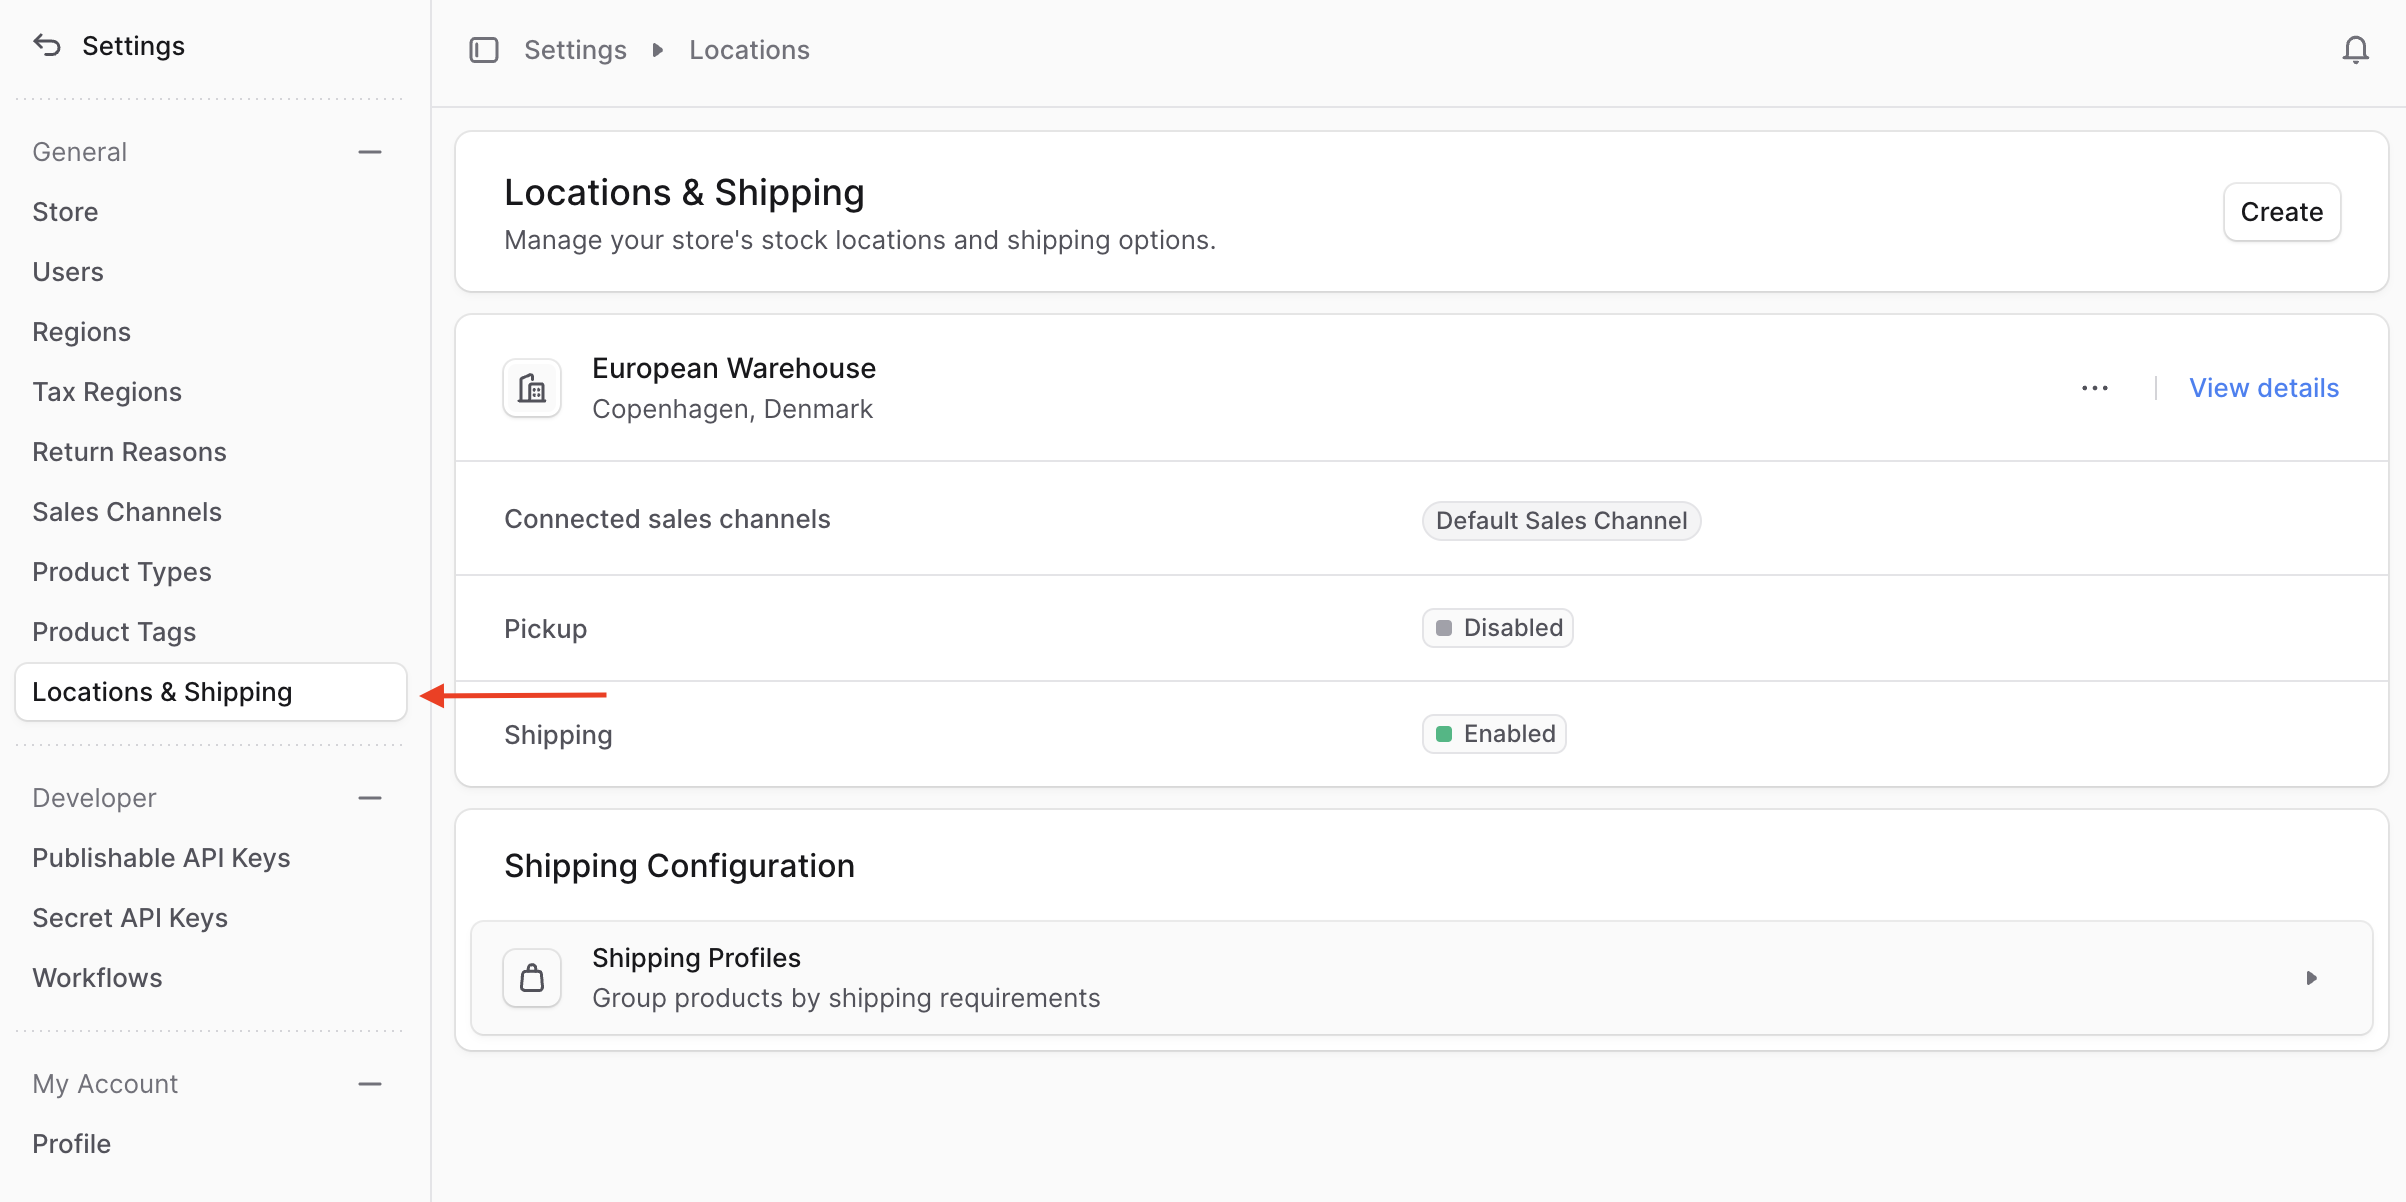
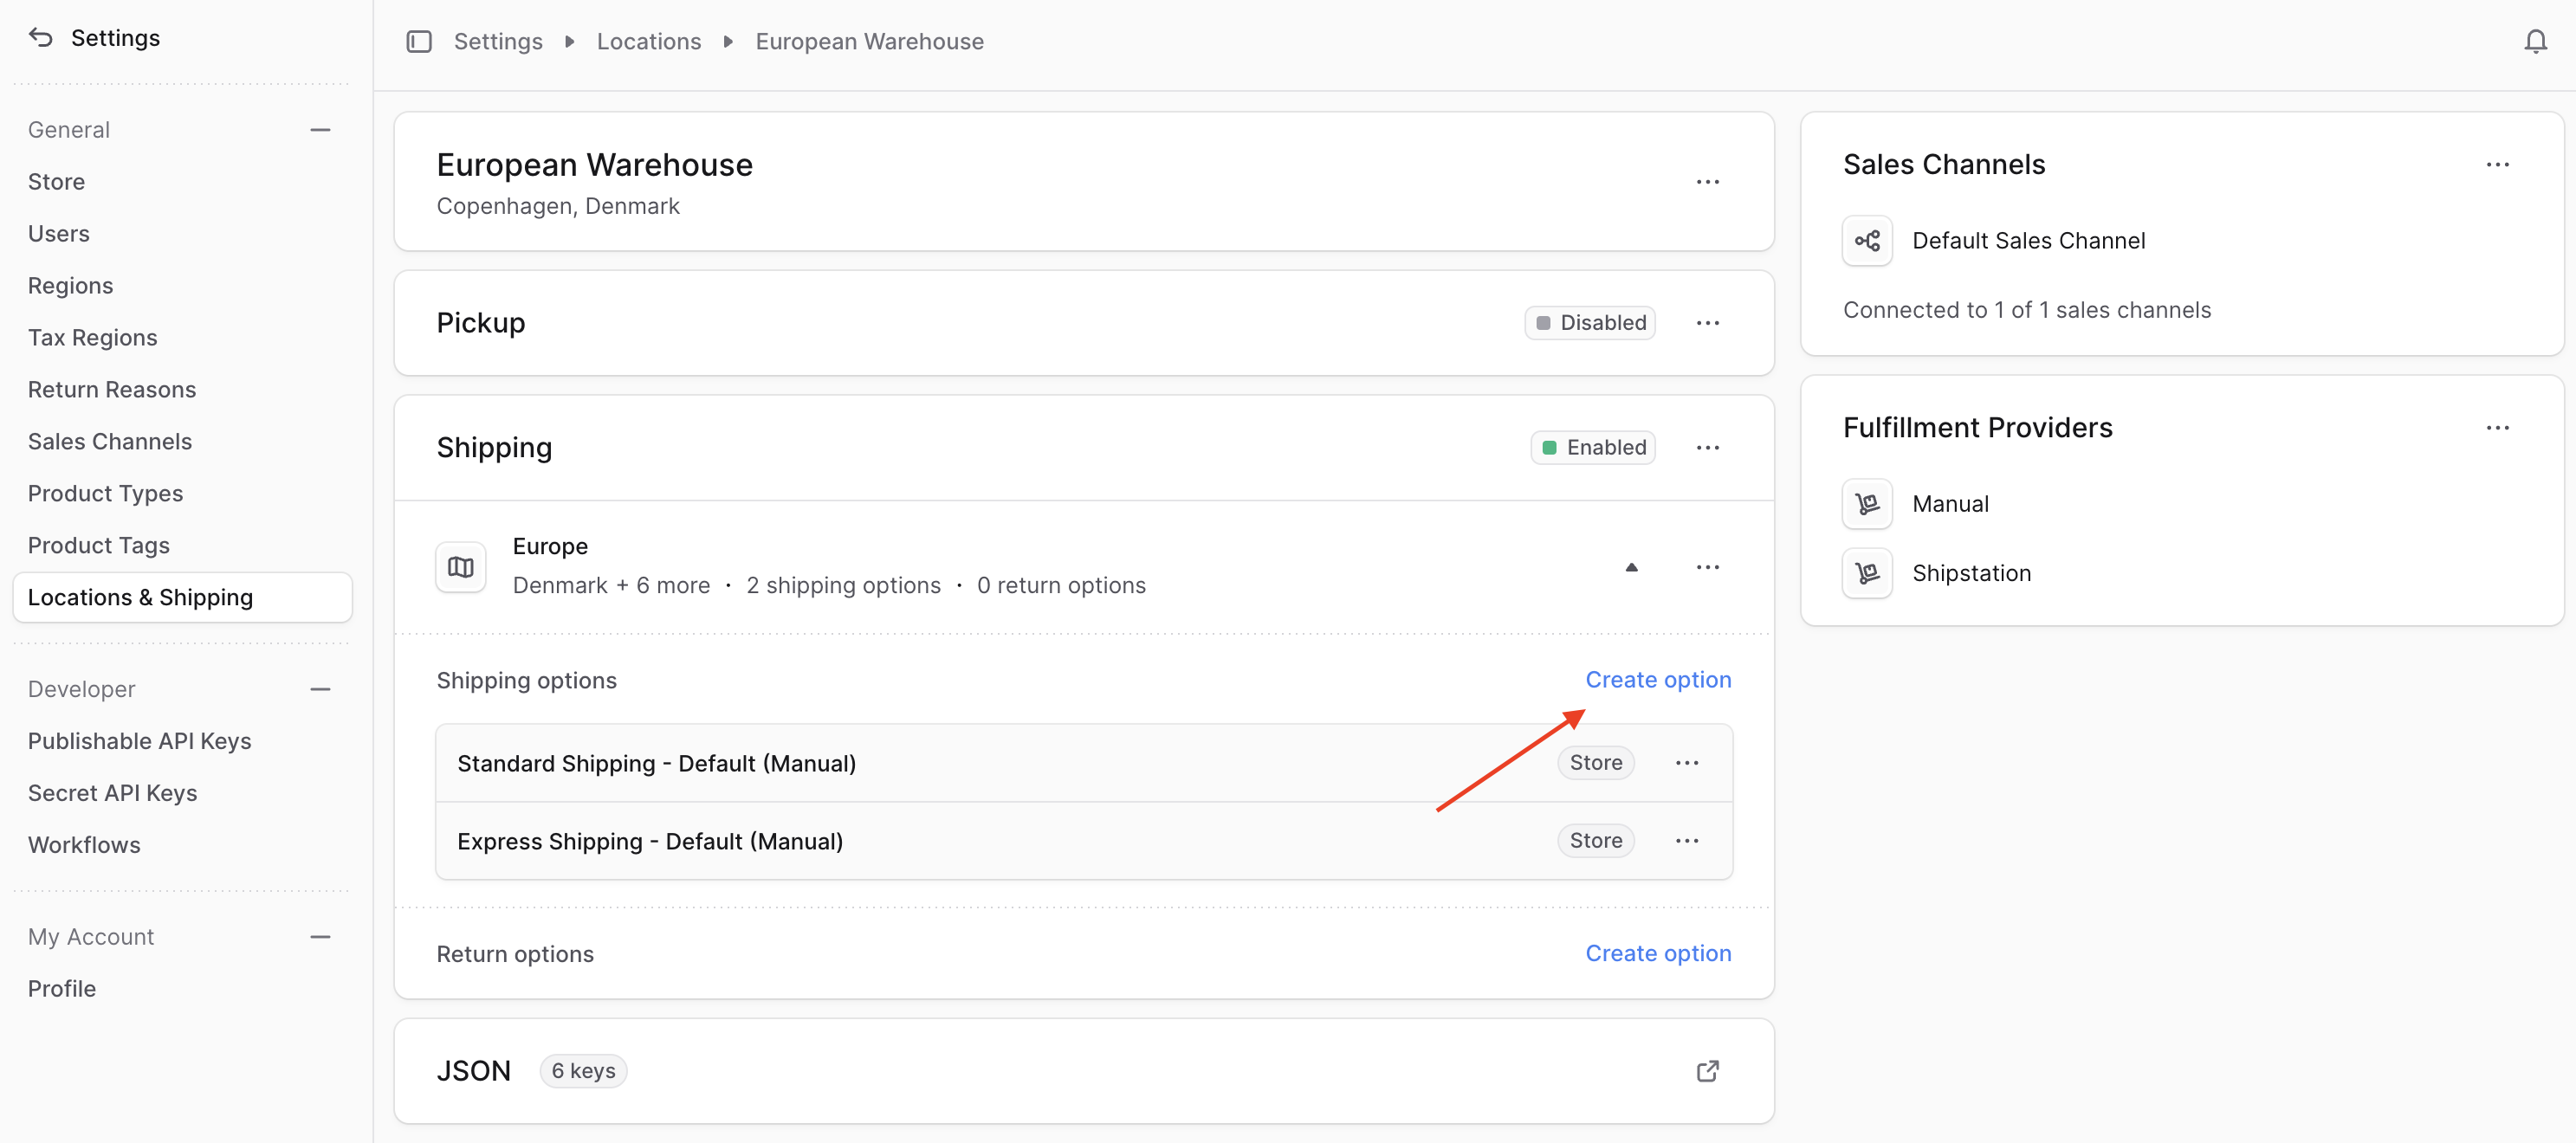
2. Go to Settings -> Locations & Shipping
|
|
|
|
|
|
|
|
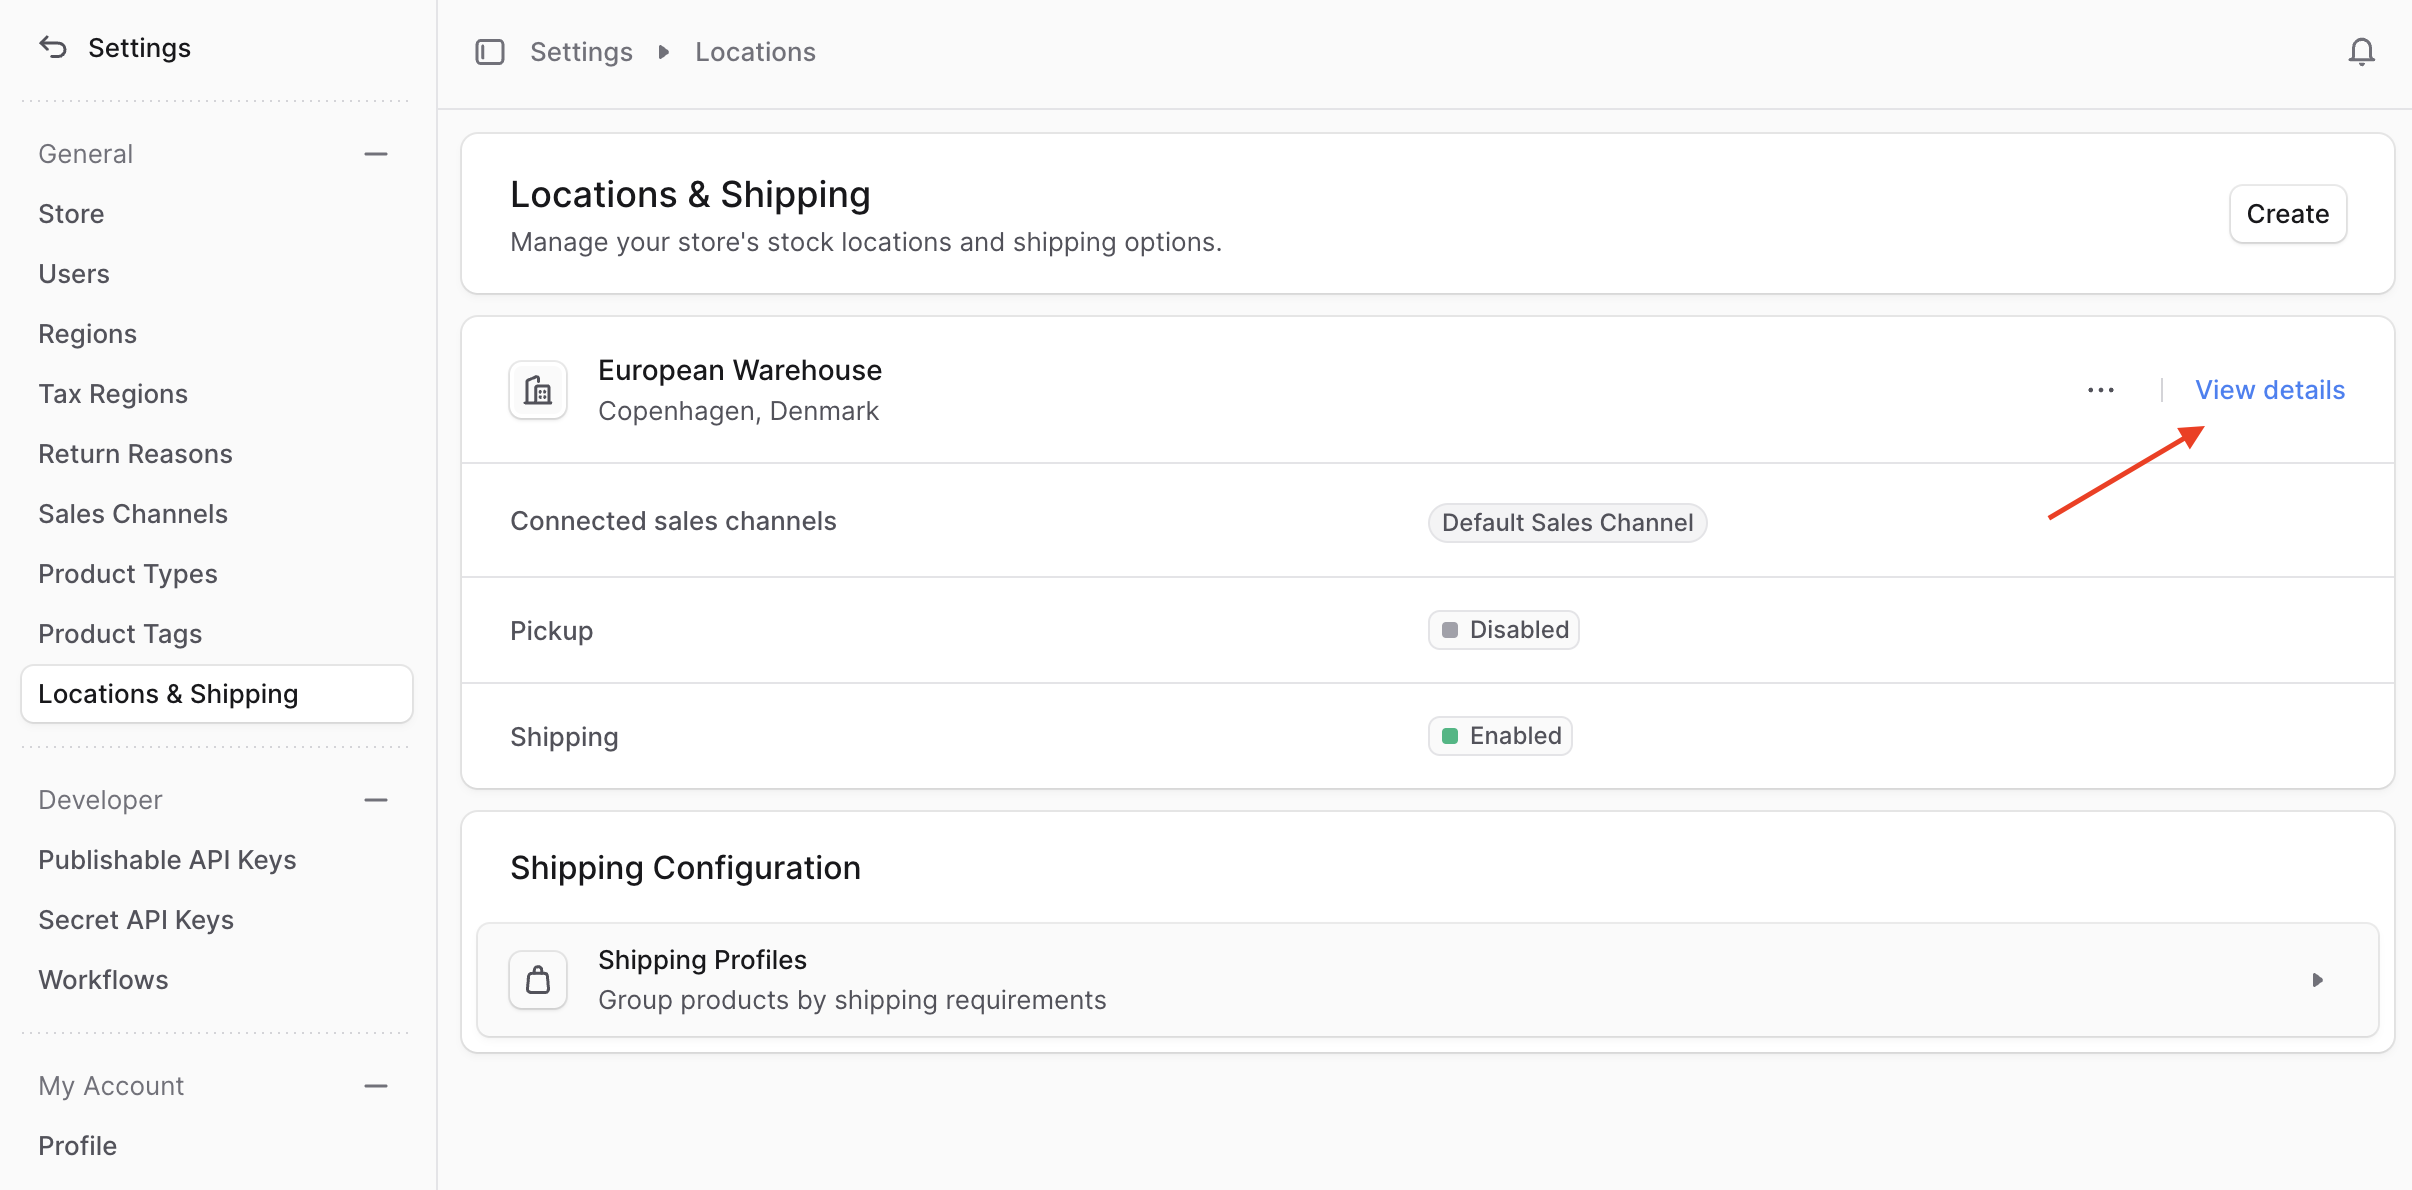
3. Each location has shipping options. So, either create a new location, or click on the "View details" link at the top-right of a location.
|
|
|
|
|
|
|
|
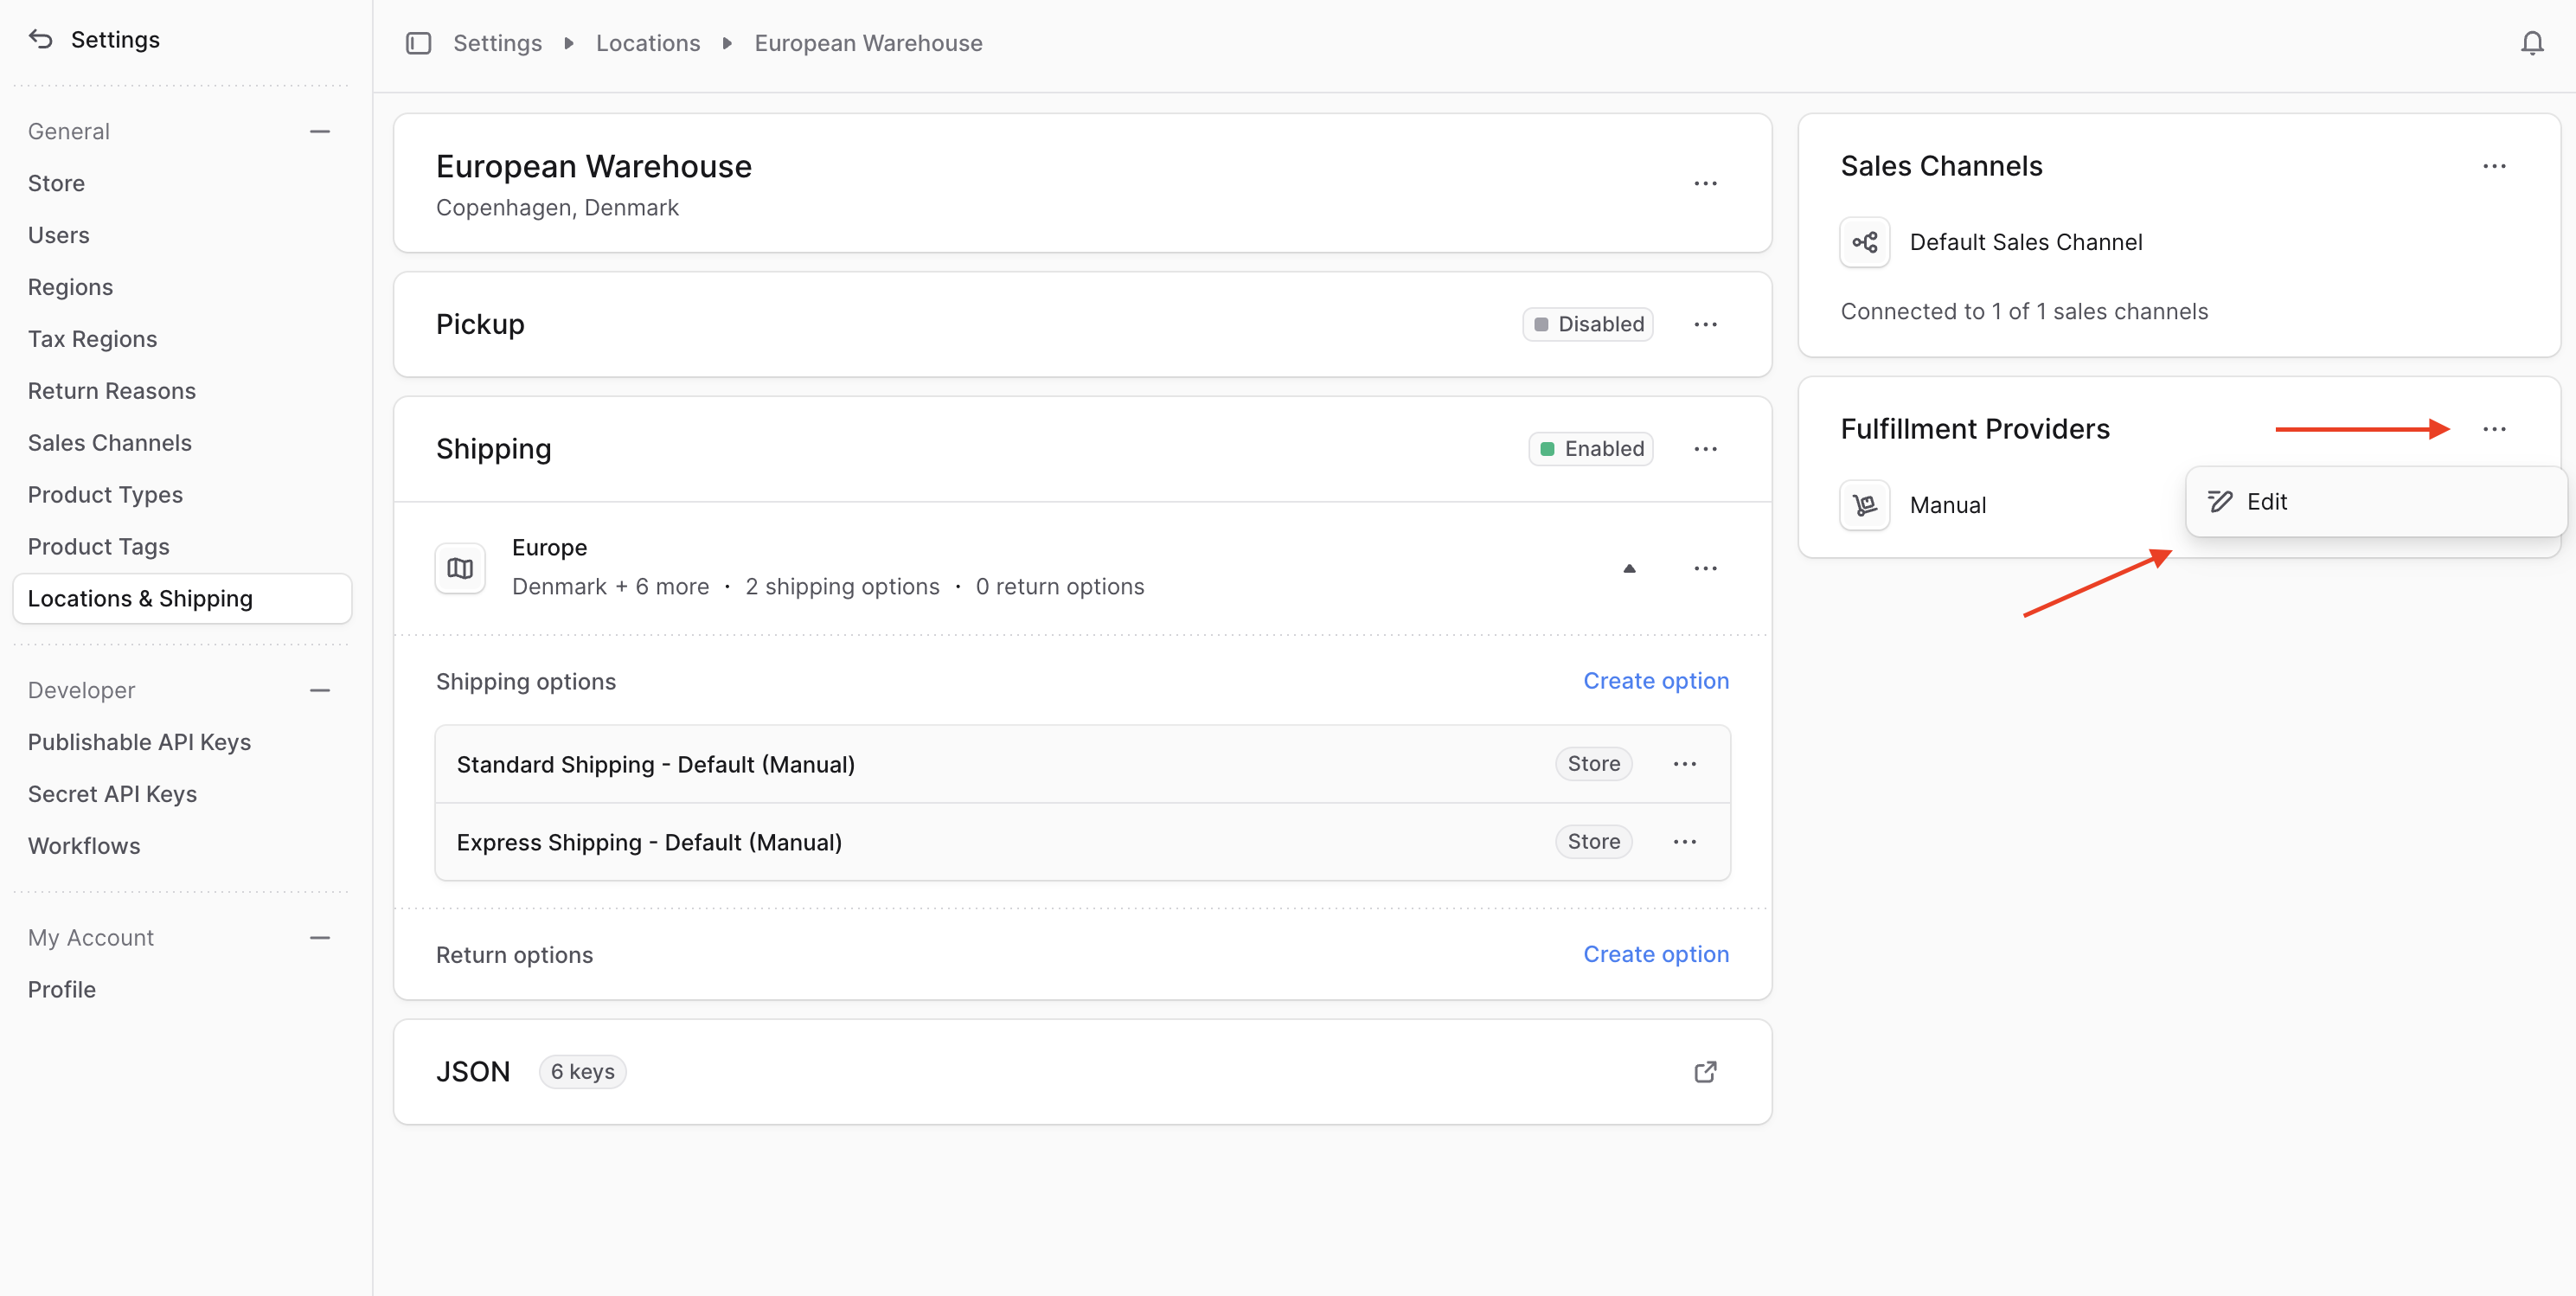
4. On the location's page and under the Fulfillment Providers section, click on the three-dots icon and choose Edit from the dropdown.
|
|
|
|
|
|
|
|
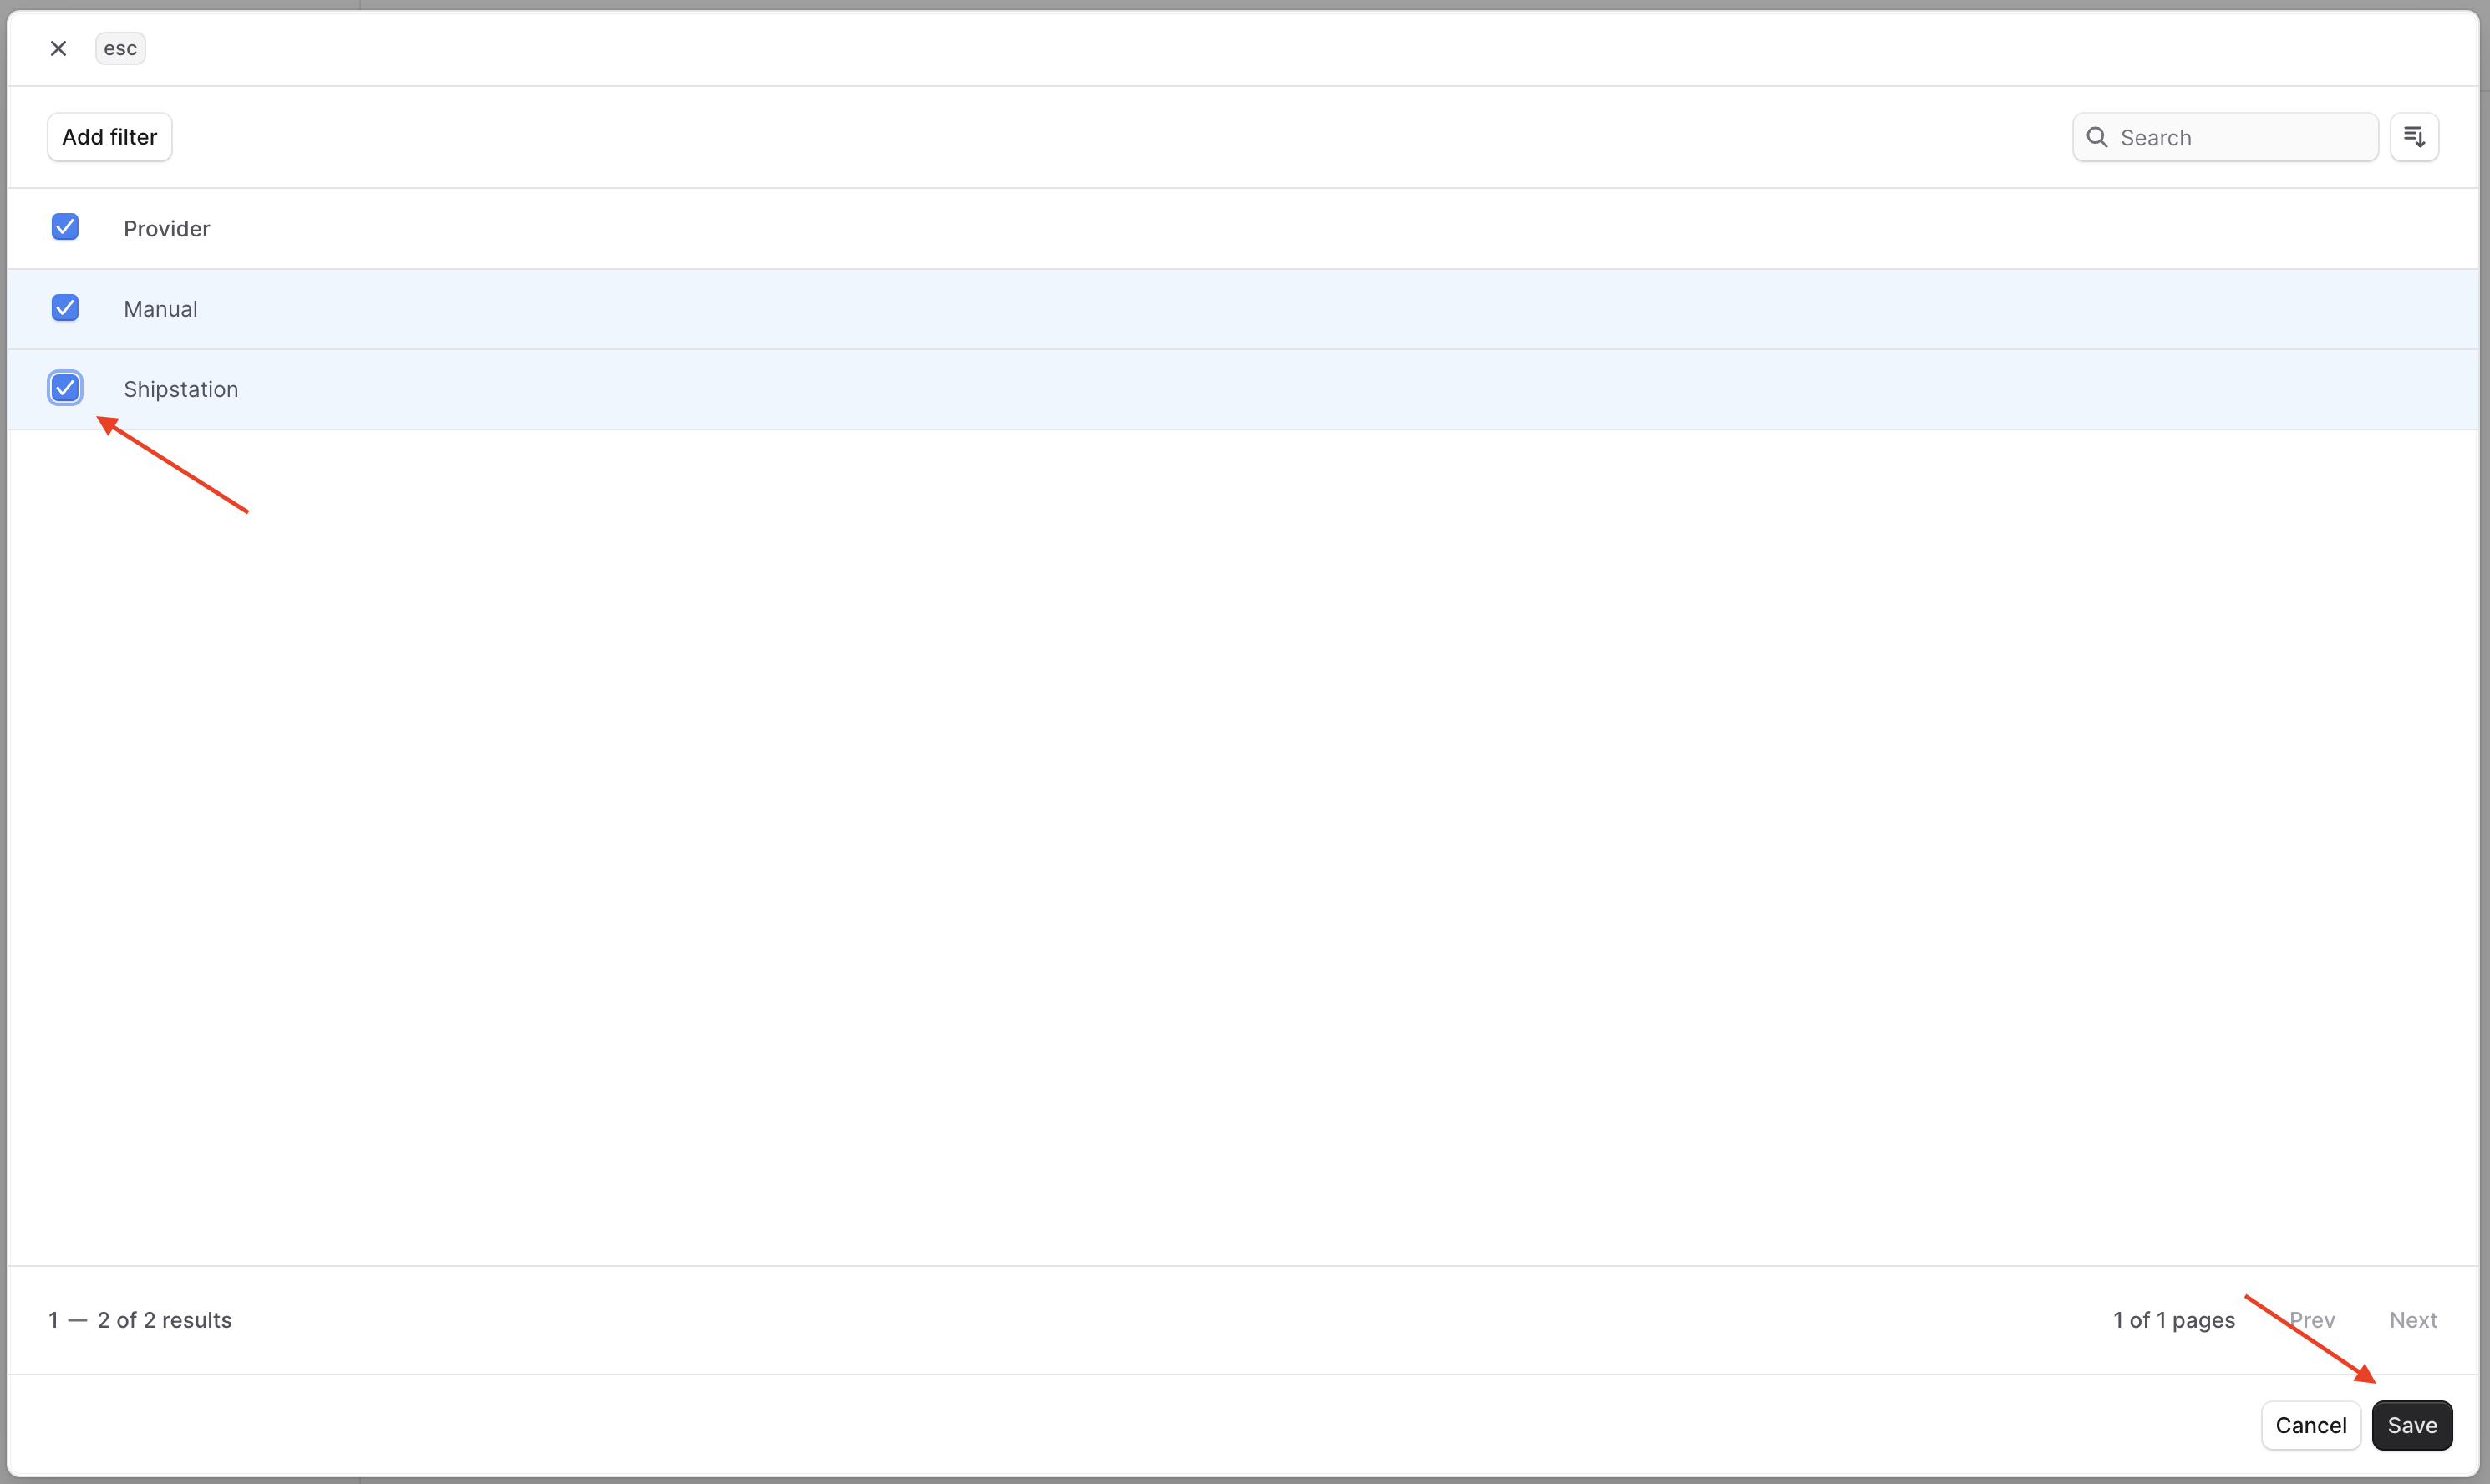
5. A pop up will open with the list of all integrated fulfillment providers. Click the checkbox at the left of the "Shipstation" provider, then click Save.
|
|
|
|
|
|
|
|
6. Under the Shipping section, click on the "Create option" link.
|
|
|
|
|
|
|
|
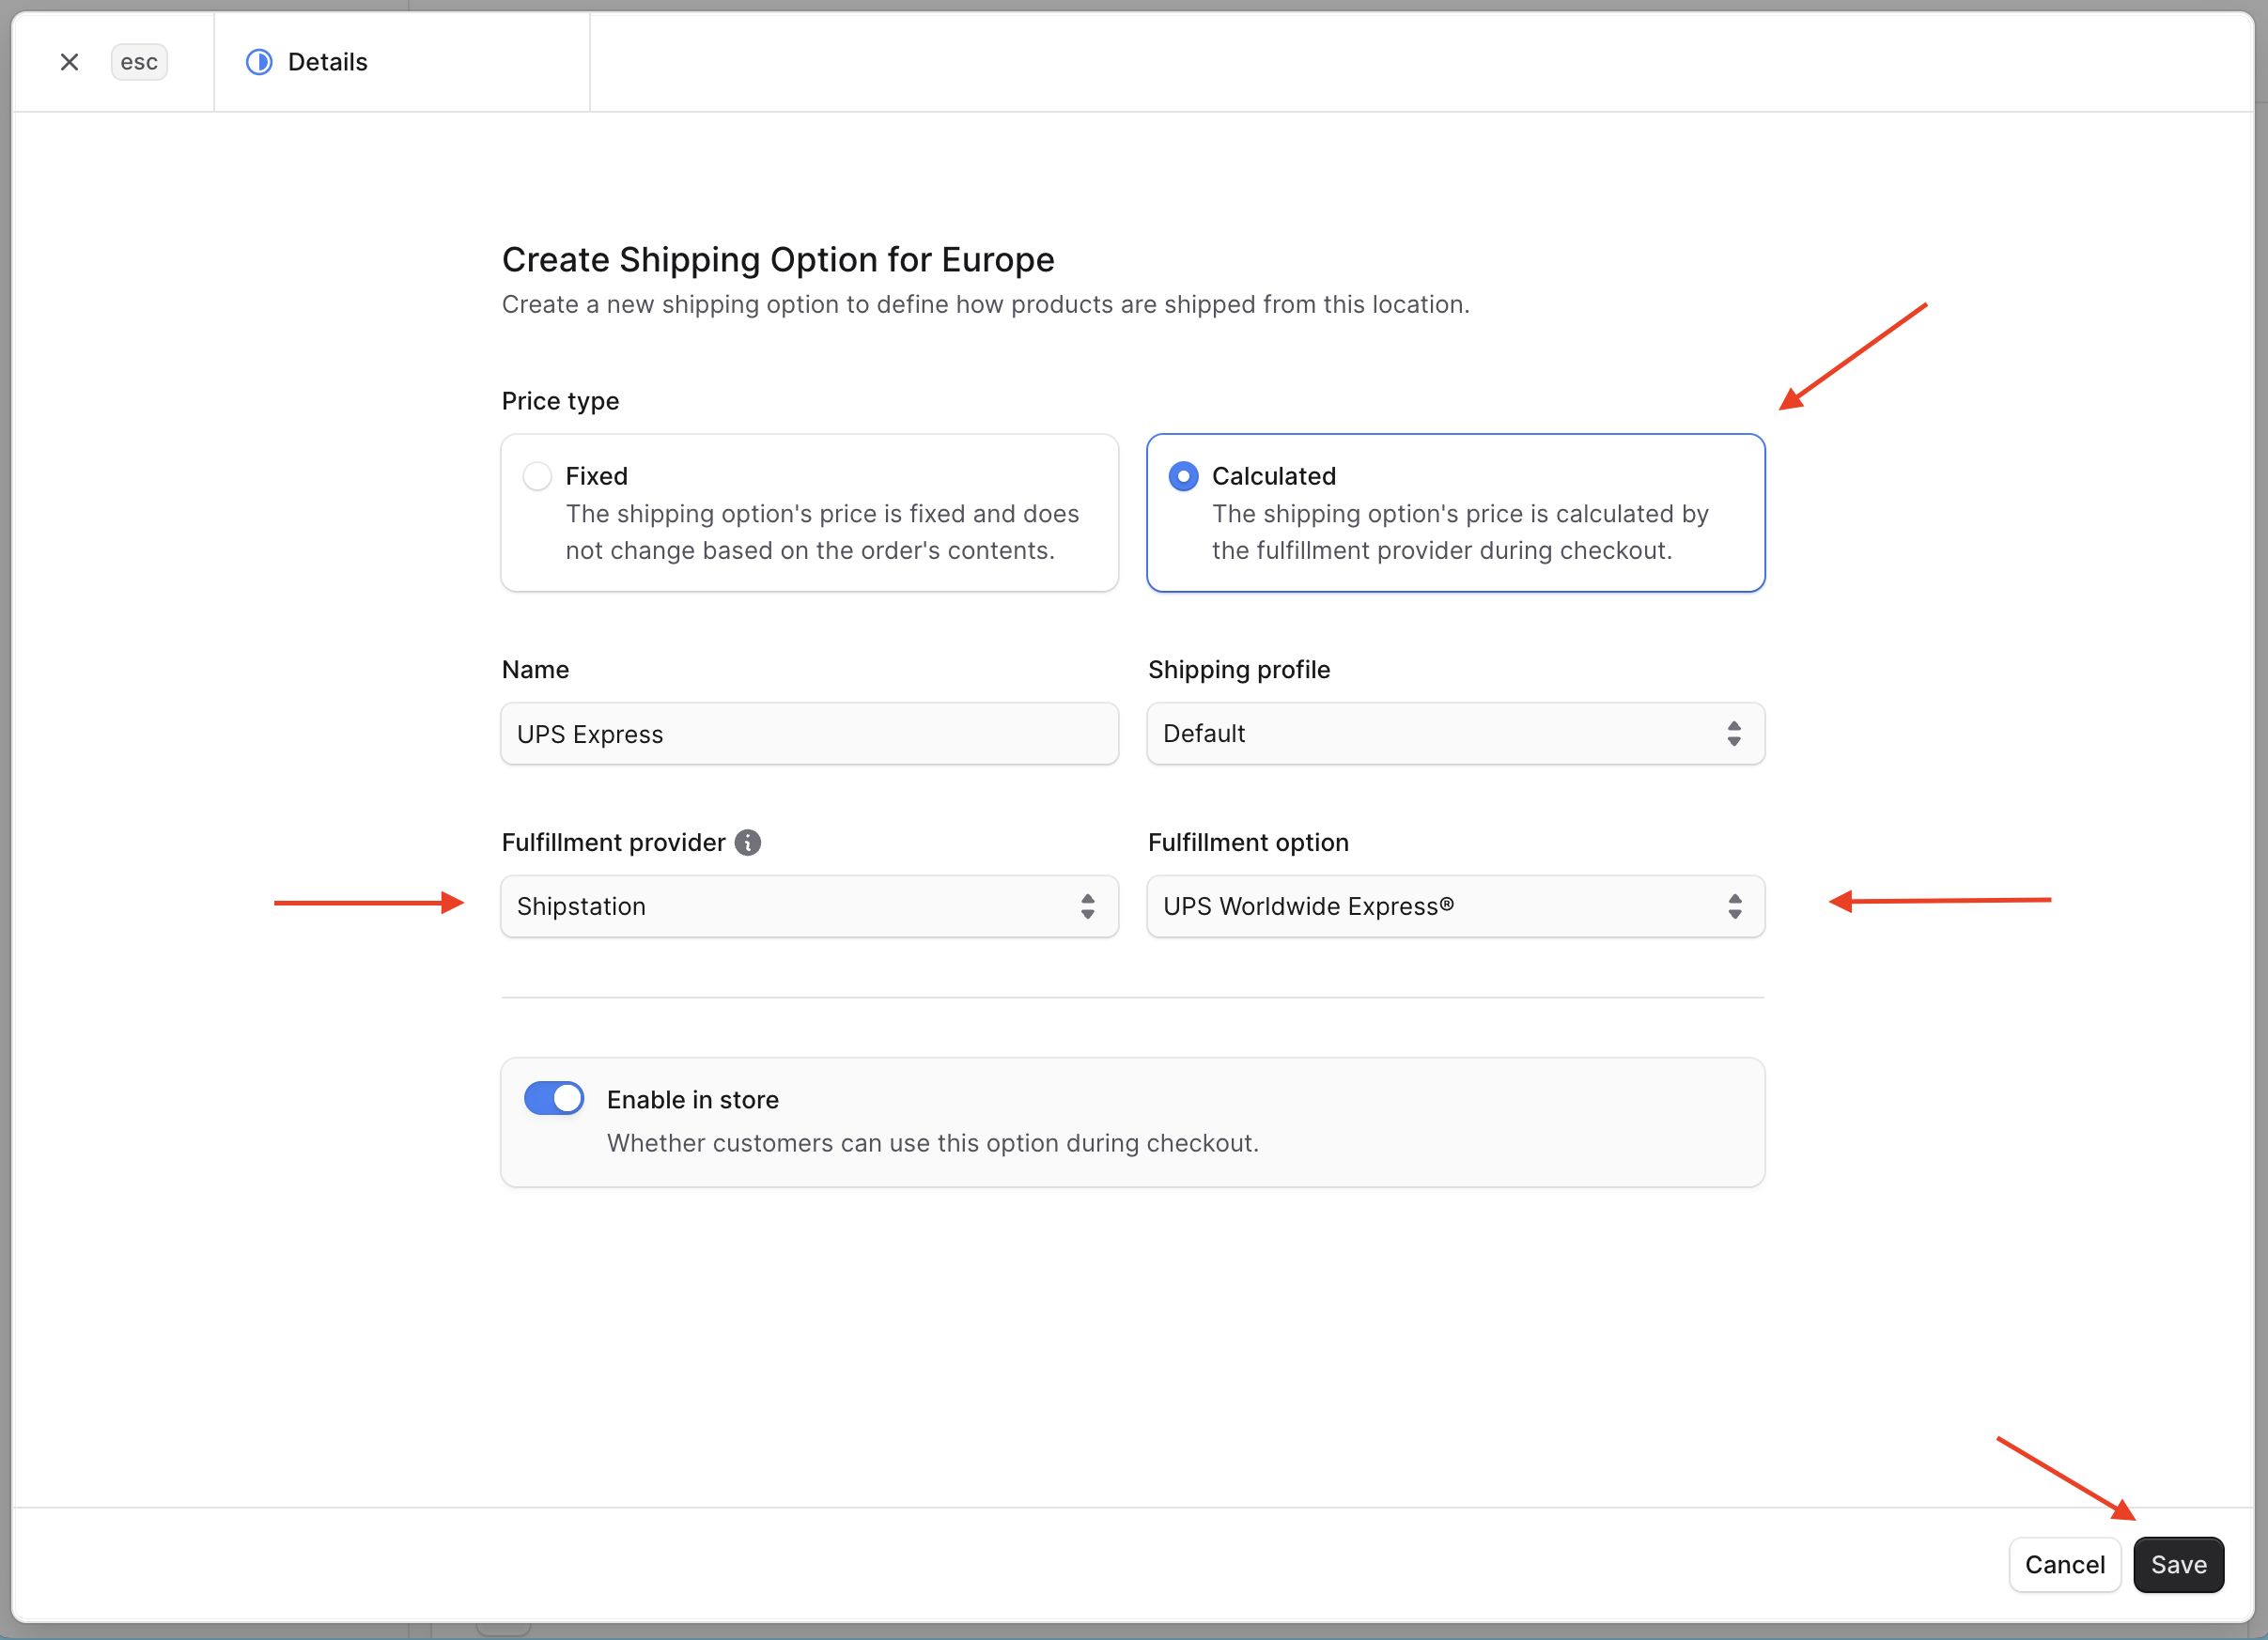
7. In the form that opens:
|
|
- Select Calculated for the price type.
|
|
- Enter a name for the shipping option. This is the name that customers see in the storefront.
|
|
- Choose a Shipping Profile.
|
|
- Choose ShipStation for Fulfillment Provider
|
|
- This will load in the "Fulfillment option" field the ShipStation provider's options, which are retrieved on the server from the provider's `getFulfillmentOptions` method. Once they're loaded, choose one of the options retrieved from ShipStation.
|
|
- Click the Save button.
|
|
|
|
|
|
|
|
You can create a shipping option for each fulfillment option.
|
|
|
|
Customers can now select this shipping option during checkout, and the fulfillment for their order will be processed by ShipStation.
|
|
|
|
---
|
|
|
|
## Test it Out: Place an Order and Fulfill It
|
|
|
|
To test out the integration, you'll place an order using the Next.js Starter Storefront you installed with the Medusa application. You'll then create a fulfillment for the order's items from the Medusa Admin dashboard.
|
|
|
|
### Place Order in Storefront
|
|
|
|
Open the terminal in the Next.js Starter Storefront's directory. It's a sibling directory of the Medusa application with the name `{project-name}-storefront`, where `{project-name}` is the name of the Medusa application's project.
|
|
|
|
Then, while the Medusa application is running, run the following command in the storefront's directory:
|
|
|
|
```bash npm2yarn
|
|
npm run dev
|
|
```
|
|
|
|
This will run the storefront at `http://localhost:8000`. Open it in your browser, then:
|
|
|
|
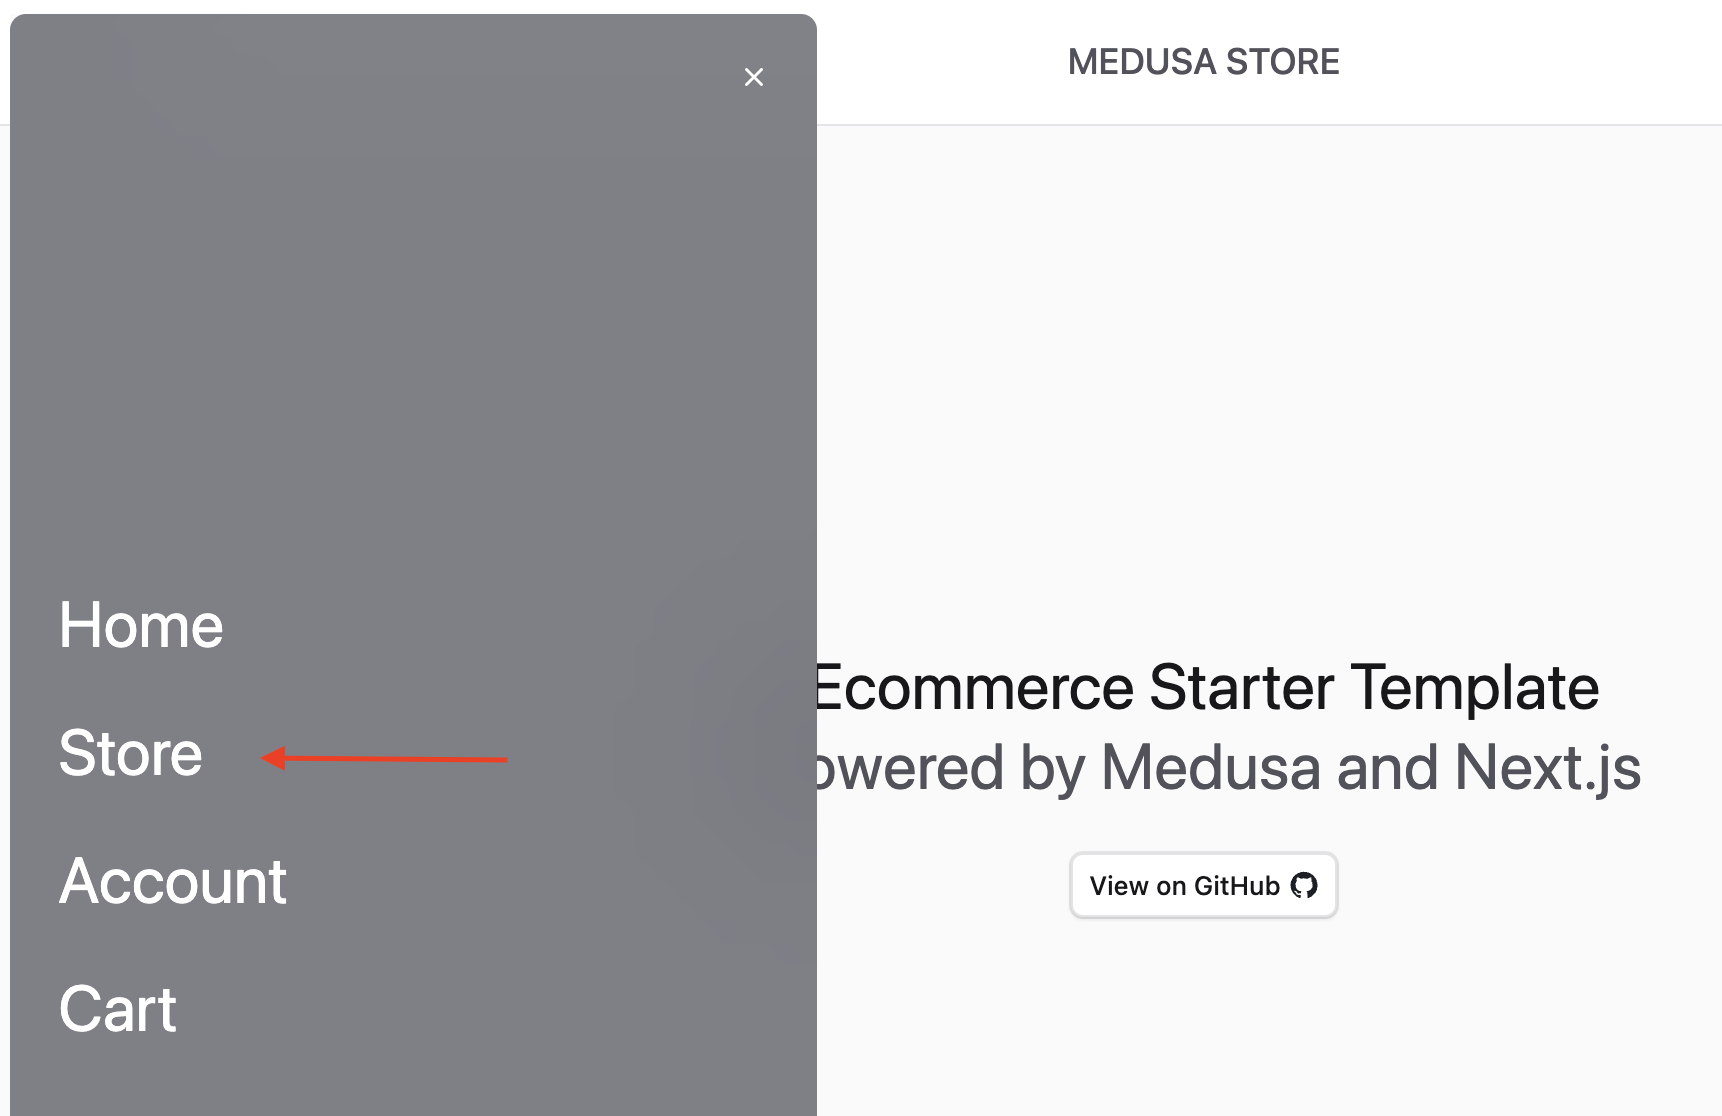
1. Click on Menu at the top left of the navigation bar, then choose Store.
|
|
|
|
|
|
|
|
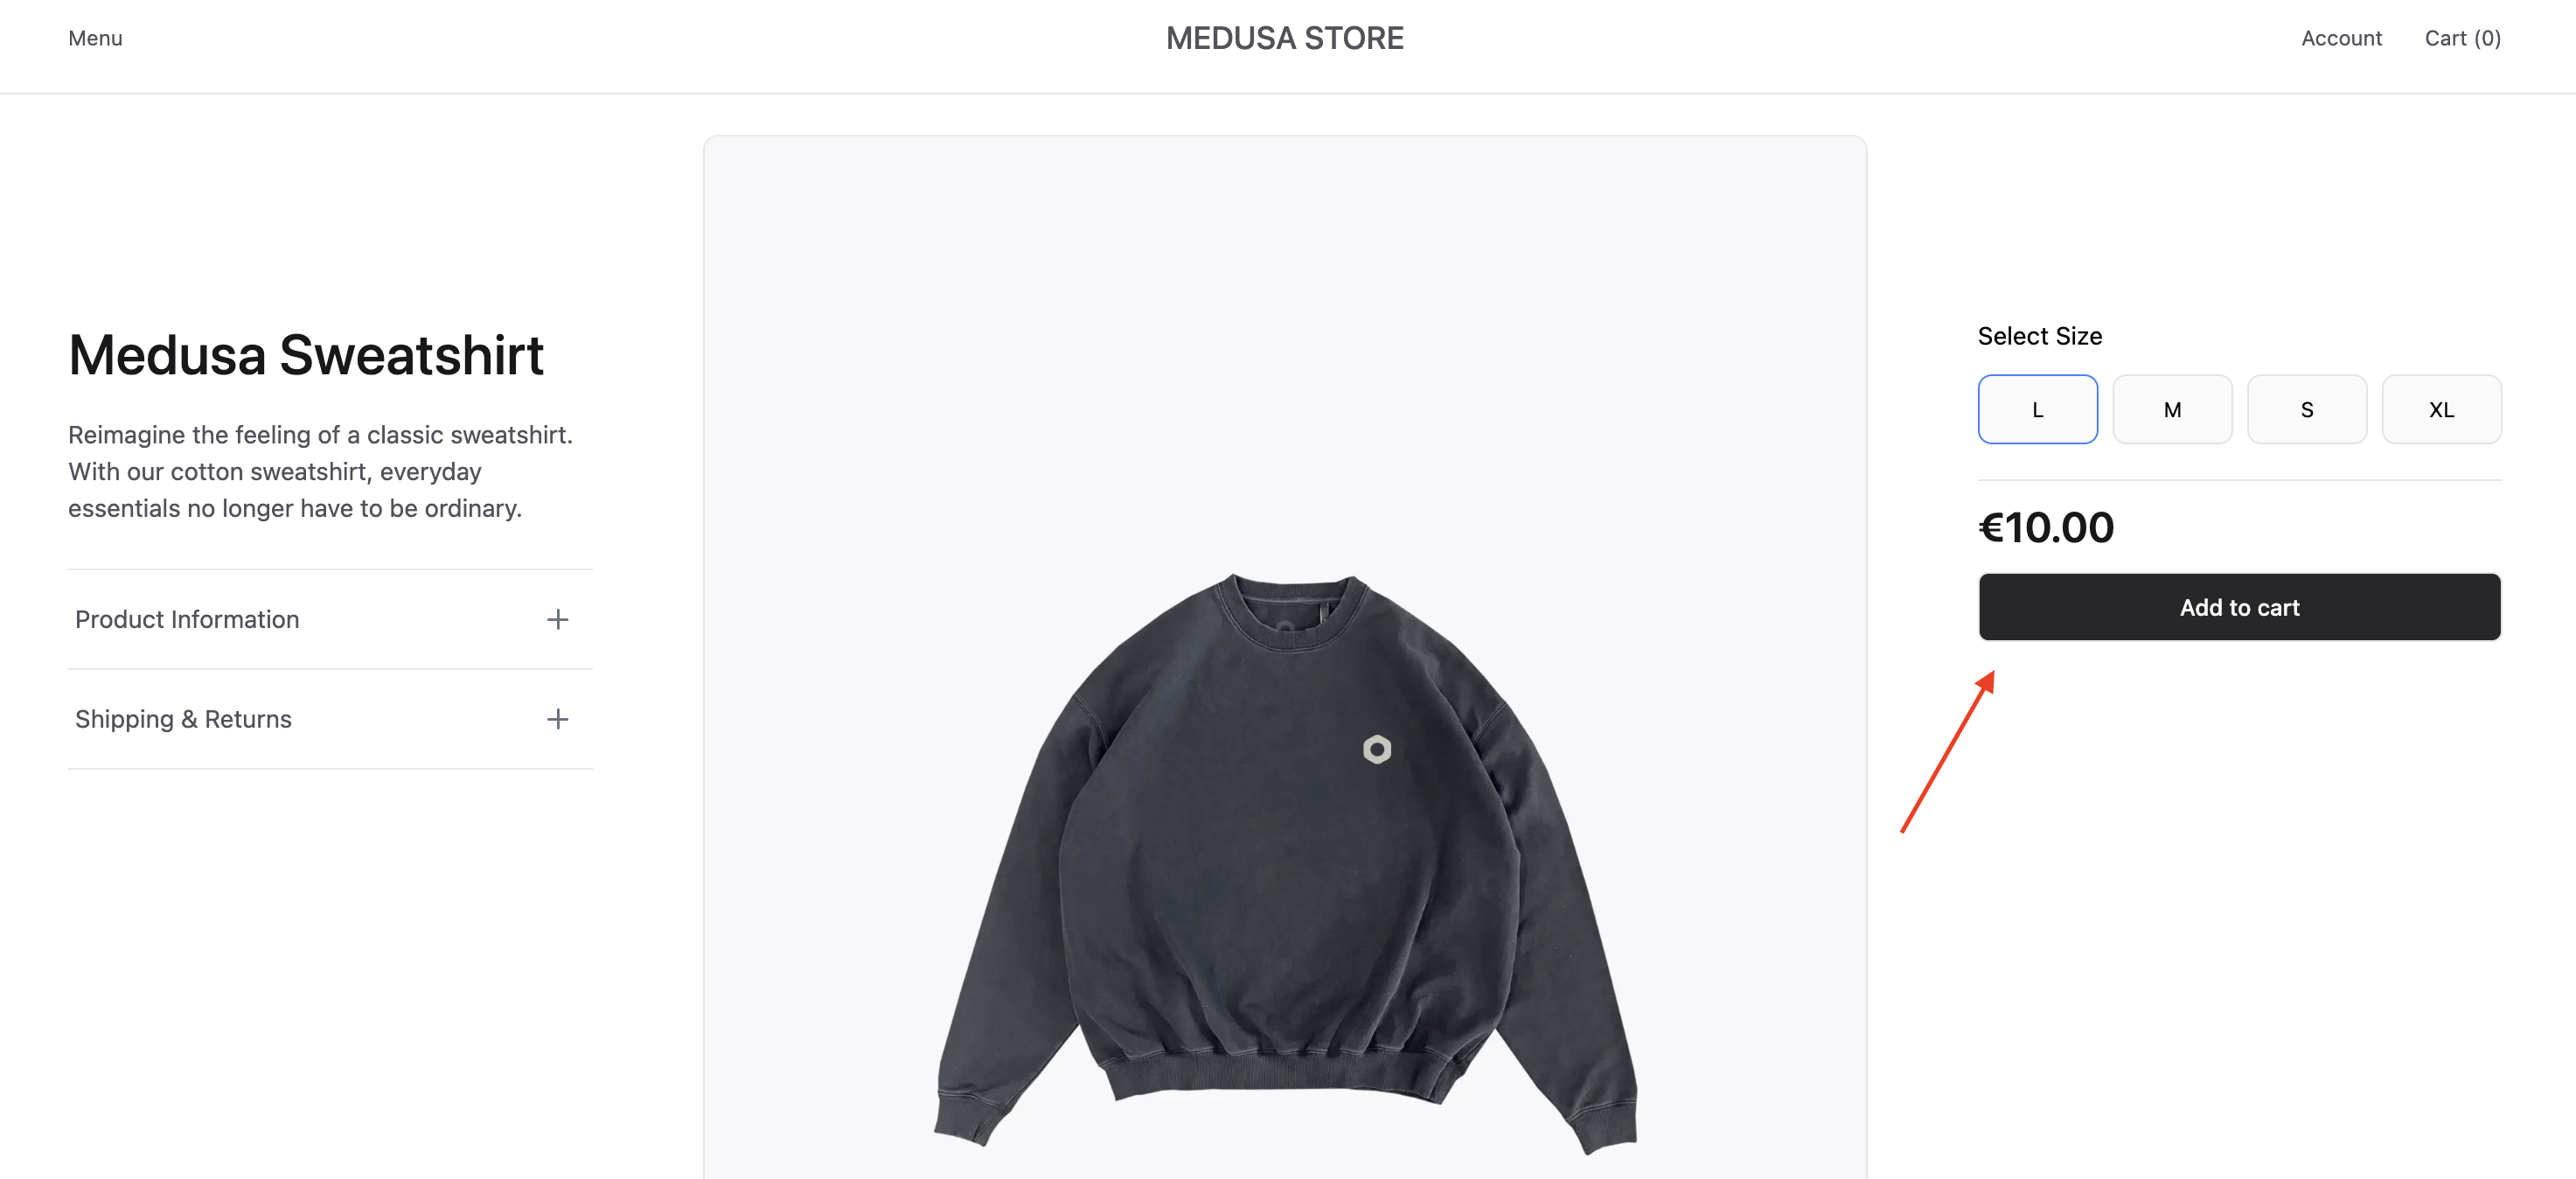
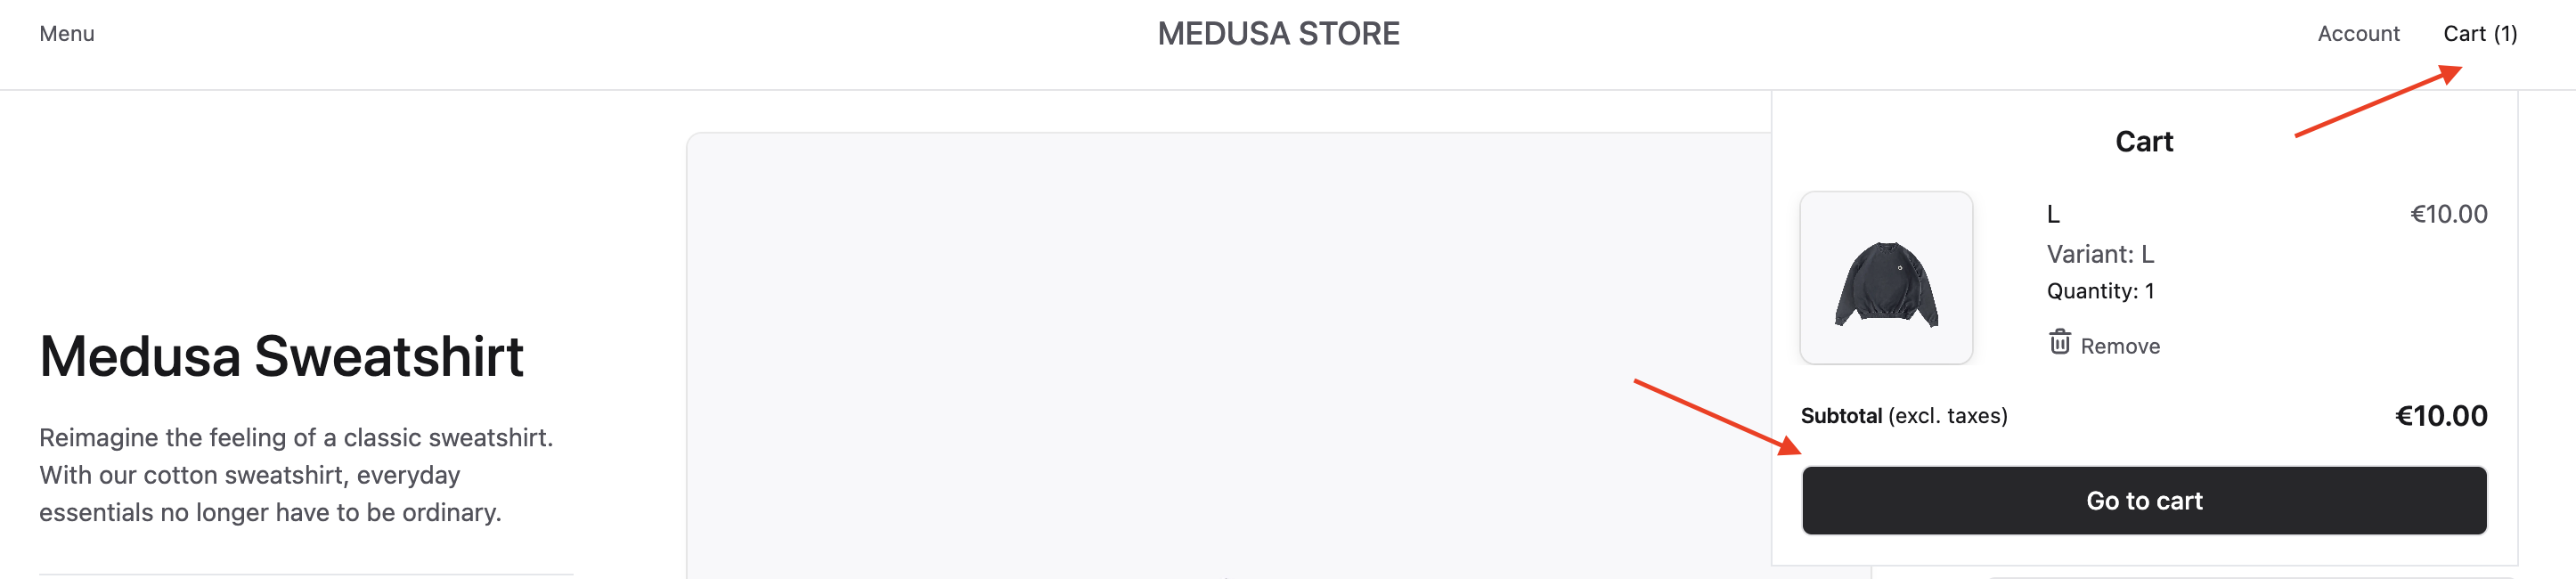
2. Click on a product and add it to the cart.
|
|
|
|
|
|
|
|
3. Click on "Cart" at the top right to go to the cart's page.
|
|
|
|
|
|
|
|
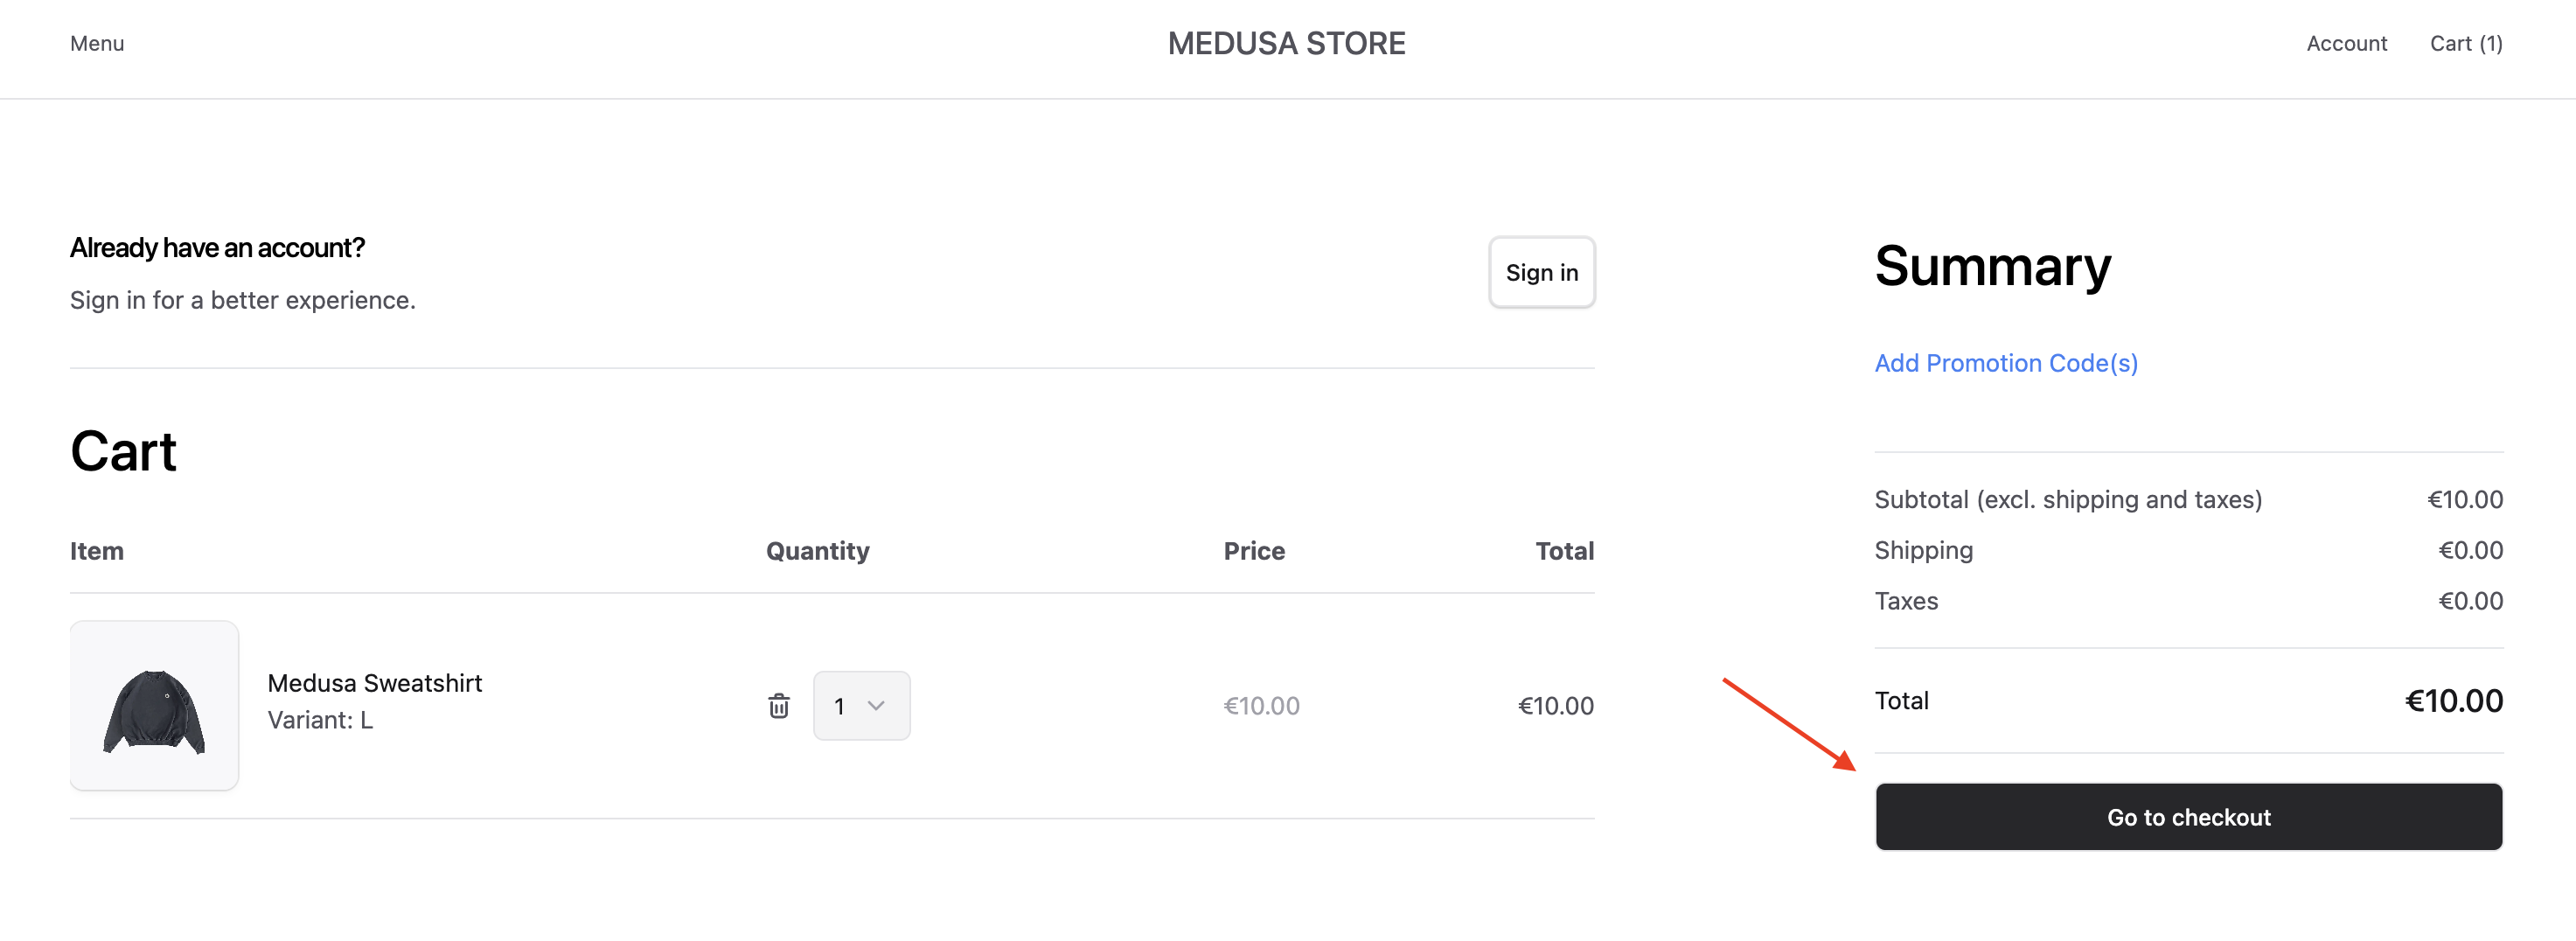
4. From the cart's page, click on "Go to checkout".
|
|
|
|
|
|
|
|
5. Enter the customer address as a first step of the Checkout. Make sure that the country you choose is the same as the location that the fulfillment provider's options are available in.
|
|
|
|
<Note>
|
|
|
|
If you're entering US-based address, make sure to enter the two-letter code for your state, as that's required by ShipStation.
|
|
|
|
</Note>
|
|
|
|
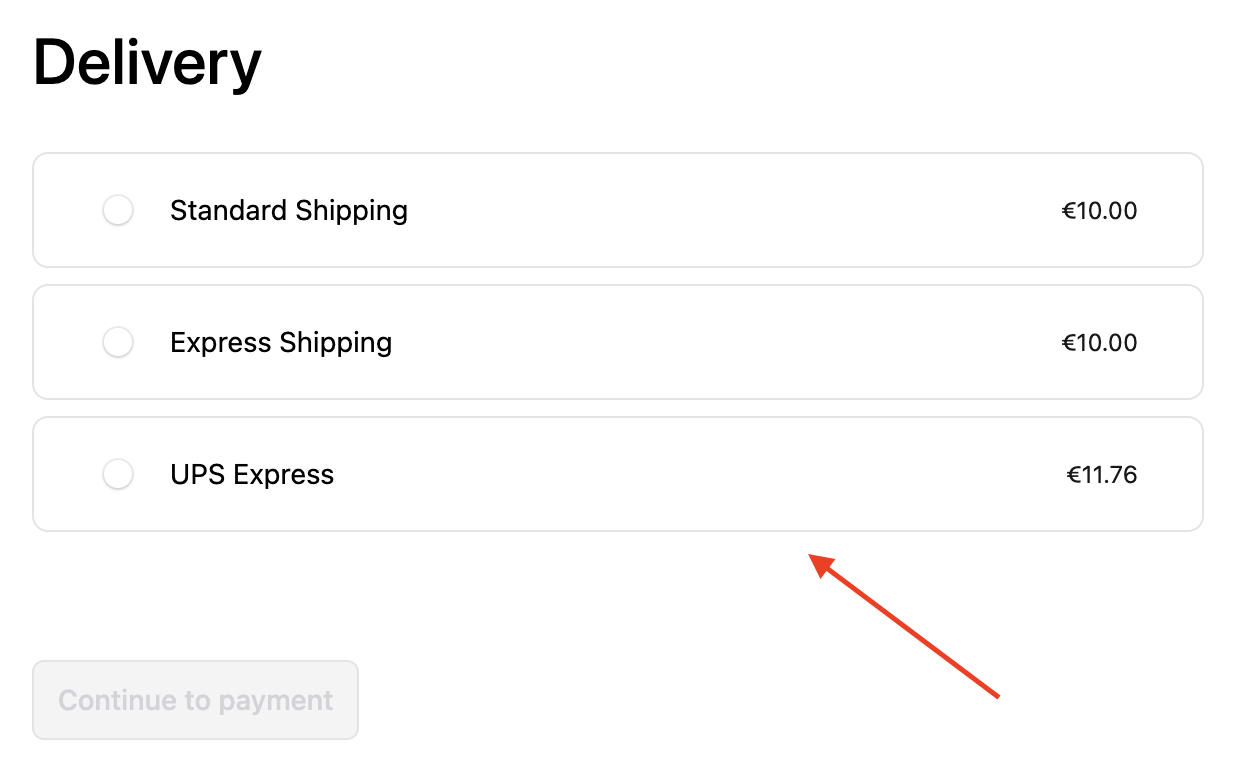
6. In the Delivery step, you'll find the option you added for ShipStation. There will be a loading indicator while its price is fetched, and the price will be shown afterwards.
|
|
|
|
|
|
|
|
7. Click on the ShipStation option, then click Continue to Payment.
|
|
8. Finish the payment step, then click Place order in the Review section
|
|
|
|
You've now created an order that uses a shipping option from ShipStation.
|
|
|
|
### Fulfill Order in Admin
|
|
|
|
You'll now manage the order you've created in the admin to fulfill it:
|
|
|
|
1. Open the admin at `http://localhost:9000/app` and login.
|
|
2. You'll find on the Orders page the order you've created. Click on it to view its details.
|
|
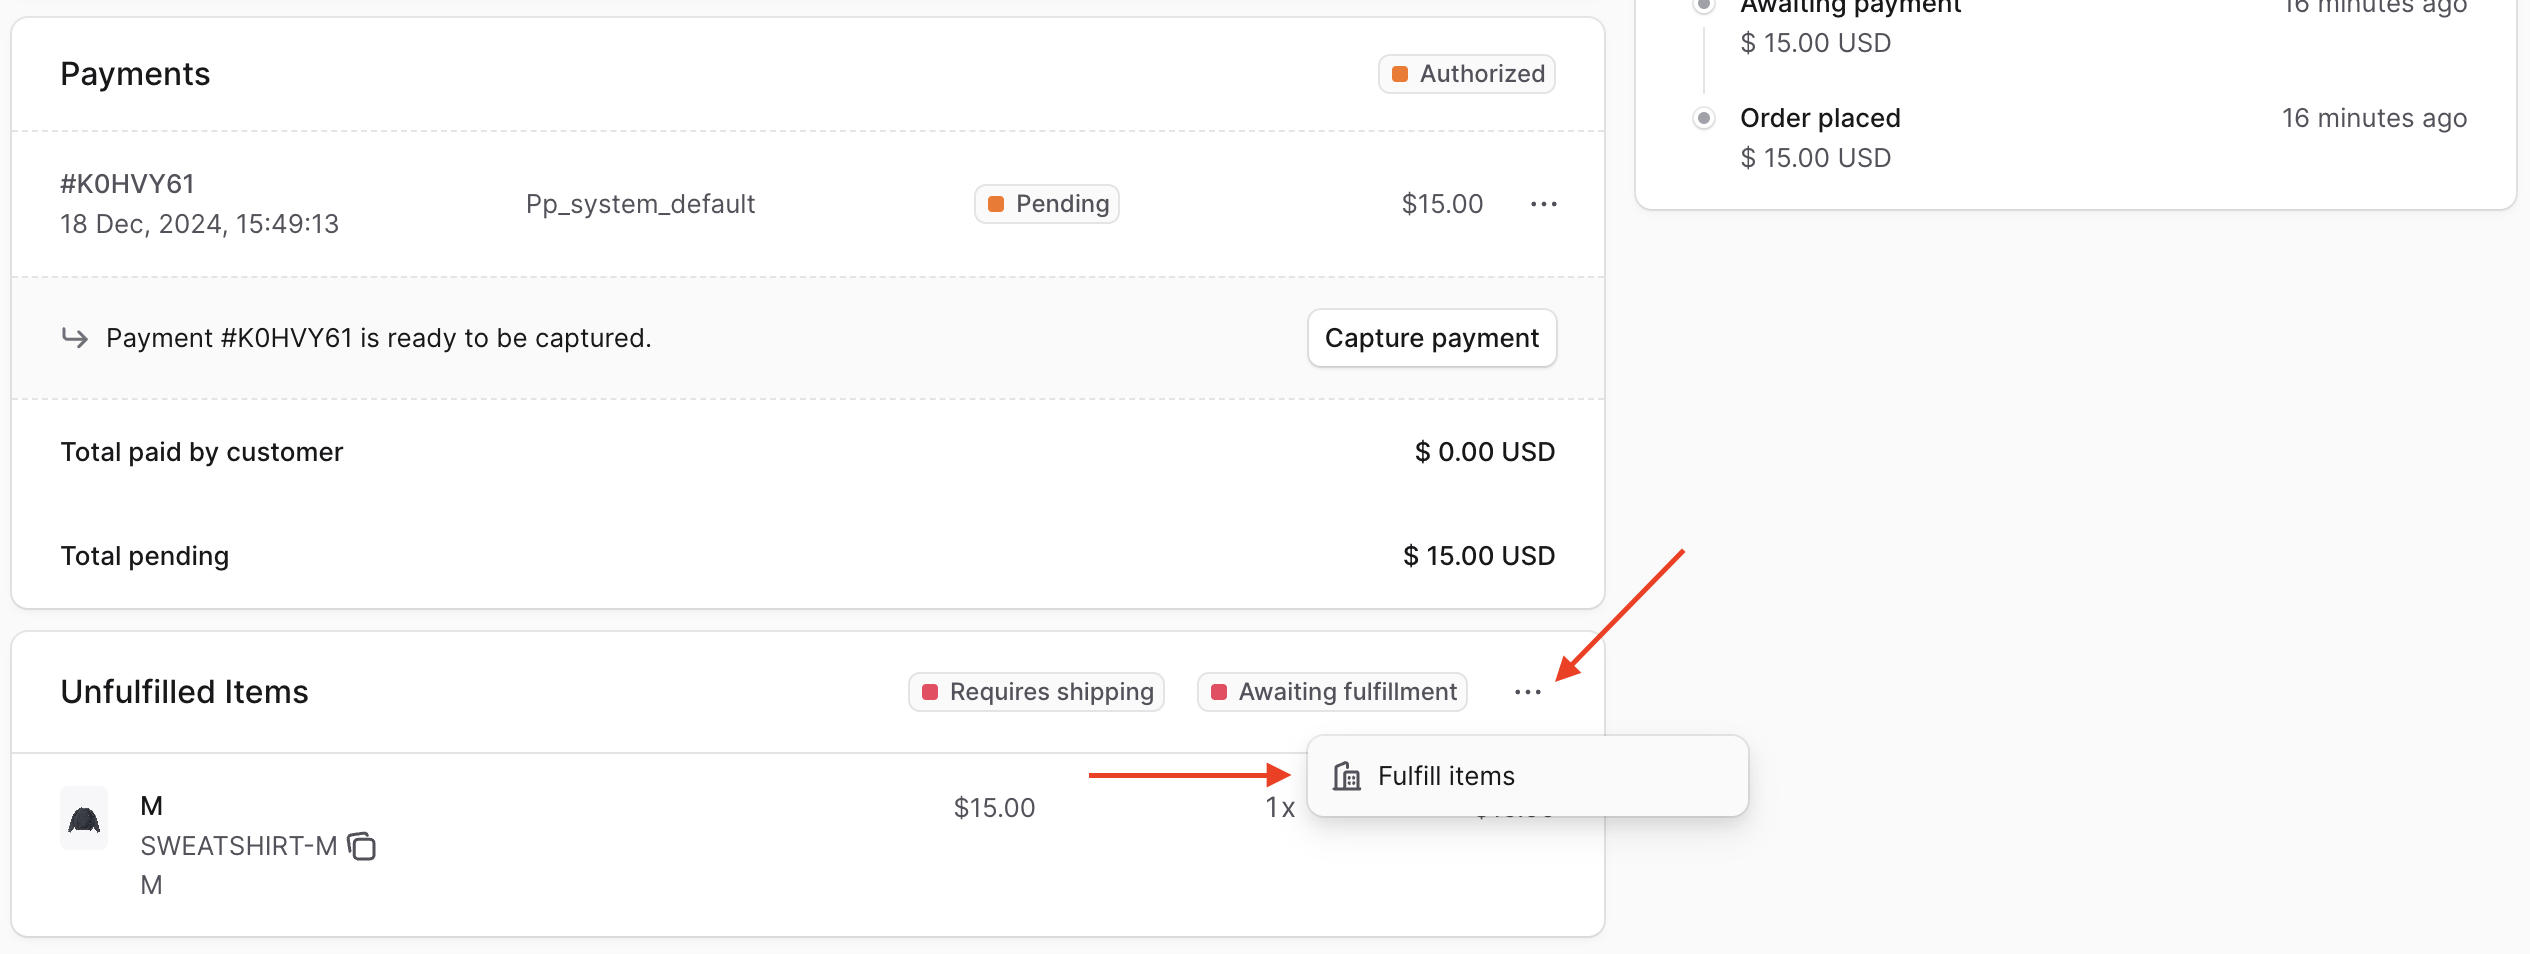
3. On the order's details page, scroll down to the Unfulfilled Items section. Then, click on the three-dots icon at the top right of the section and choose "Fulfill items" from the dropdown.
|
|
|
|
|
|
|
|
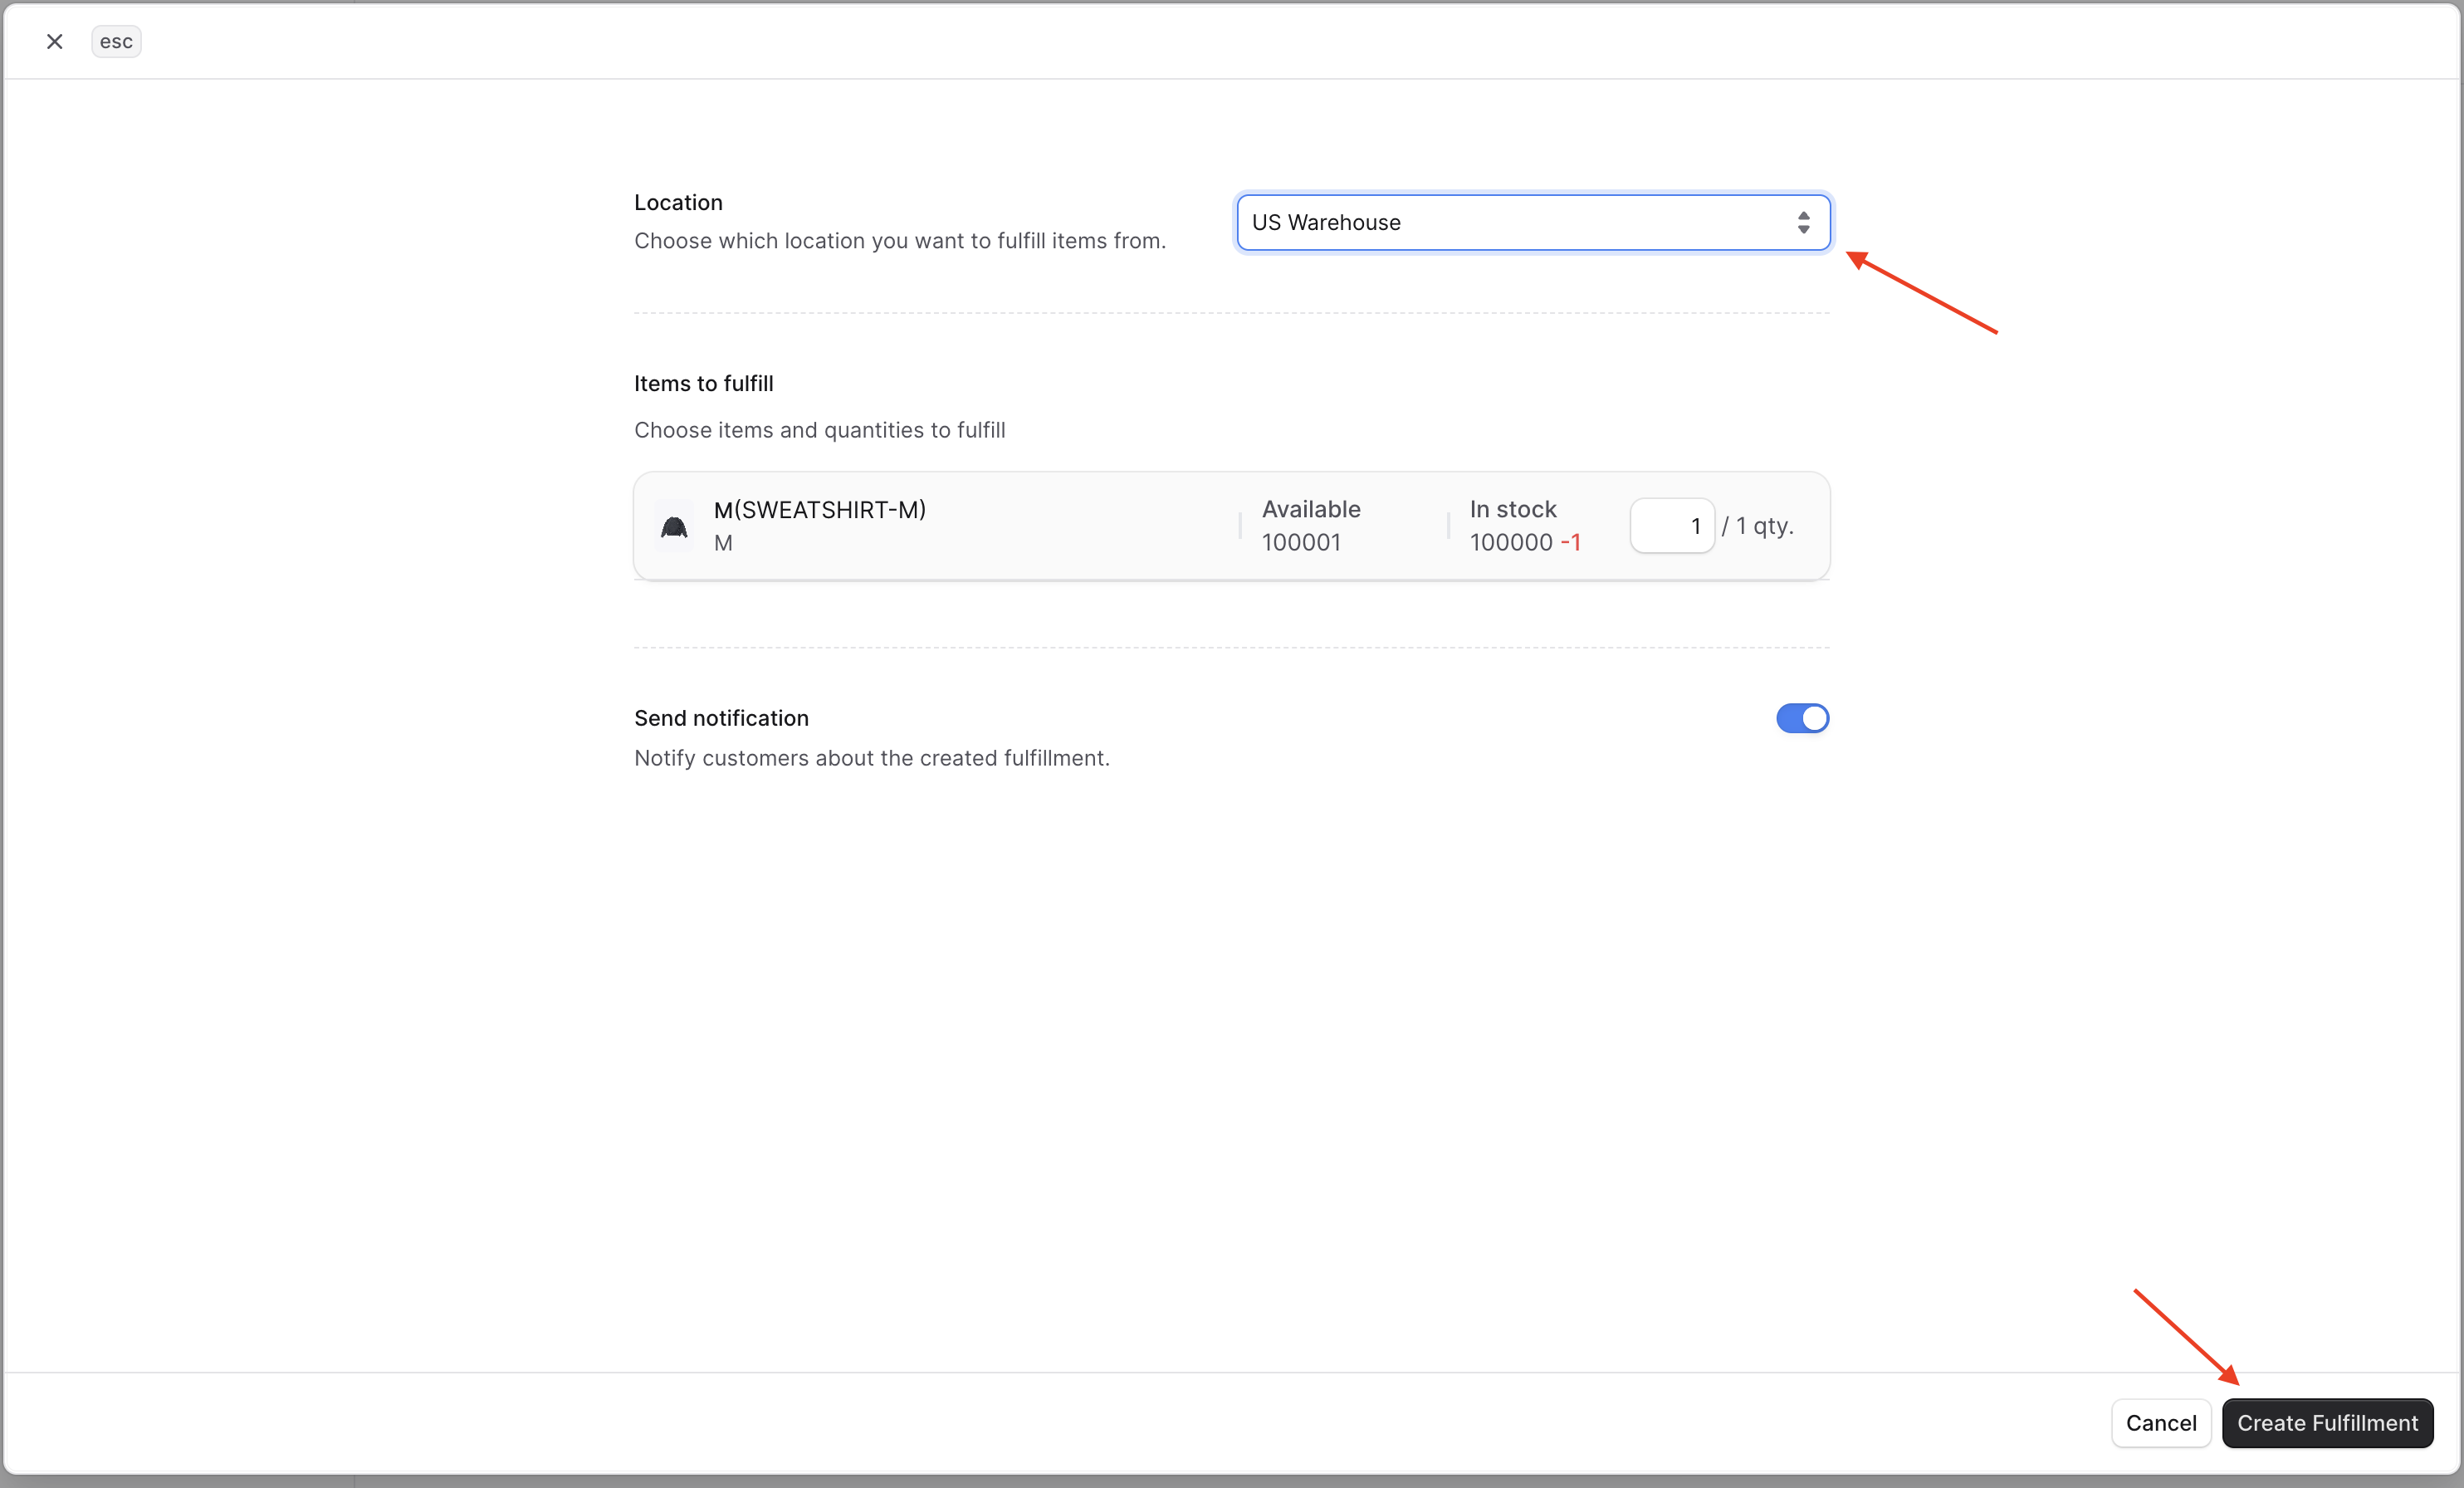
4. In the form that opens, choose the Location to fulfill the item(s) from, then click Create Fulfillment.
|
|
|
|
|
|
|
|
5. The created fulfillment will be showing on the order's details page now.
|
|
|
|

|
|
|
|
You can also cancel the fulfillment by clicking on the three-dots icon, then choosing Cancel from the dropdown. This will void the label in ShipStation and cancel its shipment.
|
|
|
|
---
|
|
|
|
|
|
## Next Steps
|
|
|
|
You've now integrated Medusa with ShipStation. You can fulfill orders with many carriers and providers, all from a single integration and platform.
|
|
|
|
If you're new to Medusa, check out the [main documentation](!docs!/learn), where you'll get a more in-depth learning of all the concepts you've used in this guide and more.
|
|
|
|
To learn more about the commerce features that Medusa provides, check out Medusa's [Commerce Modules](../../../commerce-modules/page.mdx).
|