* add tags

* docs: add tags for user guide + links in commerce modules sidebar

* generate sidebar
137 lines
5.6 KiB
Plaintext
137 lines
5.6 KiB
Plaintext
---
|
||
sidebar_position: 8
|
||
sidebar_label: "Manage Sales Channels"
|
||
tags:
|
||
- user guide
|
||
- sales channel
|
||
---
|
||
|
||
import { EllipsisHorizontal } from "@medusajs/icons"
|
||
|
||
export const metadata = {
|
||
title: `Manage Sales Channels in Medusa Admin`,
|
||
}
|
||
|
||
# {metadata.title}
|
||
|
||
In this guide, you’ll learn what sales channels are and how to manage them in the Medusa Admin.
|
||
|
||
## What is a Sales Channel?
|
||
|
||
A sales channel is a channel that you sell your products through. For example, you can have a sales channel for the web storefront, another for the mobile app, and another for selling across social media platforms.
|
||
|
||
You can set a default sales channel in your [store settings](../store/page.mdx) that is used when no sales channel is specified. This is also useful if you're not selling through multiple channels.
|
||
|
||
### How Sales Channels Work
|
||
|
||
Sales channels are associated with other data and settings in your commerce store:
|
||
|
||
- You can choose which products are available in a sales channel. This is useful when you provide different products for different types of channels. For example, you can have a B2B sales channel and only make B2B products available in it.
|
||
- When a customer places an order from a sales channel, the order is associated with it. This is useful if you're processing orders differently for each sales channel. For example, orders placed through an offline store are processed differently than through an online storefront.
|
||
- Stock locations and shipping options are also associated with sales channels. So, when a customer places an order, the items are fulfilled from the stock location associated with the order's sales channel.
|
||
|
||
<Note title="Technical Tip">
|
||
|
||
Developers can use [Publishable API Keys](../developer/secret-api-keys/page.mdx) to easily associate a storefront or client with a sales channel.
|
||
|
||
</Note>
|
||
|
||
---
|
||
|
||
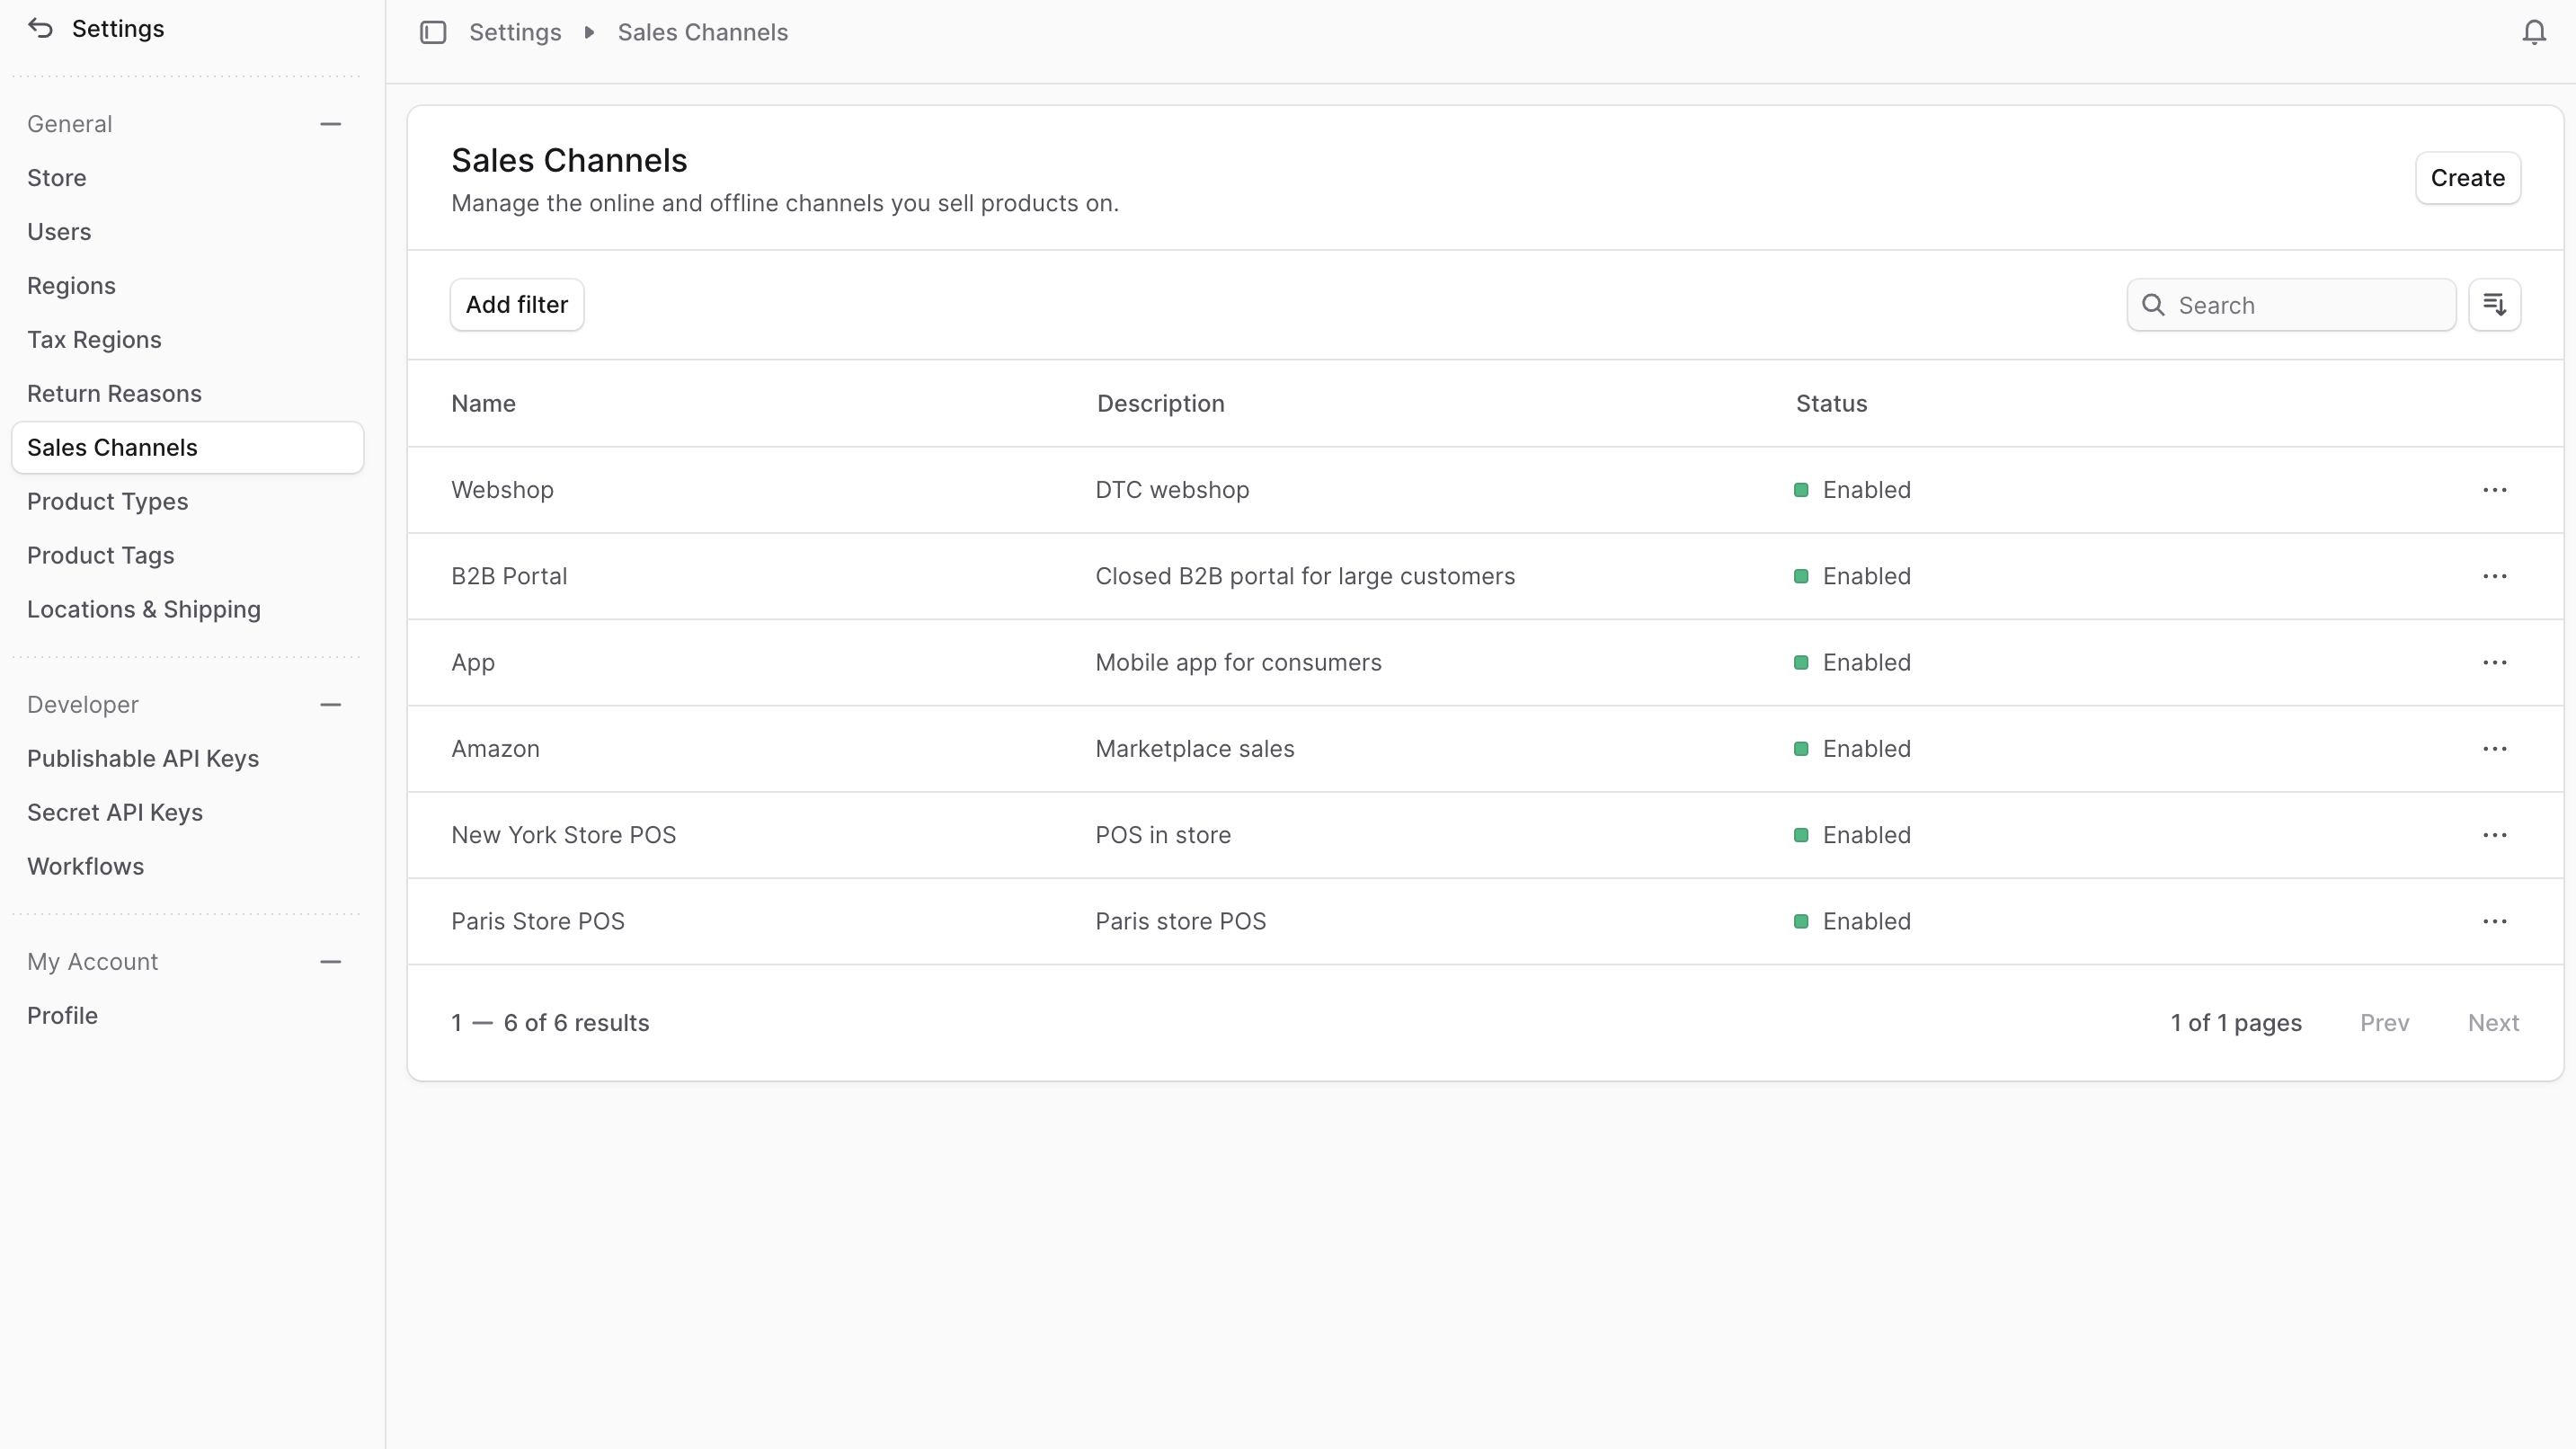
## View Sales Channels
|
||
|
||
To view sales channels in your store, go to Settings → Sales Channels. Here, you can see a list of all the sales channels you have set up in your store. You can also search, filter, and sort the sales channels to find the one you are looking for.
|
||
|
||
|
||
|
||
---
|
||
|
||
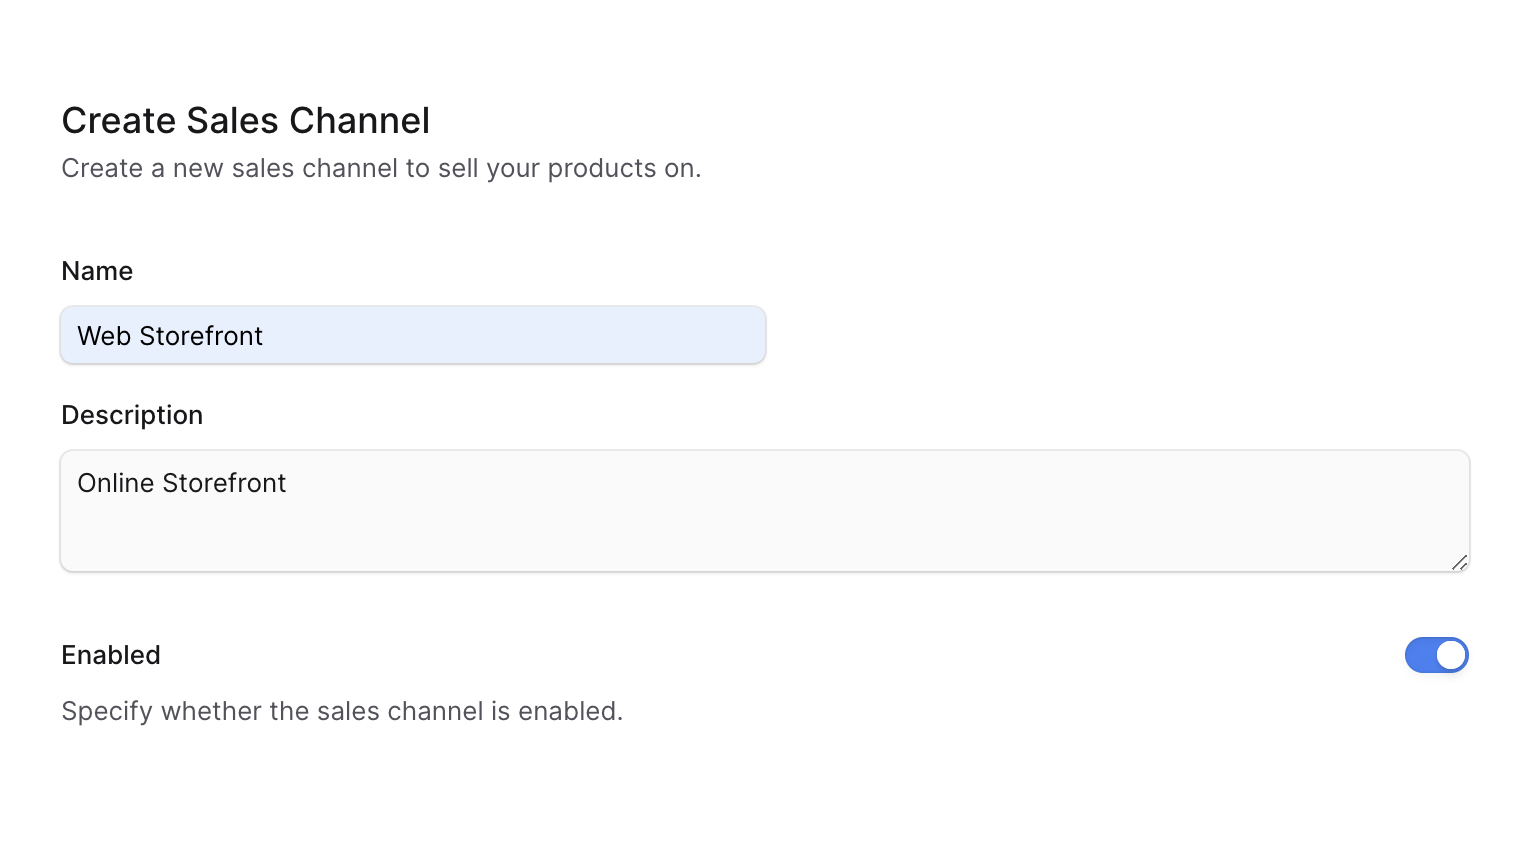
## Create Sales Channel
|
||
|
||
To create a sales channel:
|
||
|
||
1. Go to Settings → Sales Channels.
|
||
2. Click the Create button at the top right.
|
||
3. In the form that opens:
|
||
- In the Name field, enter a name for the sales channel. For example, "Web Storefront".
|
||
- In the Description field, enter a description of the sales channel.
|
||
- If you don't want to enable the sales channel immediately, disable the "Enabled" toggle.
|
||
4. Once you're done, click the Save button.
|
||
|
||
|
||
|
||
---
|
||
|
||
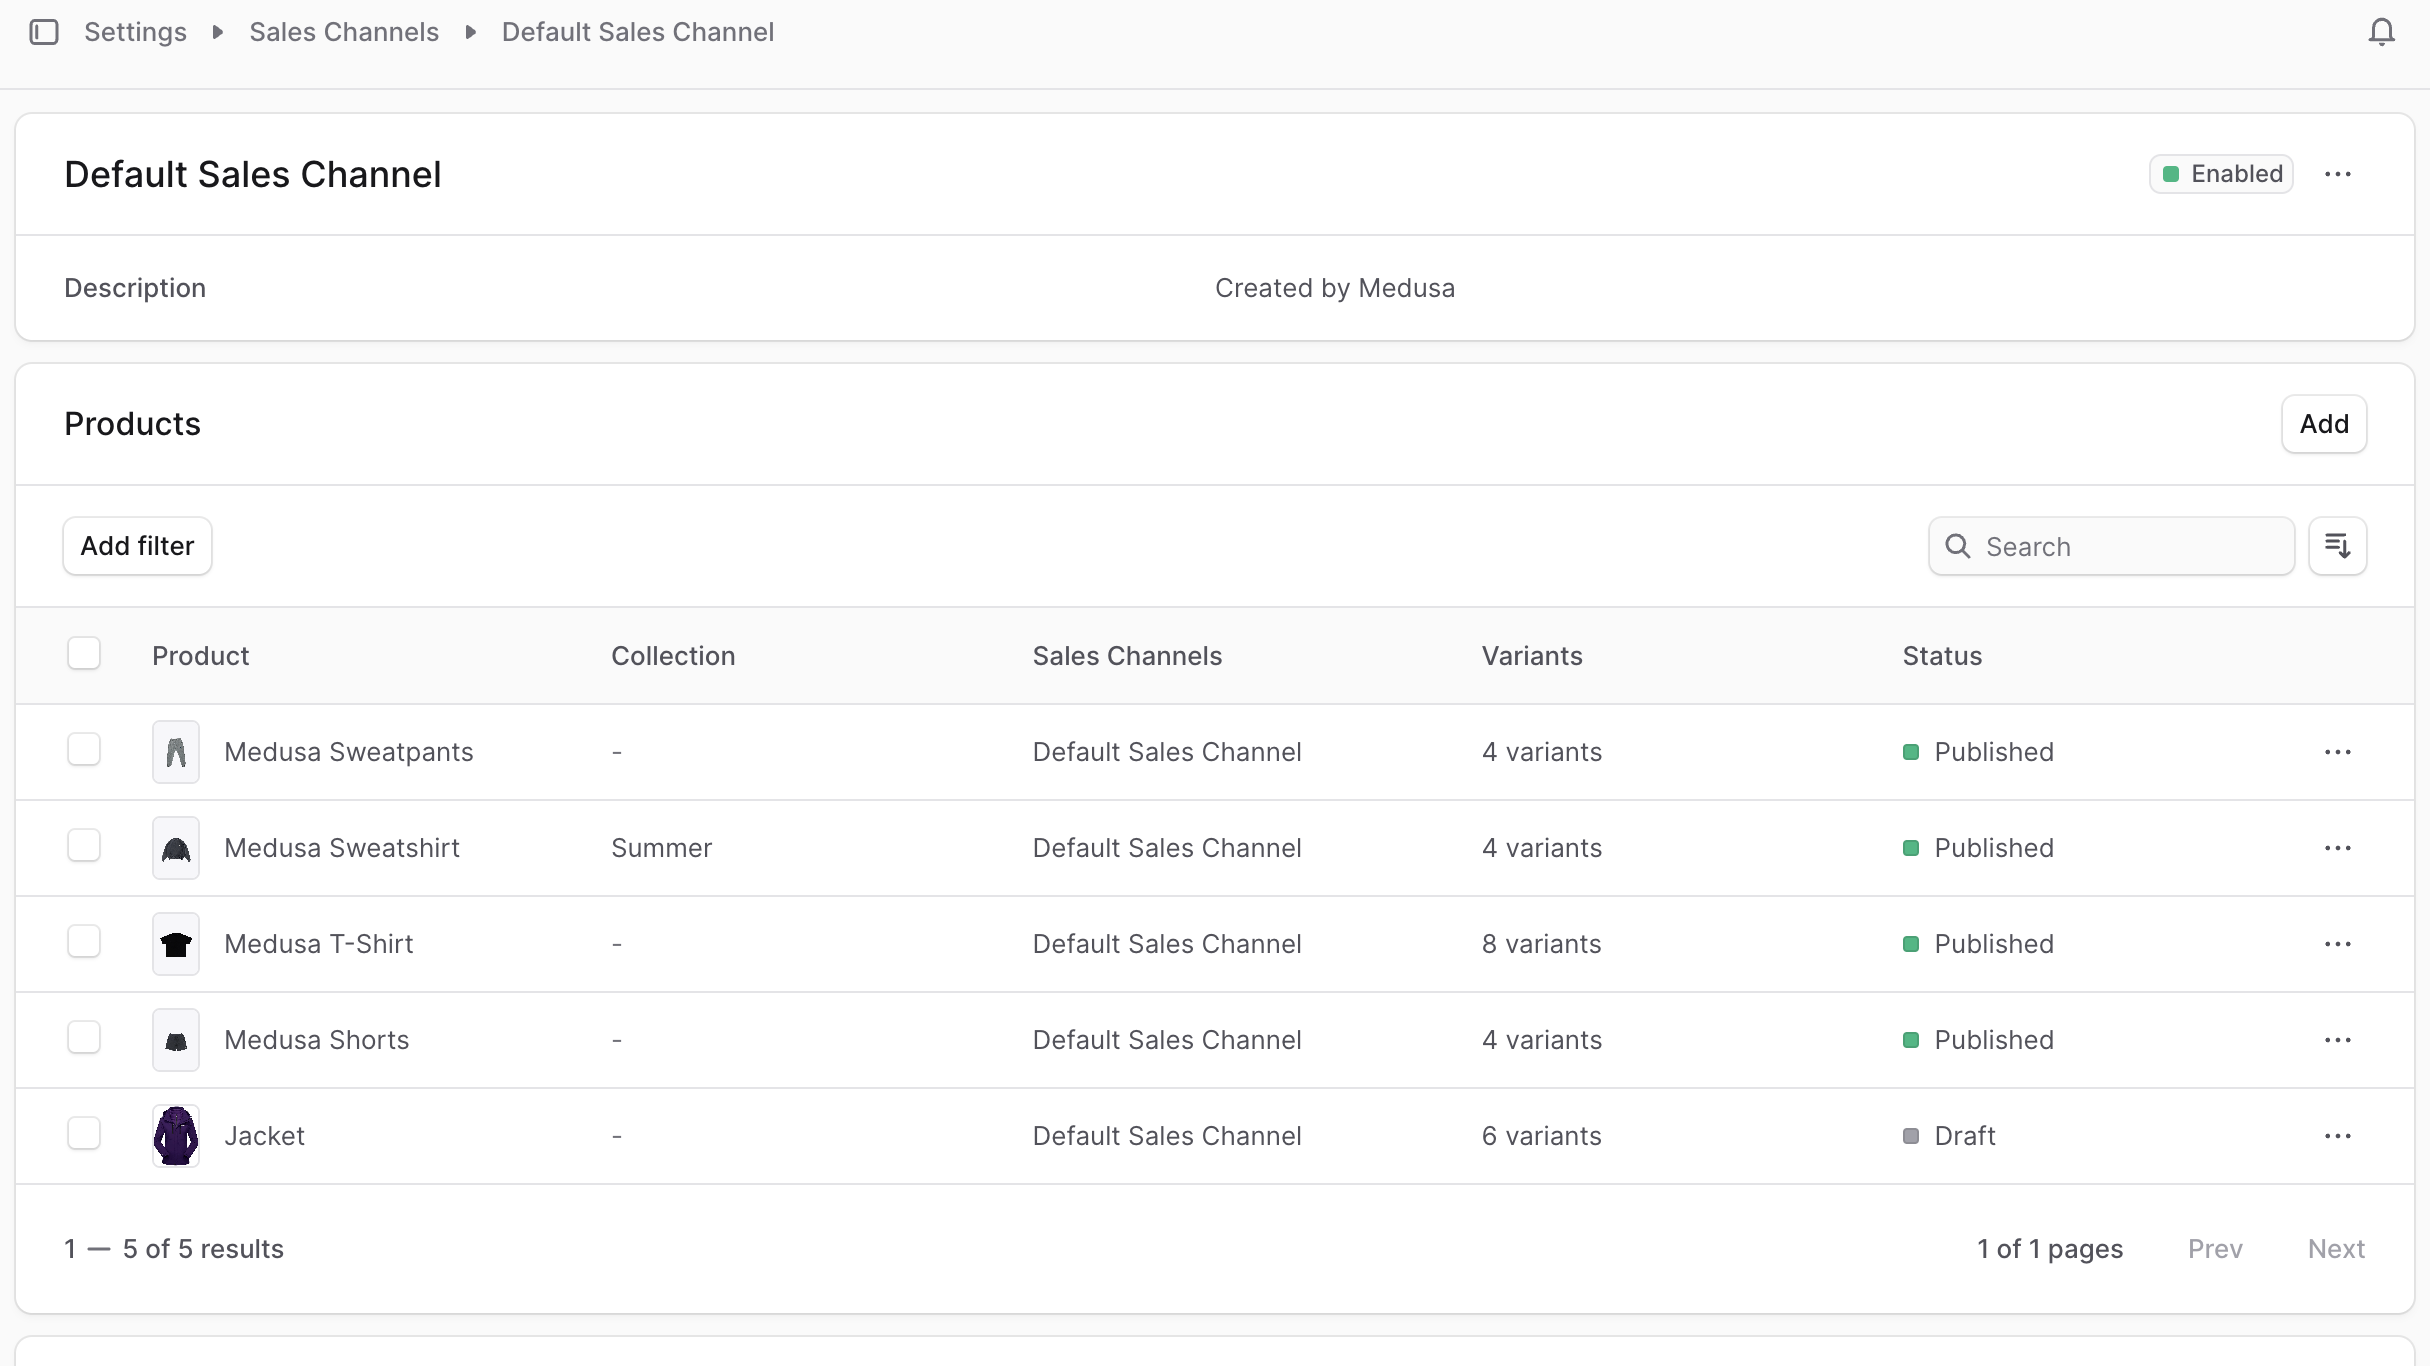
## View Sales Channel Details
|
||
|
||
To view the details of a sales channel:
|
||
|
||
1. Go to Settings → Sales Channels.
|
||
2. Click on a sales channel from the list.
|
||
|
||
This opens the sales channel's details page where you can also manage the sales channel.
|
||
|
||
|
||
|
||
### Sales Channel Status
|
||
|
||
The status of a sales channel is shown at the top right of the first section in the details page. The status can be either "Enabled" or "Disabled". You can change the status by [editing the sales channel details](#edit-sales-channel-details).
|
||
|
||
---
|
||
|
||
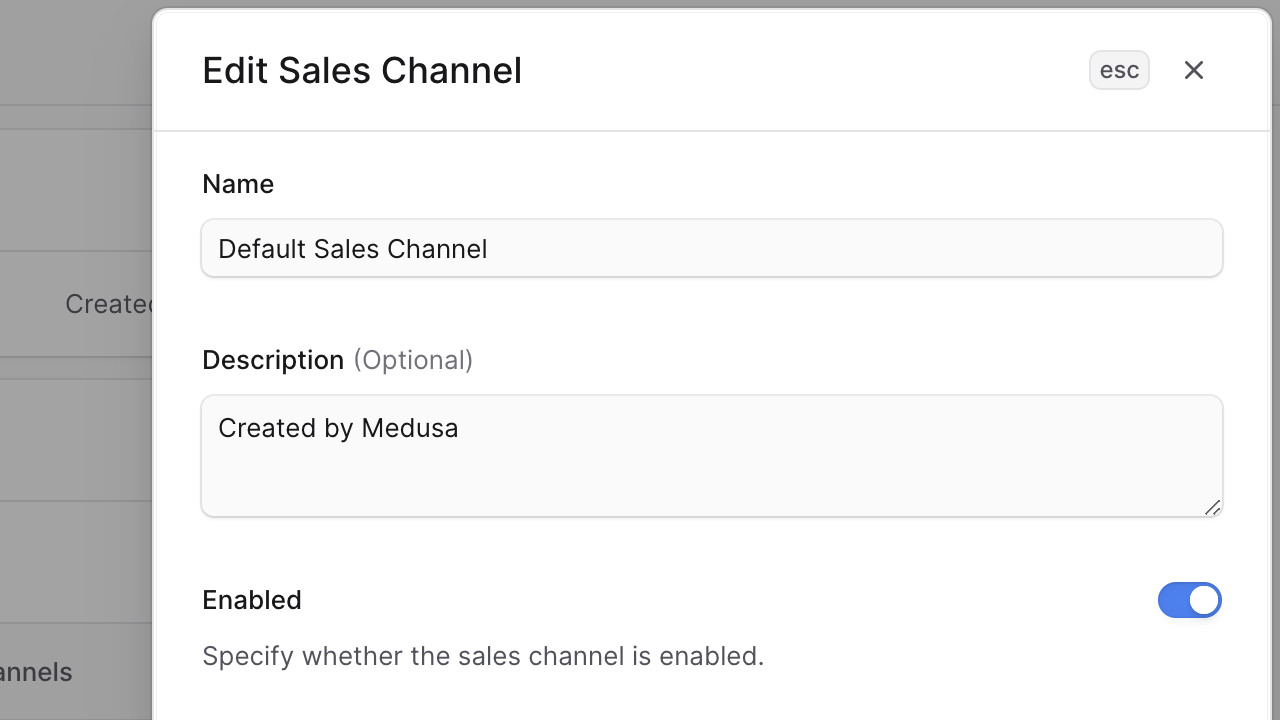
## Edit Sales Channel Details
|
||
|
||
To edit the details of a sales channel:
|
||
|
||
1. Go to the sales channel's details page.
|
||
2. Click the <InlineIcon Icon={EllipsisHorizontal} alt="three-dots" /> icon at the top right of the first section.
|
||
3. Choose Edit from the dropdown.
|
||
4. In the side window that opens, you can edit the sales channel's name, description, and whether it's enabled.
|
||
5. Once you're done, click the Save button.
|
||
|
||
|
||
|
||
---
|
||
|
||
## Manage Products in Sales Channel
|
||
|
||
You can manage the products available in a sales channel from the sales channel's details page.
|
||
|
||
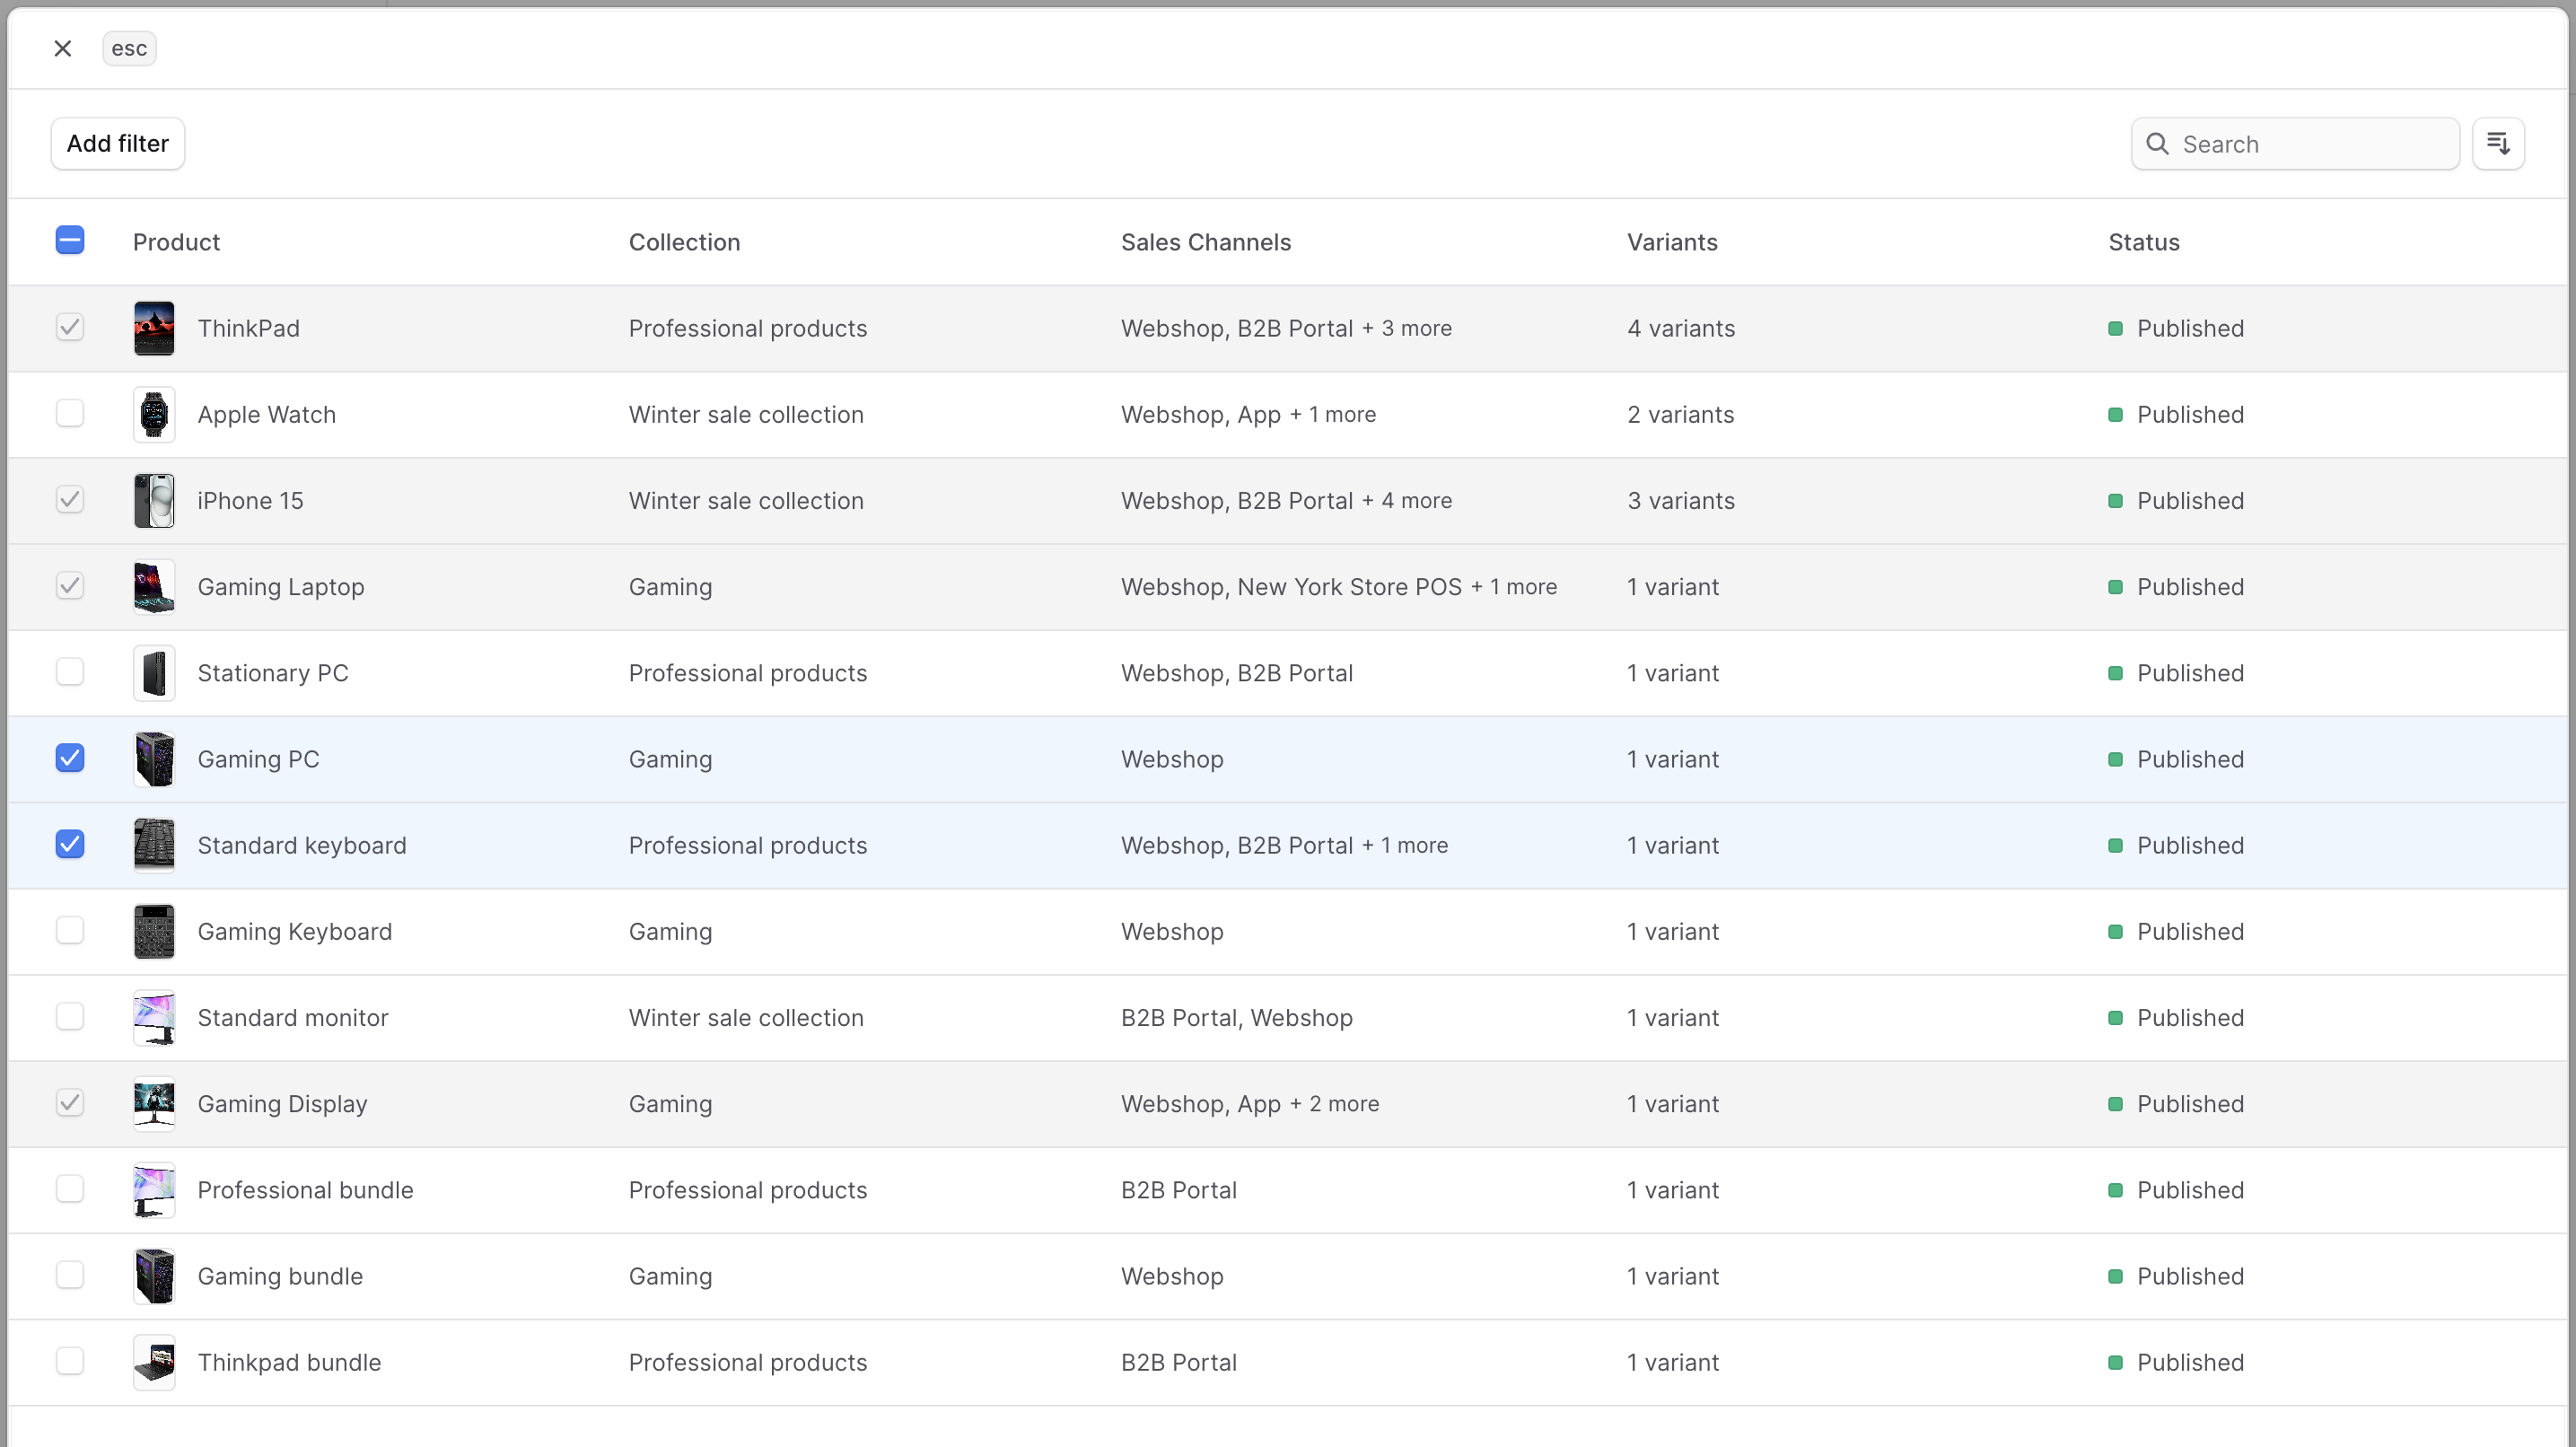
### Add Products to Sales Channel
|
||
|
||
To add products to a sales channel:
|
||
|
||
1. Go to the sales channel's details page.
|
||
2. Click the "Add" button in the "Products" section.
|
||
3. In the list that opens, check the products you want to add to the sales channel.
|
||
4. Click the Save button.
|
||
|
||
|
||
|
||
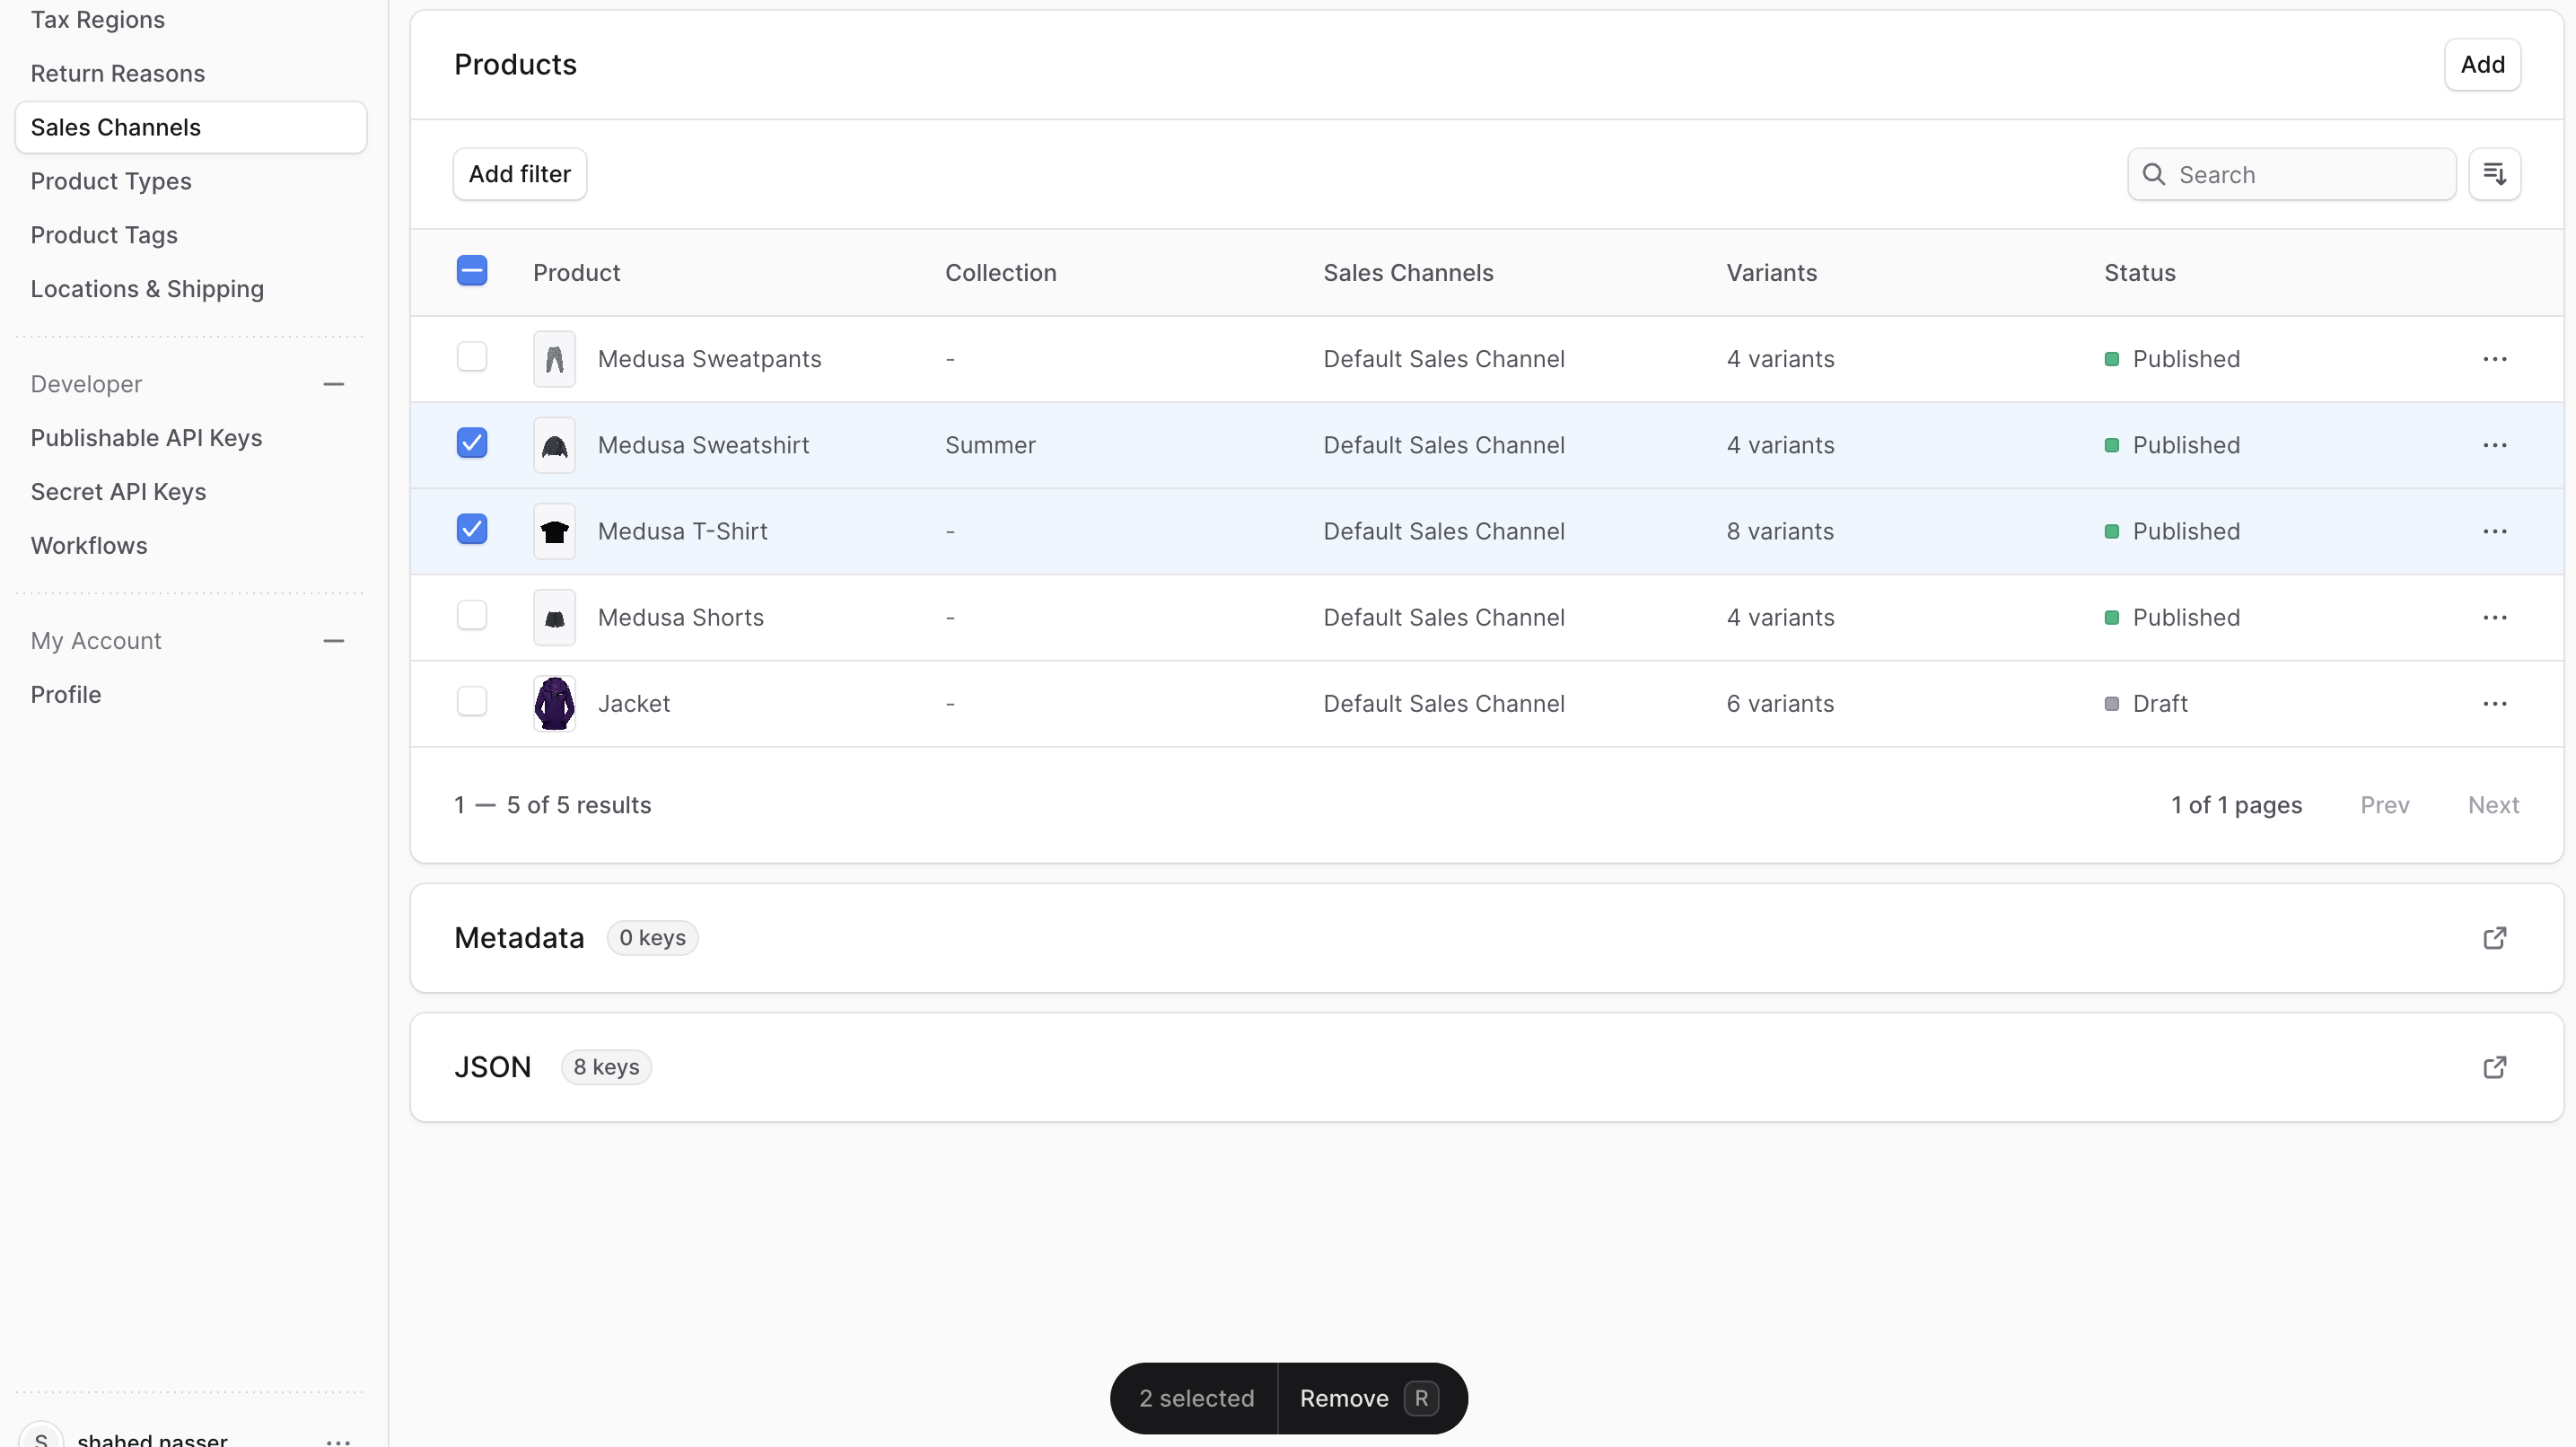
### Remove Products from Sales Channel
|
||
|
||
To remove products from a sales channel:
|
||
|
||
1. Go to the sales channel's details page.
|
||
2. Under the "Products" section, check the products you want to remove from the sales channel.
|
||
3. Press <Kbd>R</Kbd> or click the Remove button at the bottom center of the page.
|
||
4. Confirm removing the product by clicking the Delete button in the pop-up.
|
||
|
||
|
||
|
||
---
|
||
|
||
## Delete Sales Channel
|
||
|
||
<Note type="warning">
|
||
|
||
Deleting a sales channel is irreversible.
|
||
|
||
</Note>
|
||
|
||
To delete a sales channel:
|
||
|
||
1. Go to the sales channel's details page.
|
||
2. Click the <InlineIcon Icon={EllipsisHorizontal} alt="three-dots" /> icon at the top right of the first section.
|
||
3. Choose Delete from the dropdown.
|
||
4. Confirm deleting the sales channel by entering the sales channel's name and clicking the "Delete" button in the pop-up. |