219 lines
12 KiB
Plaintext
219 lines
12 KiB
Plaintext
import { Prerequisites } from "docs-ui"
|
|
|
|
export const metadata = {
|
|
title: `Projects`,
|
|
}
|
|
|
|
# {metadata.title}
|
|
|
|
In this guide, you'll learn about projects, how to create them, view their details, and manage their settings in Cloud.
|
|
|
|
## What is a Project?
|
|
|
|
A project is the collection of resources, environments, deployments, and settings related to a Medusa application deployed to the Cloud. The project is linked to a GitHub repository that hosts the Medusa application's code.
|
|
|
|
To deploy a Medusa application to the Cloud, you create a project for it. Cloud will automatically set up and configure the necessary resources in the project to run the application, such as PostgreSQL, Redis, and S3.
|
|
|
|
Each project can have multiple environments, such as production and staging. These environments allow you to test changes before pushing them live to users. You can learn more in the [Environments documentation](../environments/page.mdx).
|
|
|
|
---
|
|
|
|
## Create a Project
|
|
|
|
In this section, you'll learn how to create a project in Cloud to deploy your Medusa application.
|
|
|
|
### Prerequisites
|
|
|
|
Before creating a project, ensure you have:
|
|
|
|
- A Medusa application whose codebase is hosted in a GitHub repository.
|
|
- If you don't have a Medusa application yet, refer to the [Installation](!docs!/learn/installation) guide to set up a new Medusa application.
|
|
- A Cloud account with a valid plan that allows creating more projects.
|
|
- If you've exceeded the number of projects limit for your plan, you can [contact support](../support/page.mdx) to upgrade your plan.
|
|
|
|
#### Medusa Application Configurations
|
|
|
|
Your Medusa application doesn't need specific configurations to be deployed to Cloud. Cloud will automatically:
|
|
|
|
- Create the necessary [server and worker instances](!docs!/learn/production/worker-mode).
|
|
- Scale your Medusa application's resources based on the traffic it receives.
|
|
- Set up and configure production resources and modules for your Medusa application:
|
|
- [Redis Cache Module](!resources!/infrastructure-modules/cache/redis)
|
|
- [Redis Event Module](!resources!/infrastructure-modules/event/redis)
|
|
- [Redis Locking Module Provider](!resources!/infrastructure-modules/locking/redis)
|
|
- [Redis Workflow Engine Module](!resources!/infrastructure-modules/workflow-engine/redis)
|
|
- [S3 File Provider Module](!resources!/infrastructure-modules/file/s3)
|
|
|
|
So, make sure to remove any of these modules from your `medusa-config.ts` file, unless you want to use custom options for them. In that case, you're expected to manually set up and manage those resources externally and configure them in your Medusa application.
|
|
|
|
### Steps to Create a Project
|
|
|
|
To create a project:
|
|
|
|
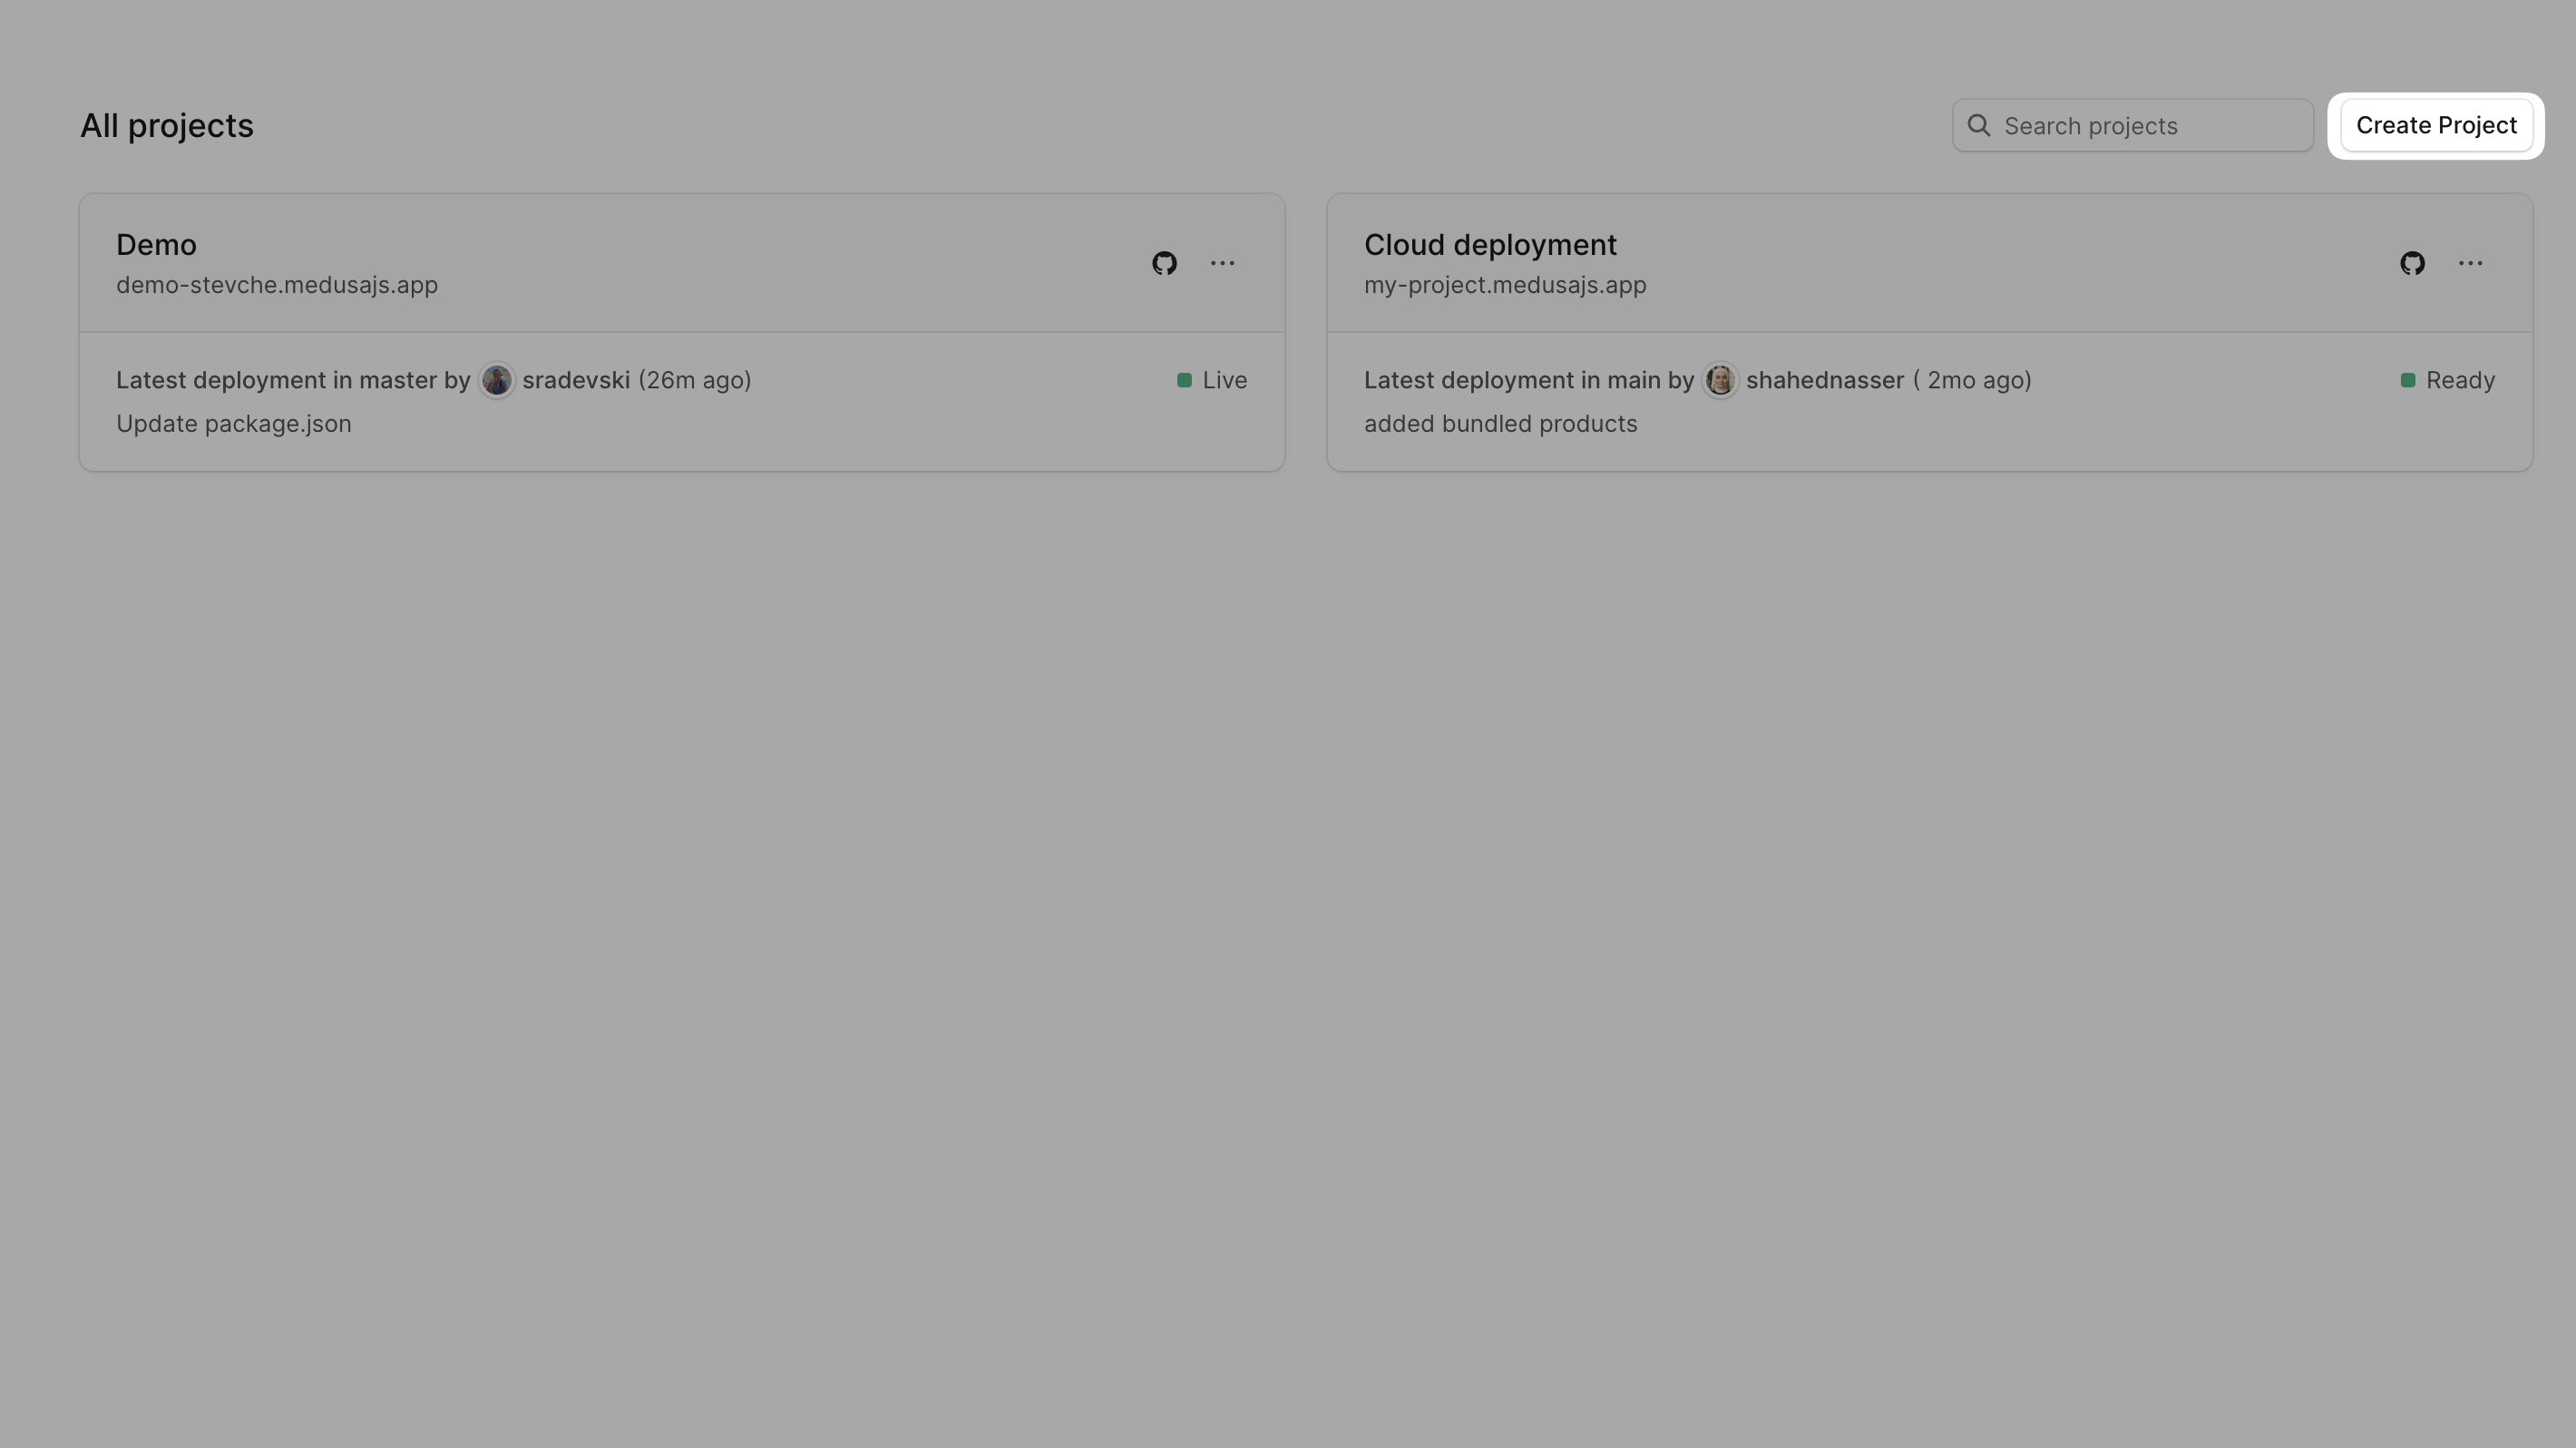
1. Make sure you're viewing the [correct organization's dashboard in Cloud](../organizations/page.mdx#switch-organization).
|
|
2. Click on the **Create Project** button in your organization's dashboard.
|
|
|
|
|
|
|
|
3. If you haven't authenticated with GitHub yet, you'll be asked to authenticate first.
|
|
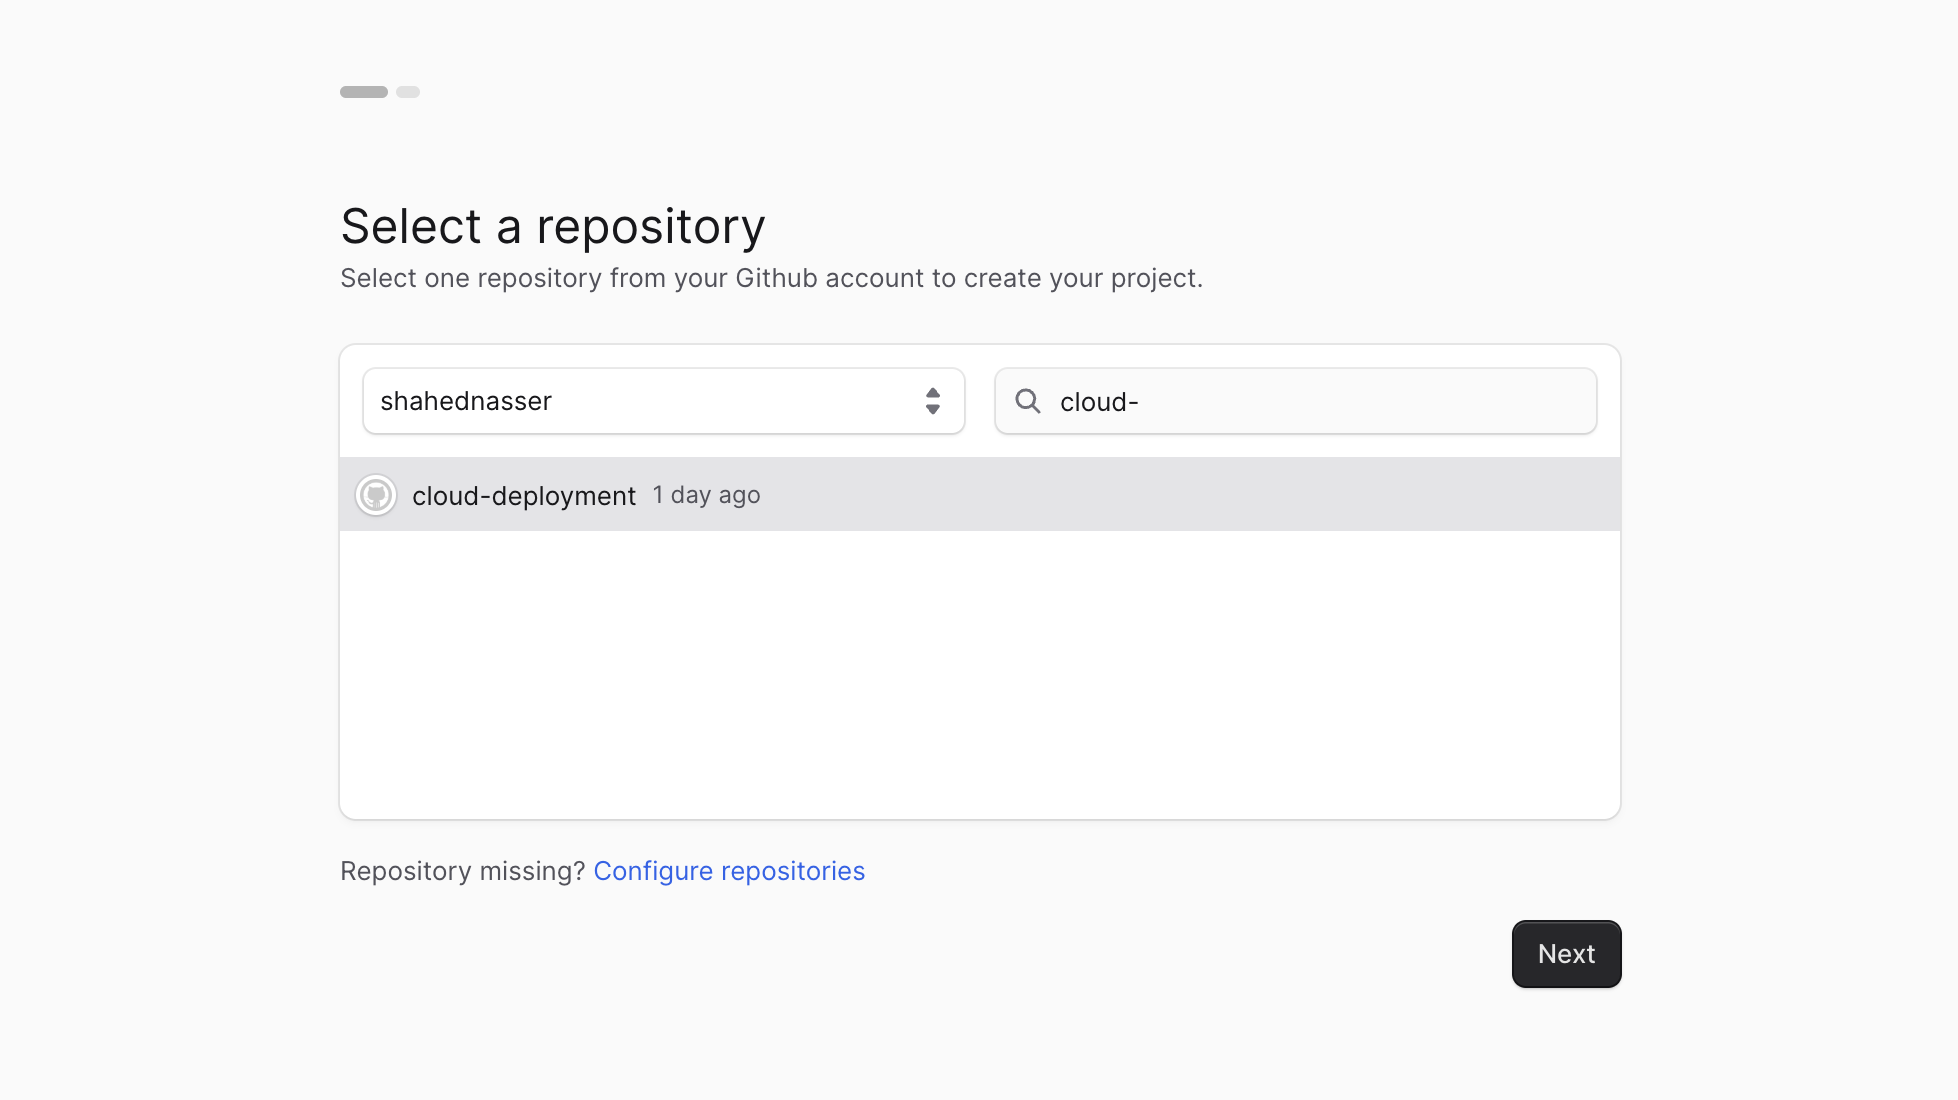
4. Once you're authenticated, you'll need to select a GitHub account and the repository that contains your Medusa application's code. The repository can be public or private.
|
|
- If you don't see your repository, you can click the "Configure repositories" link to manage the GitHub repositories that Cloud can access.
|
|
5. Once you find the repository, select it and click the "Next" button.
|
|
|
|
|
|
|
|
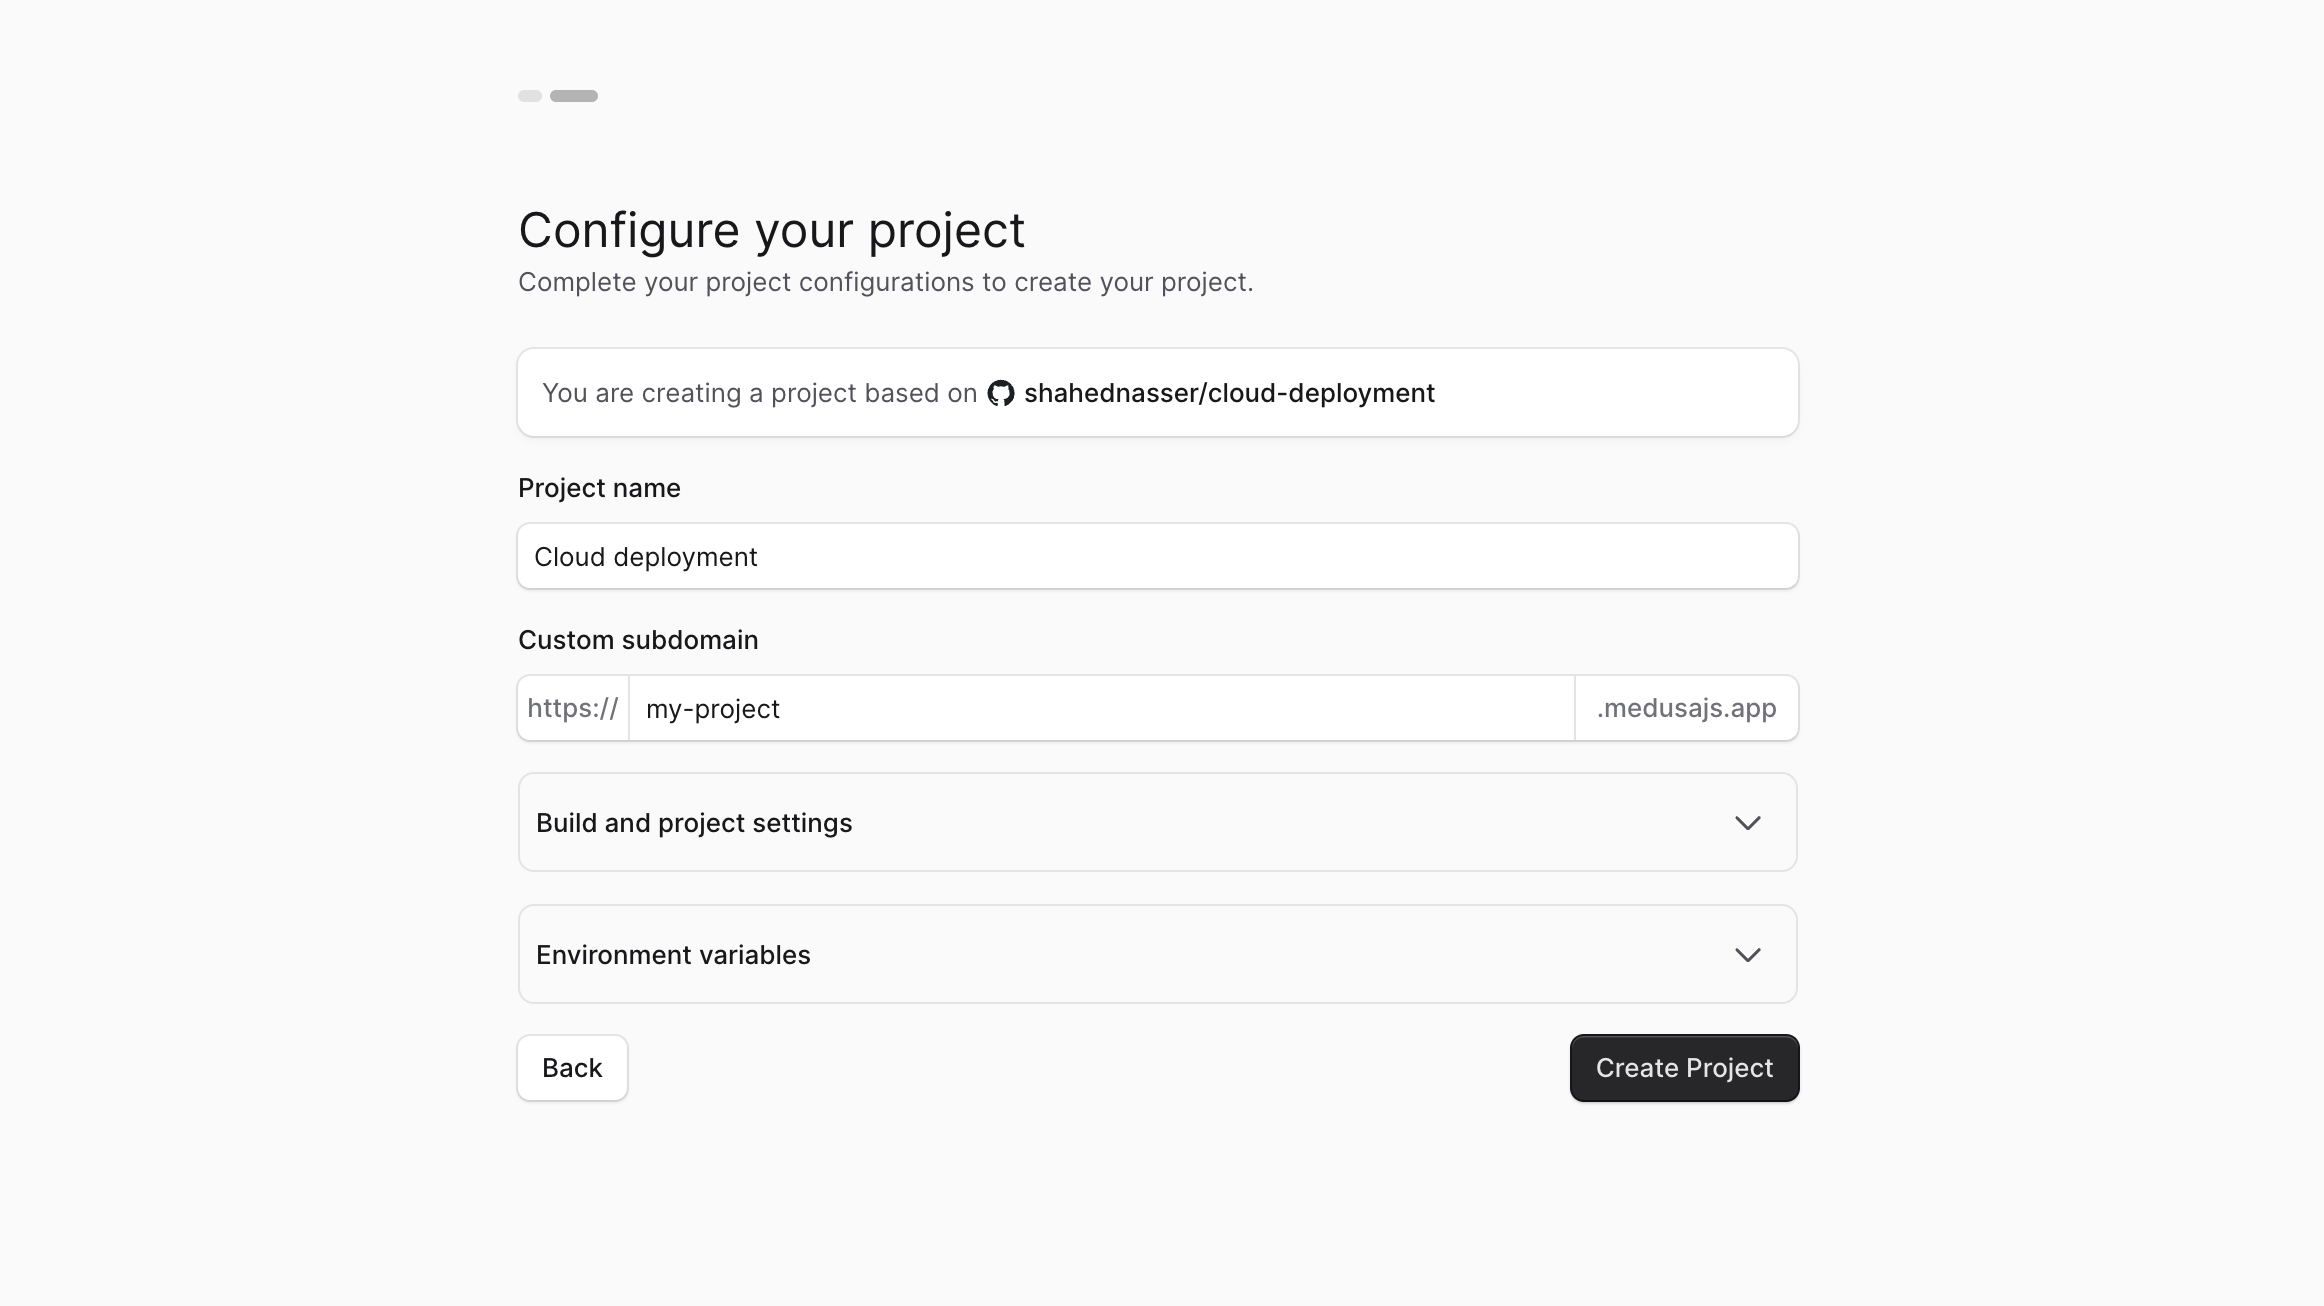
6. In the next step, configure the project's settings:
|
|
- Enter the name of the project.
|
|
- Enter a custom subdomain for the project. All projects are subdomains of `medusajs.app`. For example, if you enter `my-project`, the project will be accessible at `my-project.medusajs.app`. Refer to the [subdomain restrictions](#subdomain-restrictions) section for more details.
|
|
|
|
|
|
|
|
7. You can optionally change the "Build and project" settings by expanding its section:
|
|
- Select a region to deploy the project. For better performance, choose a region that's closer to your target users. The region can't be changed later.
|
|
- If you don't find the region you need, you can [contact support](../support/page.mdx) to request it.
|
|
- If your project is in a monorepo, you can specify the path to the Medusa project in the repository. Otherwise, leave it empty.
|
|
- You can change the email and password for the admin user created for the project. These are the credentials you'll use to access the Medusa Admin.
|
|
|
|

|
|
|
|
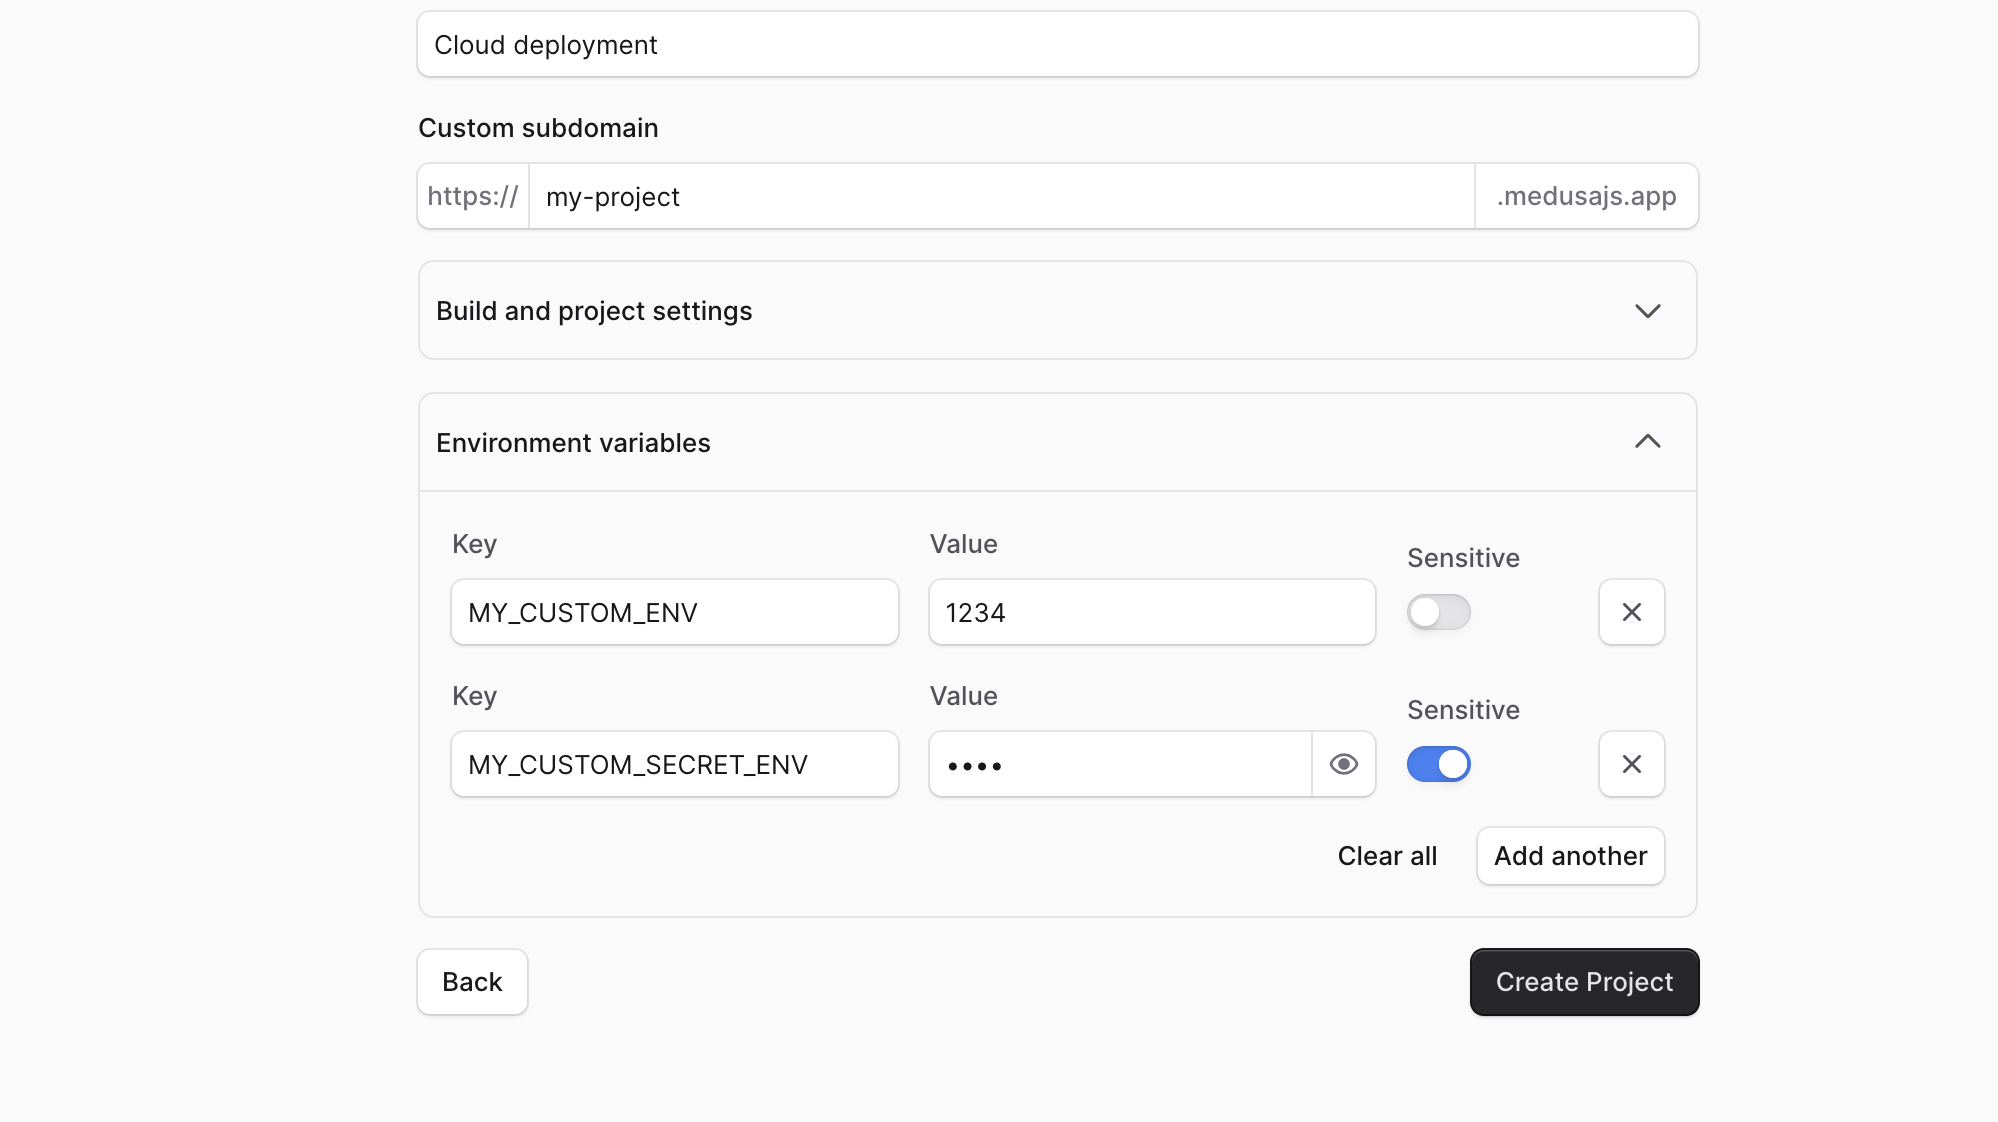
8. You can optionally add Environment Variables by expanding its section:
|
|
- Enter the key and value for each environment variable you want to add.
|
|
- Mark the variable as "Sensitive" to hide its value in the UI.
|
|
- To add more variables, click the "Add another" button.
|
|
- You can also add and change environment variables later in the project's environment settings.
|
|
|
|
|
|
|
|
9. Once you're done configuring the project, click the **Create Project** button.
|
|
|
|
After creating the project, it will take a few minutes to create the necessary resources for it and deploy it. You'll be redirected to the organization dashboard, where you can see the project in the list of projects.
|
|
|
|
<Note>
|
|
|
|
If the project creation takes too long, check out the [troubleshooting section](#troubleshooting-project-creation).
|
|
|
|
</Note>
|
|
|
|
|
|
|
|
If you click on the project, you'll be taken to the project's dashboard, where you can view [its details and status](#find-project-details).
|
|
|
|
Once the project is created and deployed, you'll receive a notification in the Cloud dashboard. You can also view its status in the list of projects and in the project's details.
|
|
|
|
|
|
|
|
### Troubleshooting Project Creation
|
|
|
|
If you encounter any issues while creating a project:
|
|
|
|
- [Check the build and runtime logs of the project's production deployment](../logs/page.mdx).
|
|
- [Contact support for help](../support/page.mdx).
|
|
|
|
### Subdomain Restrictions
|
|
|
|
When you choose a subdomain for your project, it must be at least five characters long. It also can't be one of the following reserved subdomains:
|
|
|
|
- `medusa`
|
|
- `admin`
|
|
- `staging`
|
|
- `production`
|
|
- `preview`
|
|
- `development`
|
|
- `proxy`.
|
|
|
|
---
|
|
|
|
## Access Deployed Project
|
|
|
|
To access the deployed project, you can access the URL of its Production environment.
|
|
|
|
Learn more in the [Deployments](../deployments/page.mdx#access-live-deployment) guide.
|
|
|
|
---
|
|
|
|
## Open Project Dashboard
|
|
|
|
To open a project's dashboard:
|
|
|
|
1. Make sure you're viewing the [correct organization's dashboard in Cloud](../organizations/page.mdx#switch-organization).
|
|
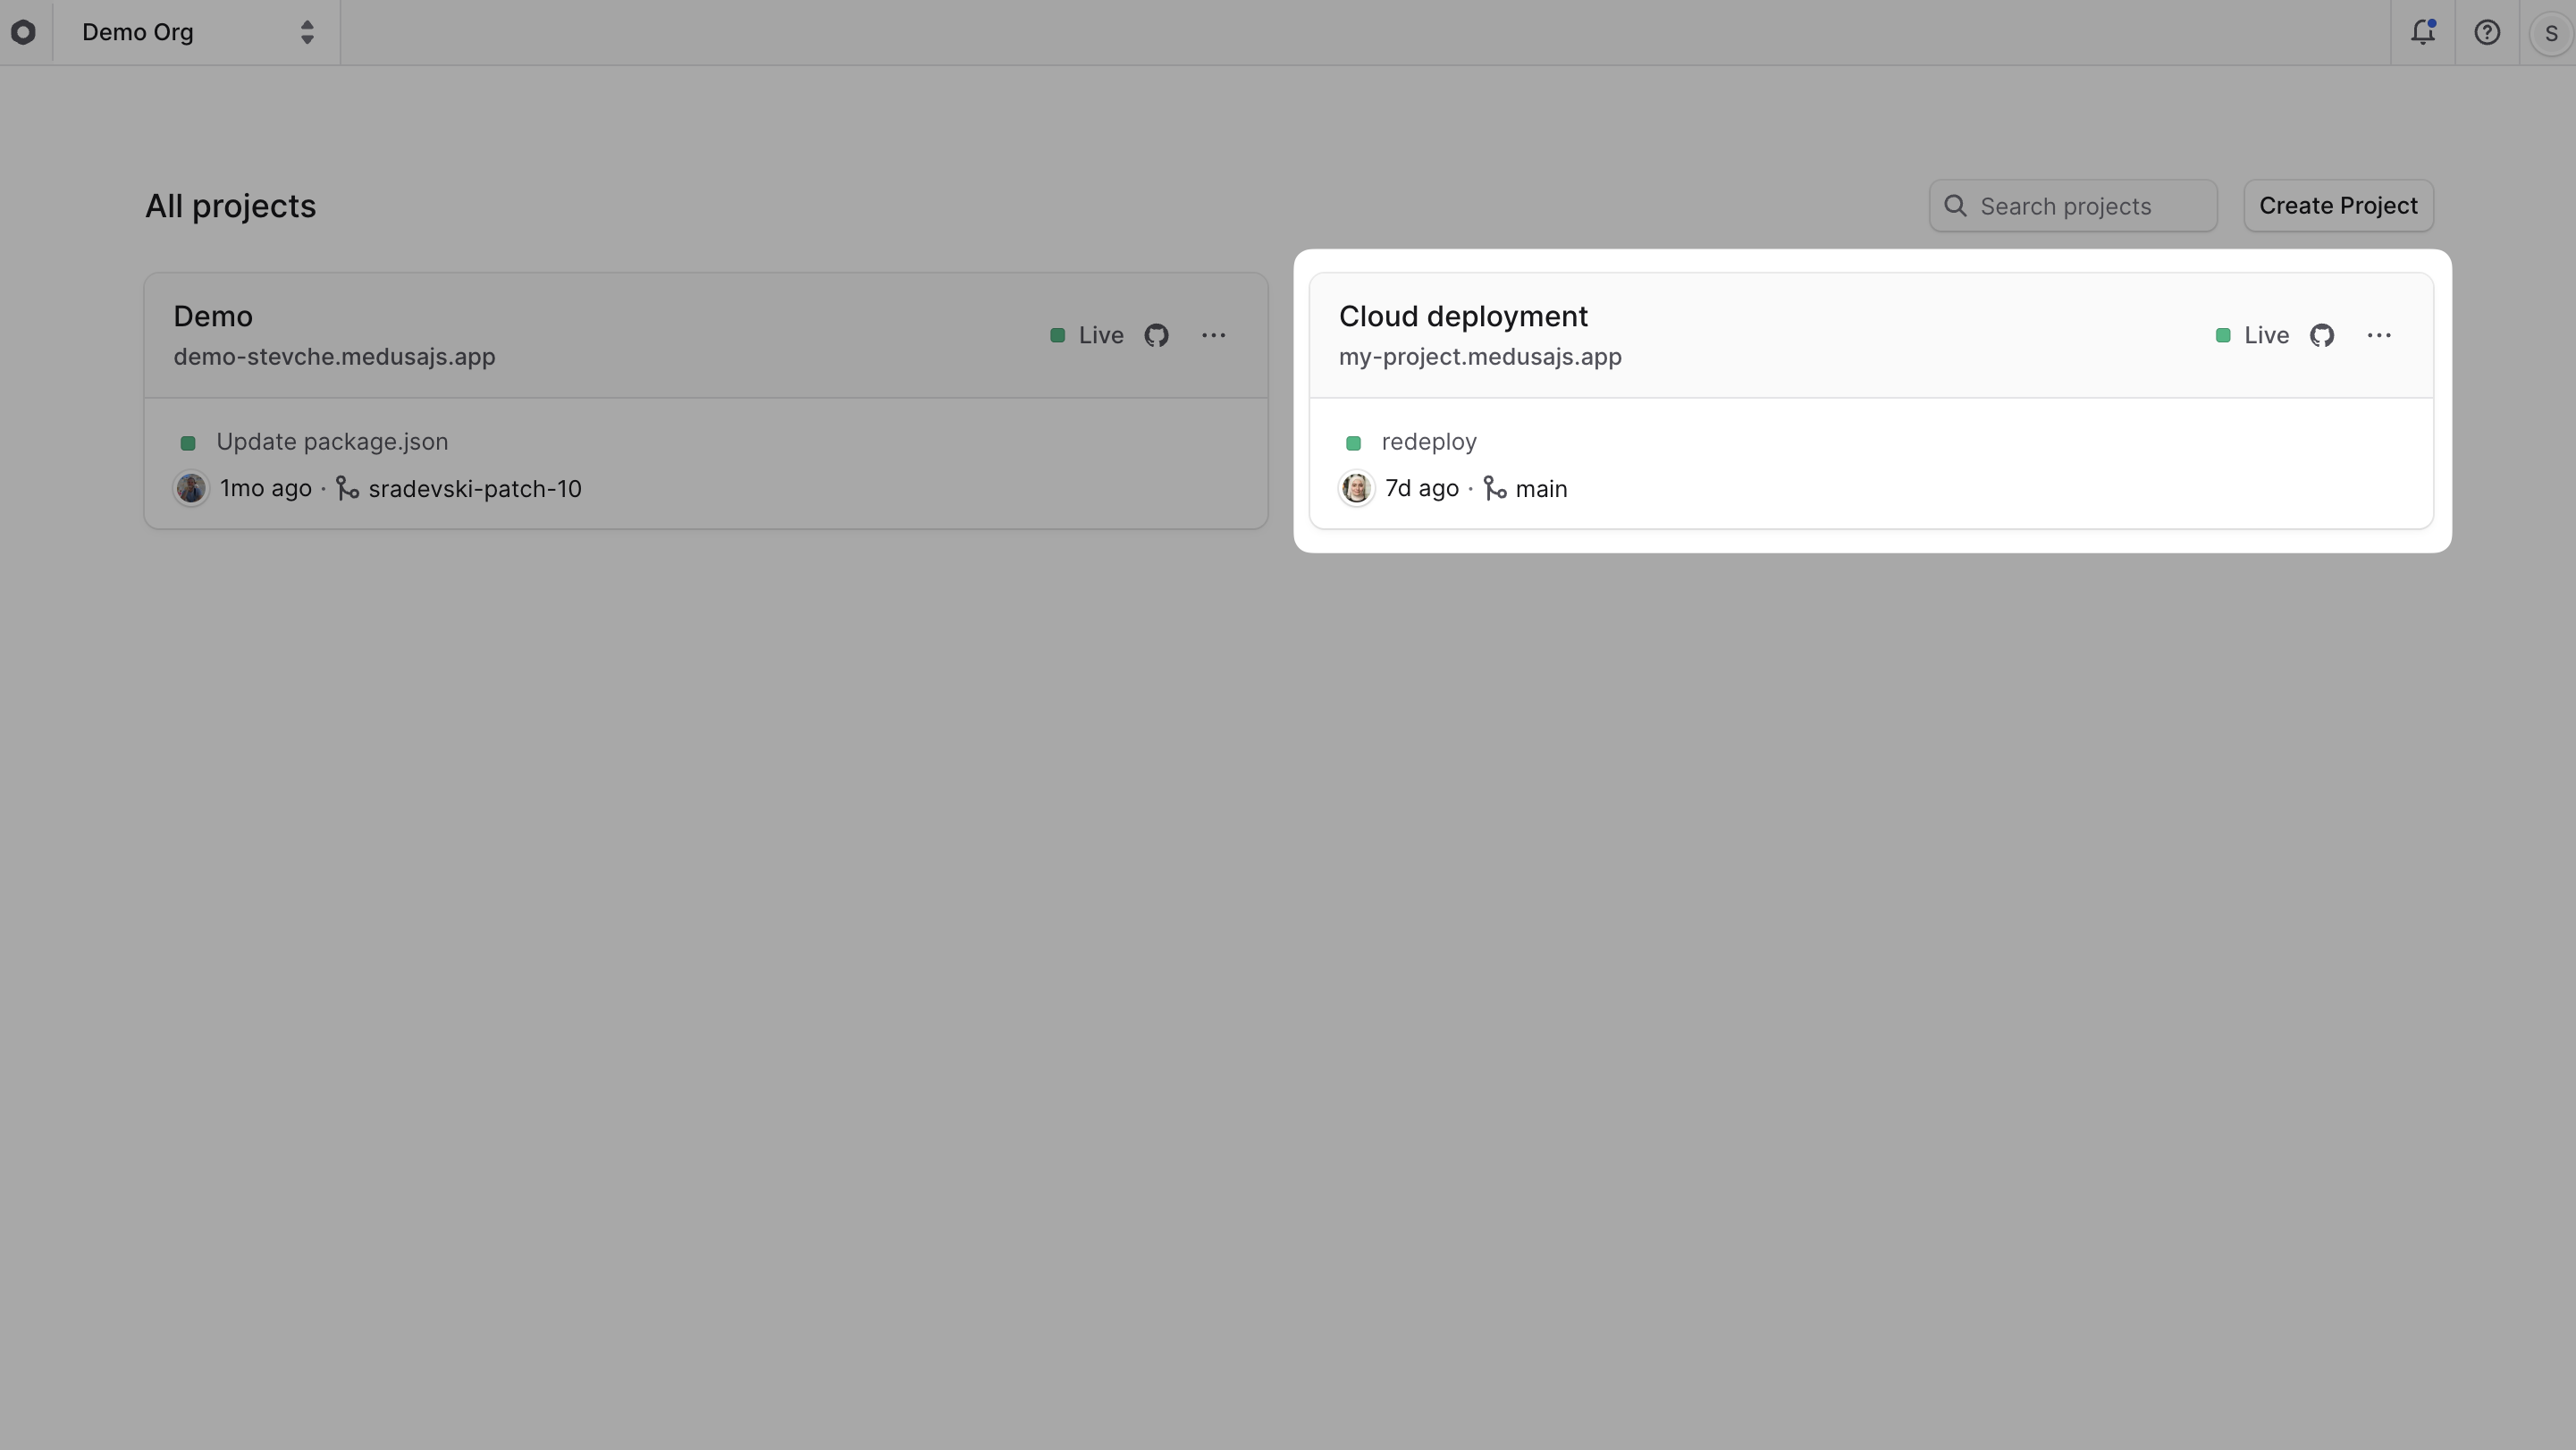
2. Open the project's dashboard by clicking on the project card in the organization's dashboard.
|
|
|
|
When you open a project's dashboard, its name will be shown at the top left next to the [organization switcher](../organizations/page.mdx#organization-switcher).
|
|
|
|
|
|
|
|
### Find Project Details
|
|
|
|
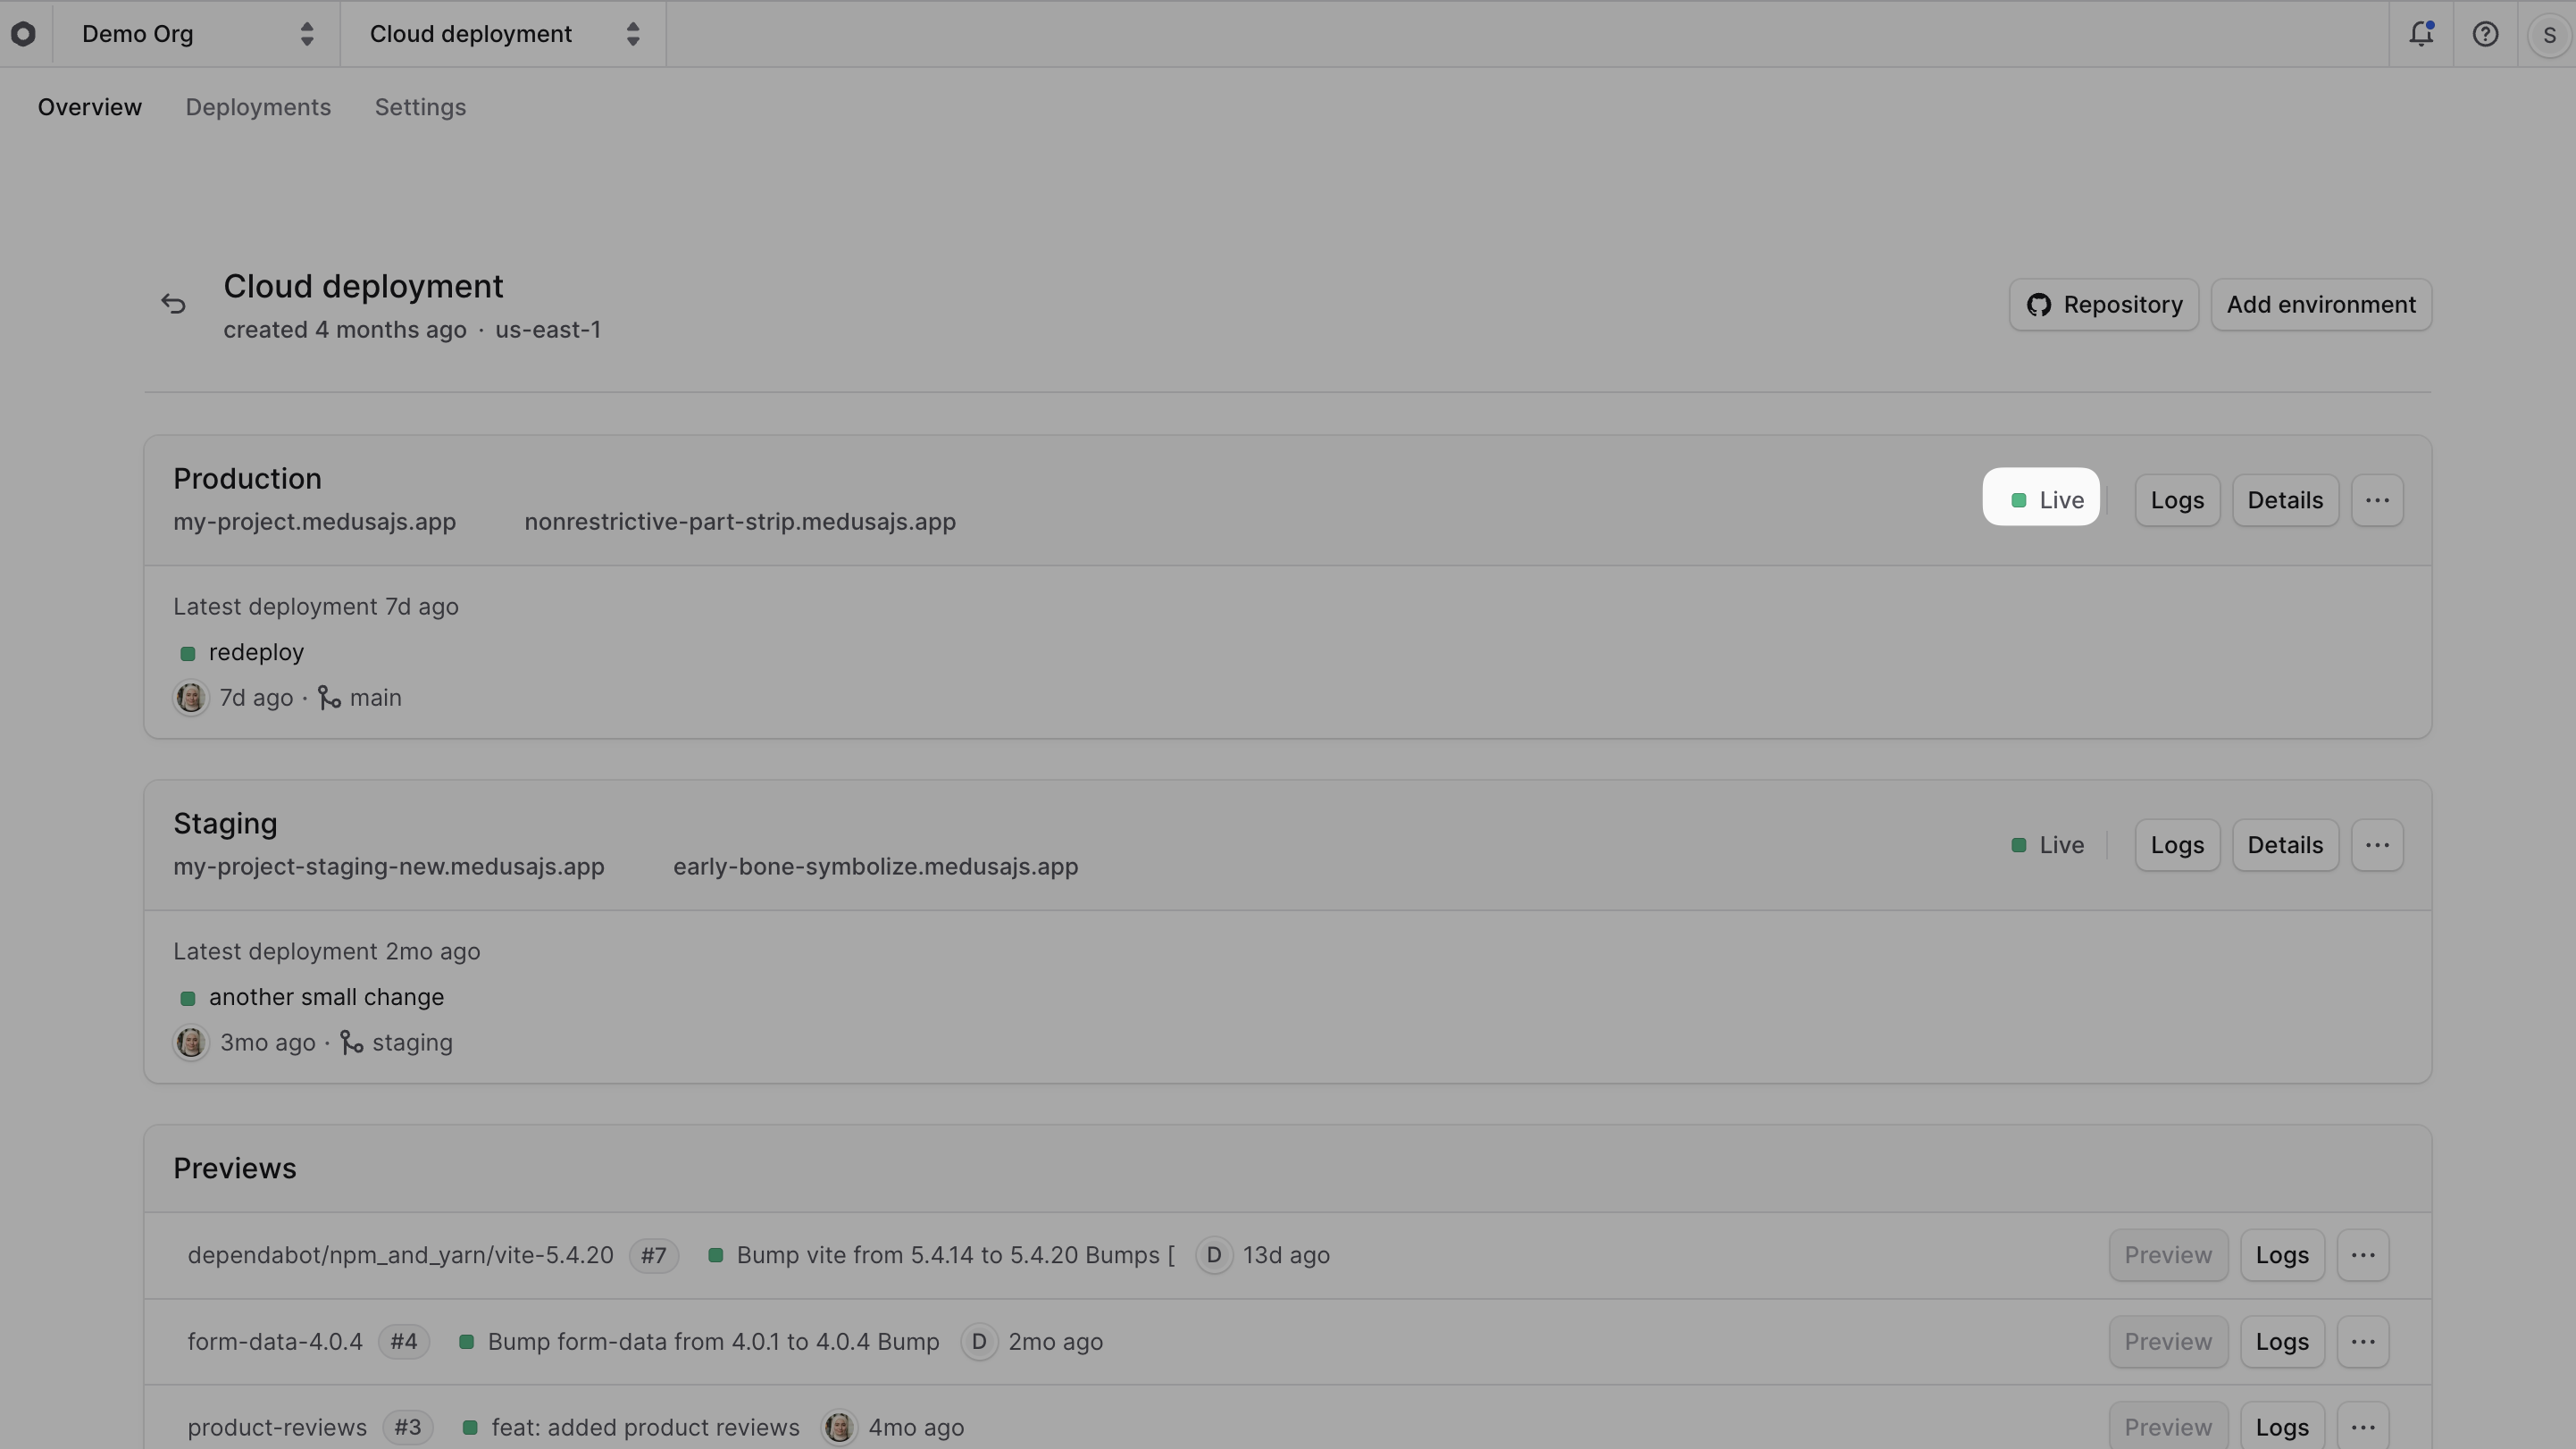
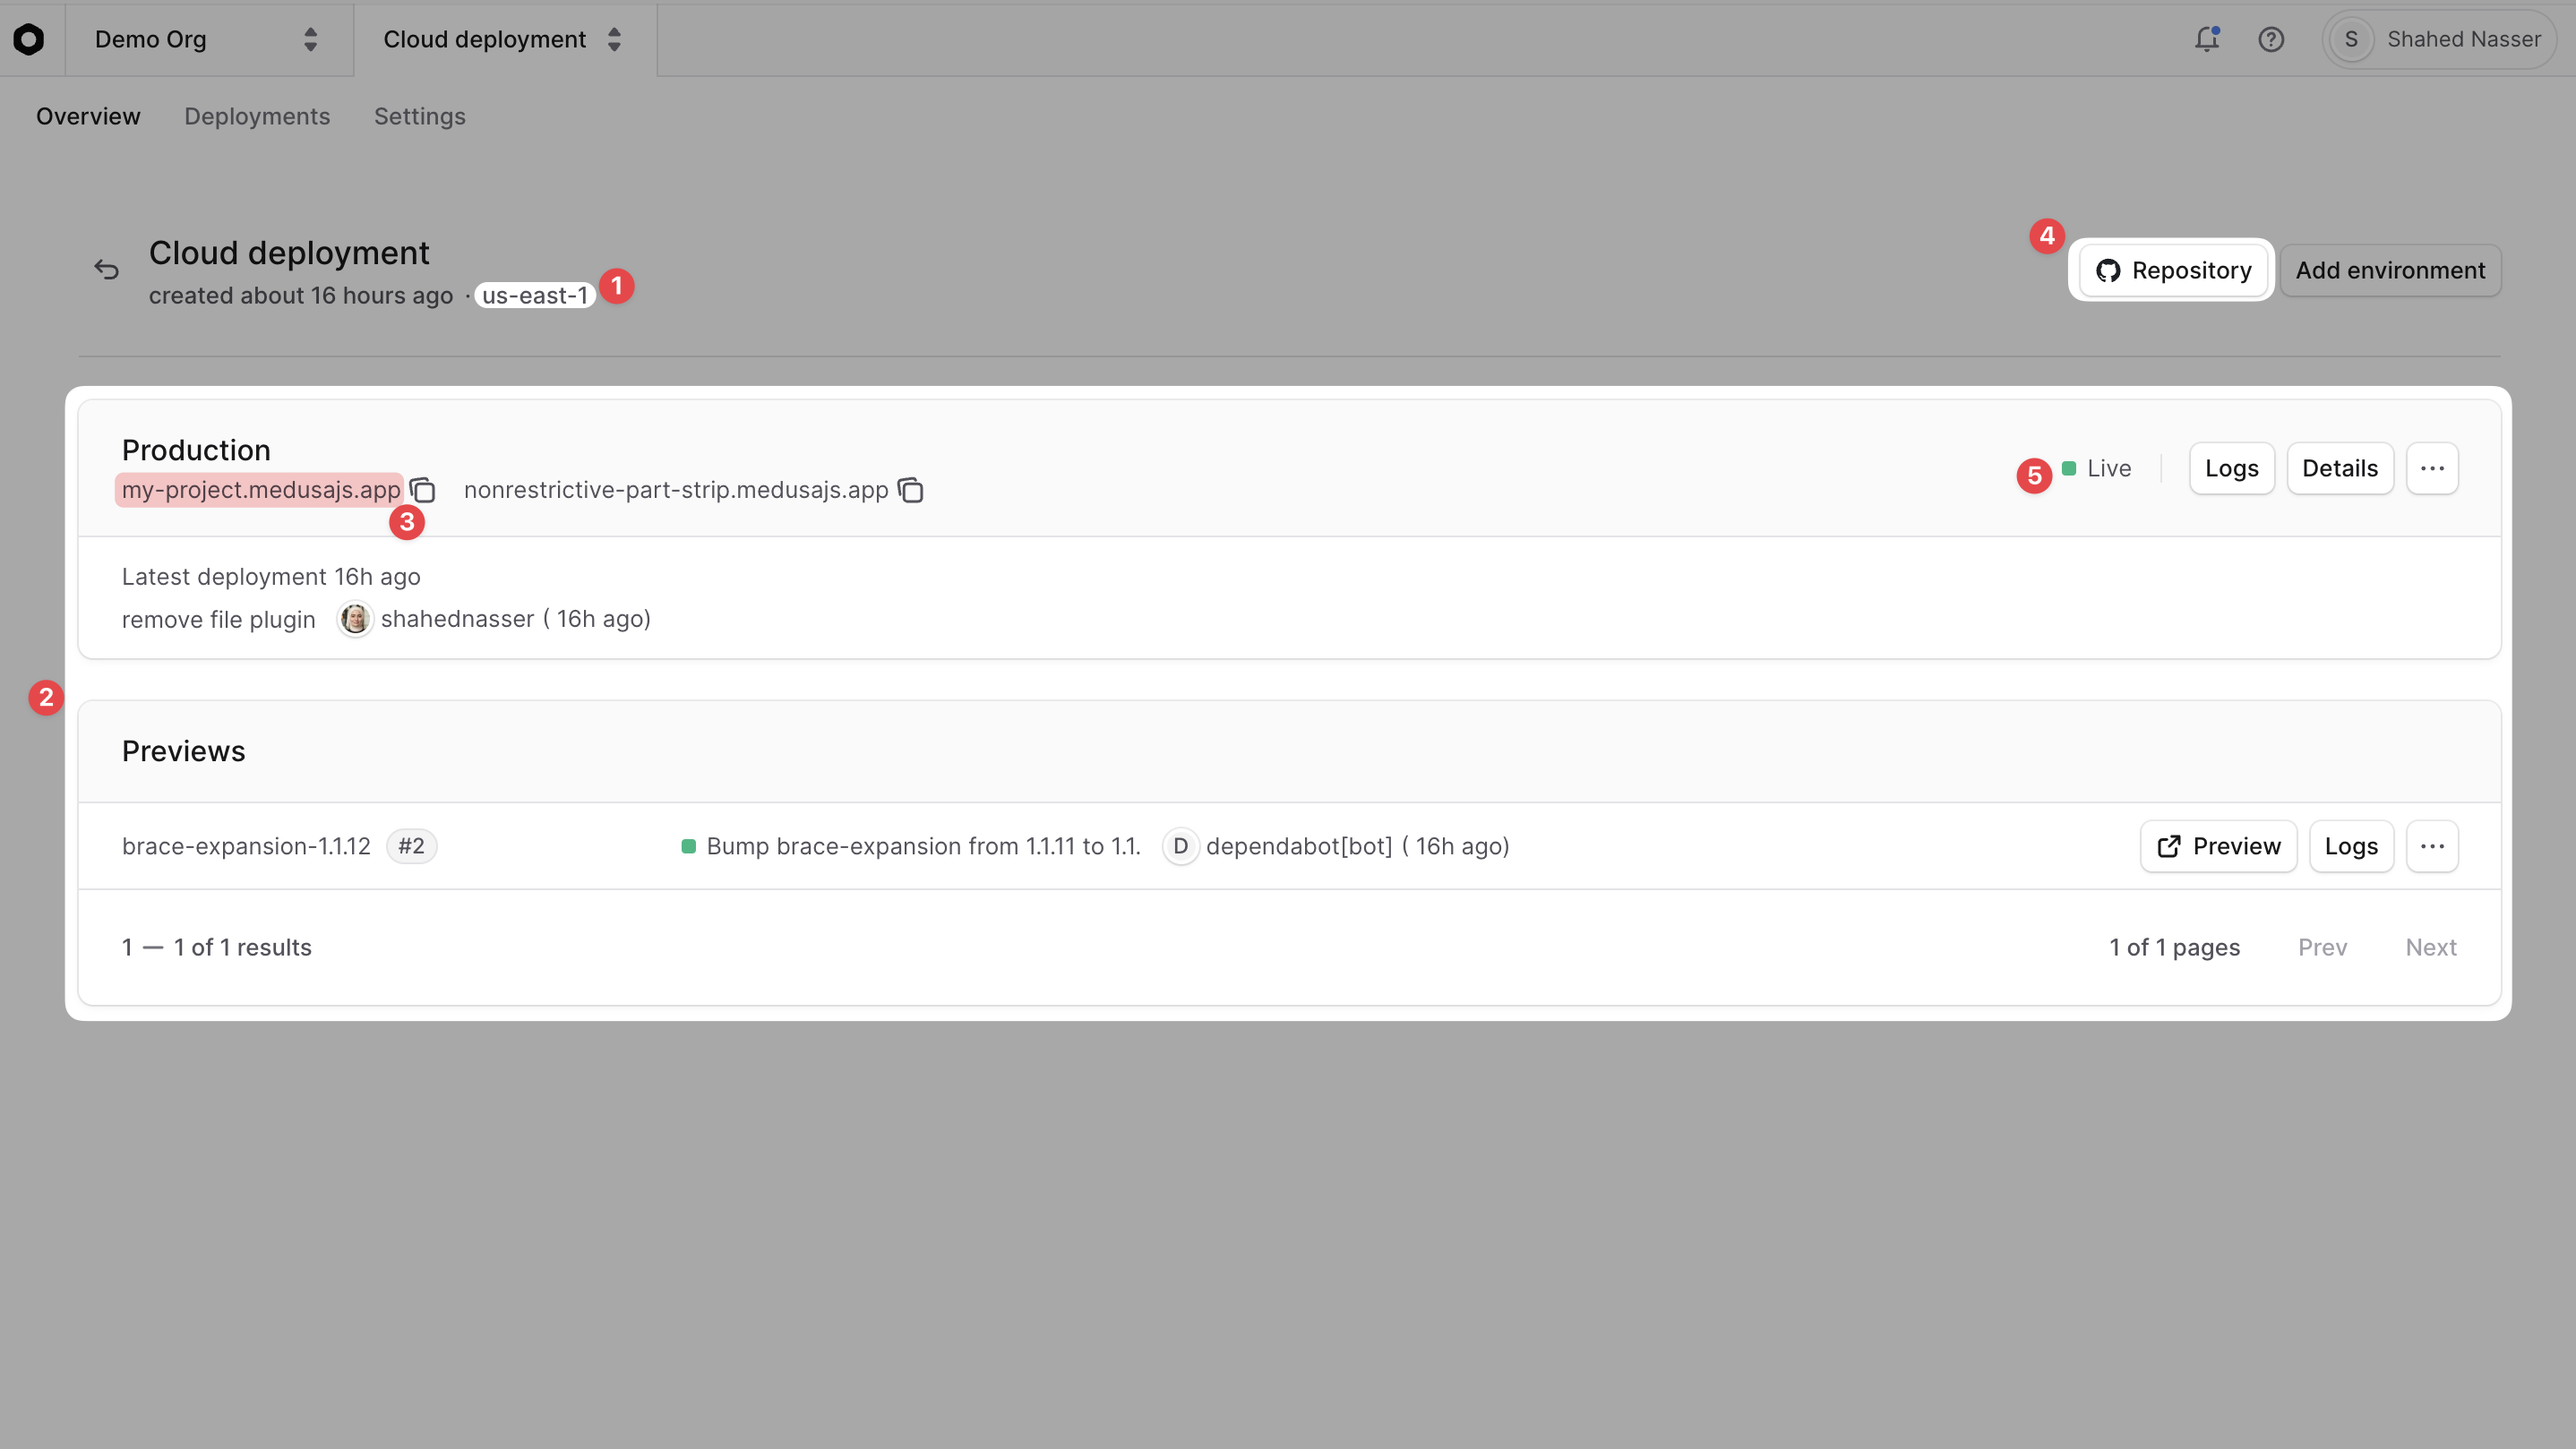
On the project's dashboard, you can view the following details:
|
|
|
|
|
|
|
|
1. **Region**: The region where the project is deployed. You'll find it below the project name.
|
|
2. **Environments**: The environments for the project are shown as cards. By default, you'll find Production and Previews environments. You can learn more about environments in the [Environments](../environments/page.mdx) guide.
|
|
- The Production environment is the live environment where your Medusa application is deployed and clients connect to.
|
|
- The Previews environments are created whenever you create a pull request in the linked GitHub repository. They allow you to preview changes before merging them into the main branch.
|
|
3. **Production URL**: The URL of the project's production deployment. You'll find it in the "Production" card under the title. Clicking it will open the production Medusa Admin in a new tab.
|
|
4. **Repository**: The GitHub repository linked to the project. You'll find it as a "Repository" button at the top right of the project's dashboard. Clicking it will open the repository in a new tab.
|
|
5. **Production Status**: The status of the project's environment, which may be "Live" or "Building". Learn more in the [Deployments](../deployments/page.mdx#deployment-statuses-and-lifecycle) guide.
|
|
|
|
### Switch Projects
|
|
|
|
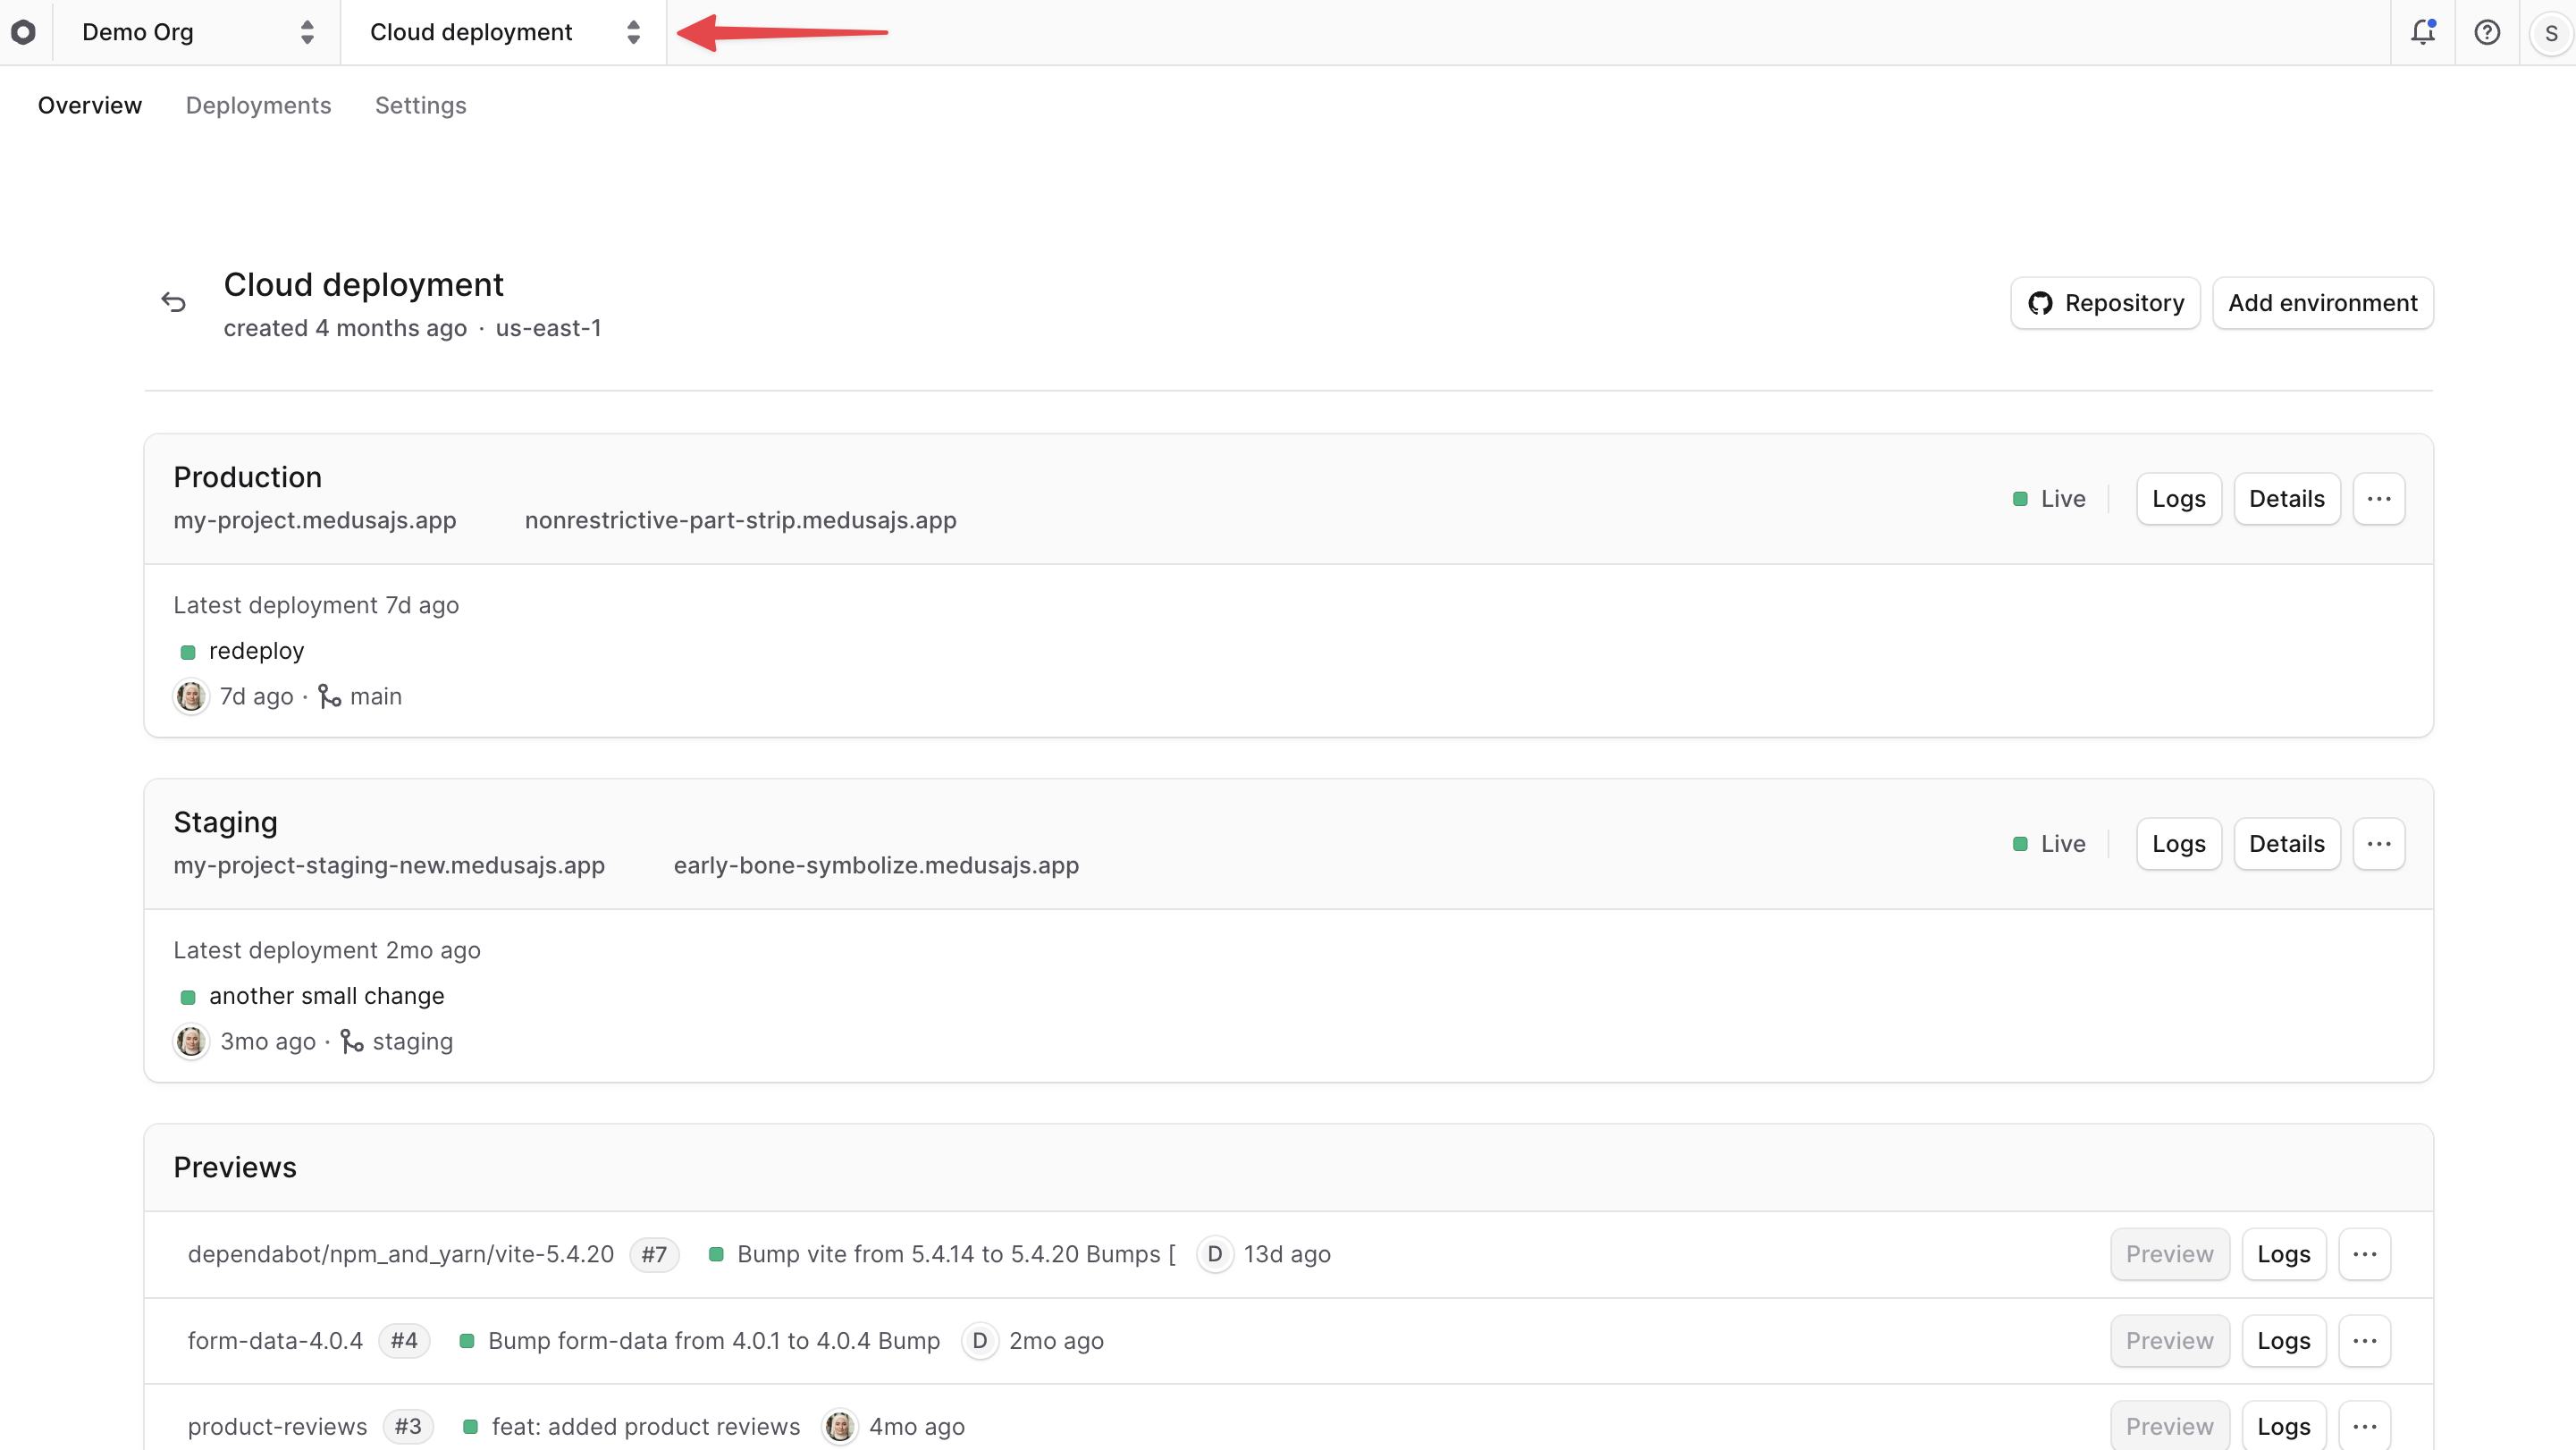
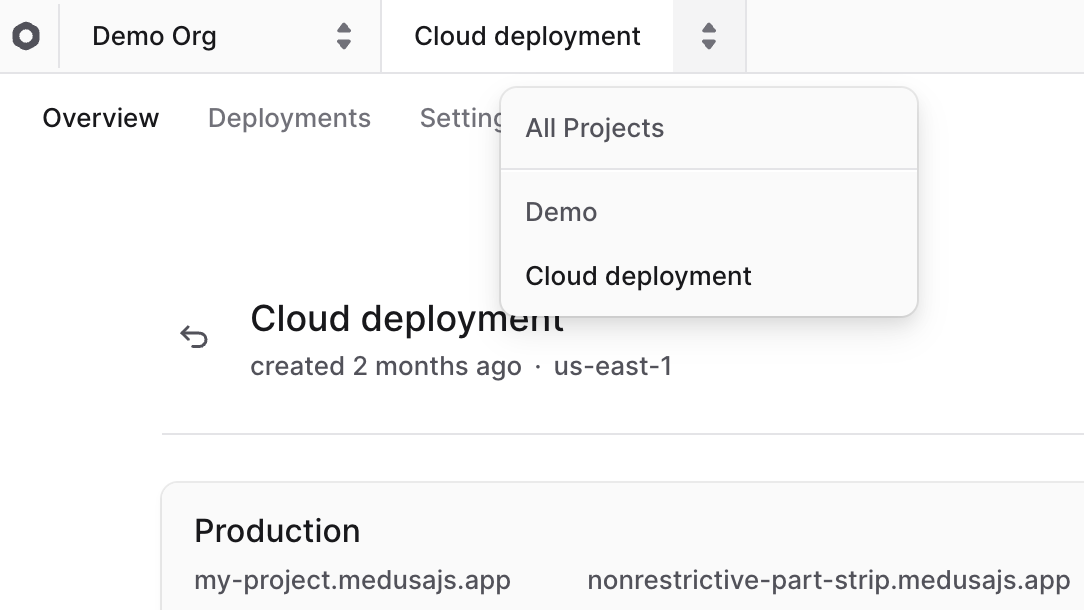
The project's name at the top left of the dashboard is also a project switcher.
|
|
|
|
To switch to a different project:
|
|
|
|
1. Click on the project's name at the top left of the Cloud dashboard, next to the organization name.
|
|
2. Choose the project you want to switch to from the dropdown.
|
|
|
|
|
|
|
|
This will change the view to the selected project, and you'll see its details, environments, and settings.
|
|
|
|
---
|
|
|
|
## View Project Deployments
|
|
|
|
To view the deployments of a project, click on the "Deployments" tab in the project's dashboard. This will show you a list of all deployments for the project, including their status, environment, and how long the deployment took.
|
|
|
|
Learn more in the [Deployments](../deployments/page.mdx) guide.
|
|
|
|
---
|
|
|
|
## Edit Project Details
|
|
|
|
After creating a project, you can edit its general details, such as its name and root directory in the repository, and manage its preview settings.
|
|
|
|
To edit a project's general details:
|
|
|
|
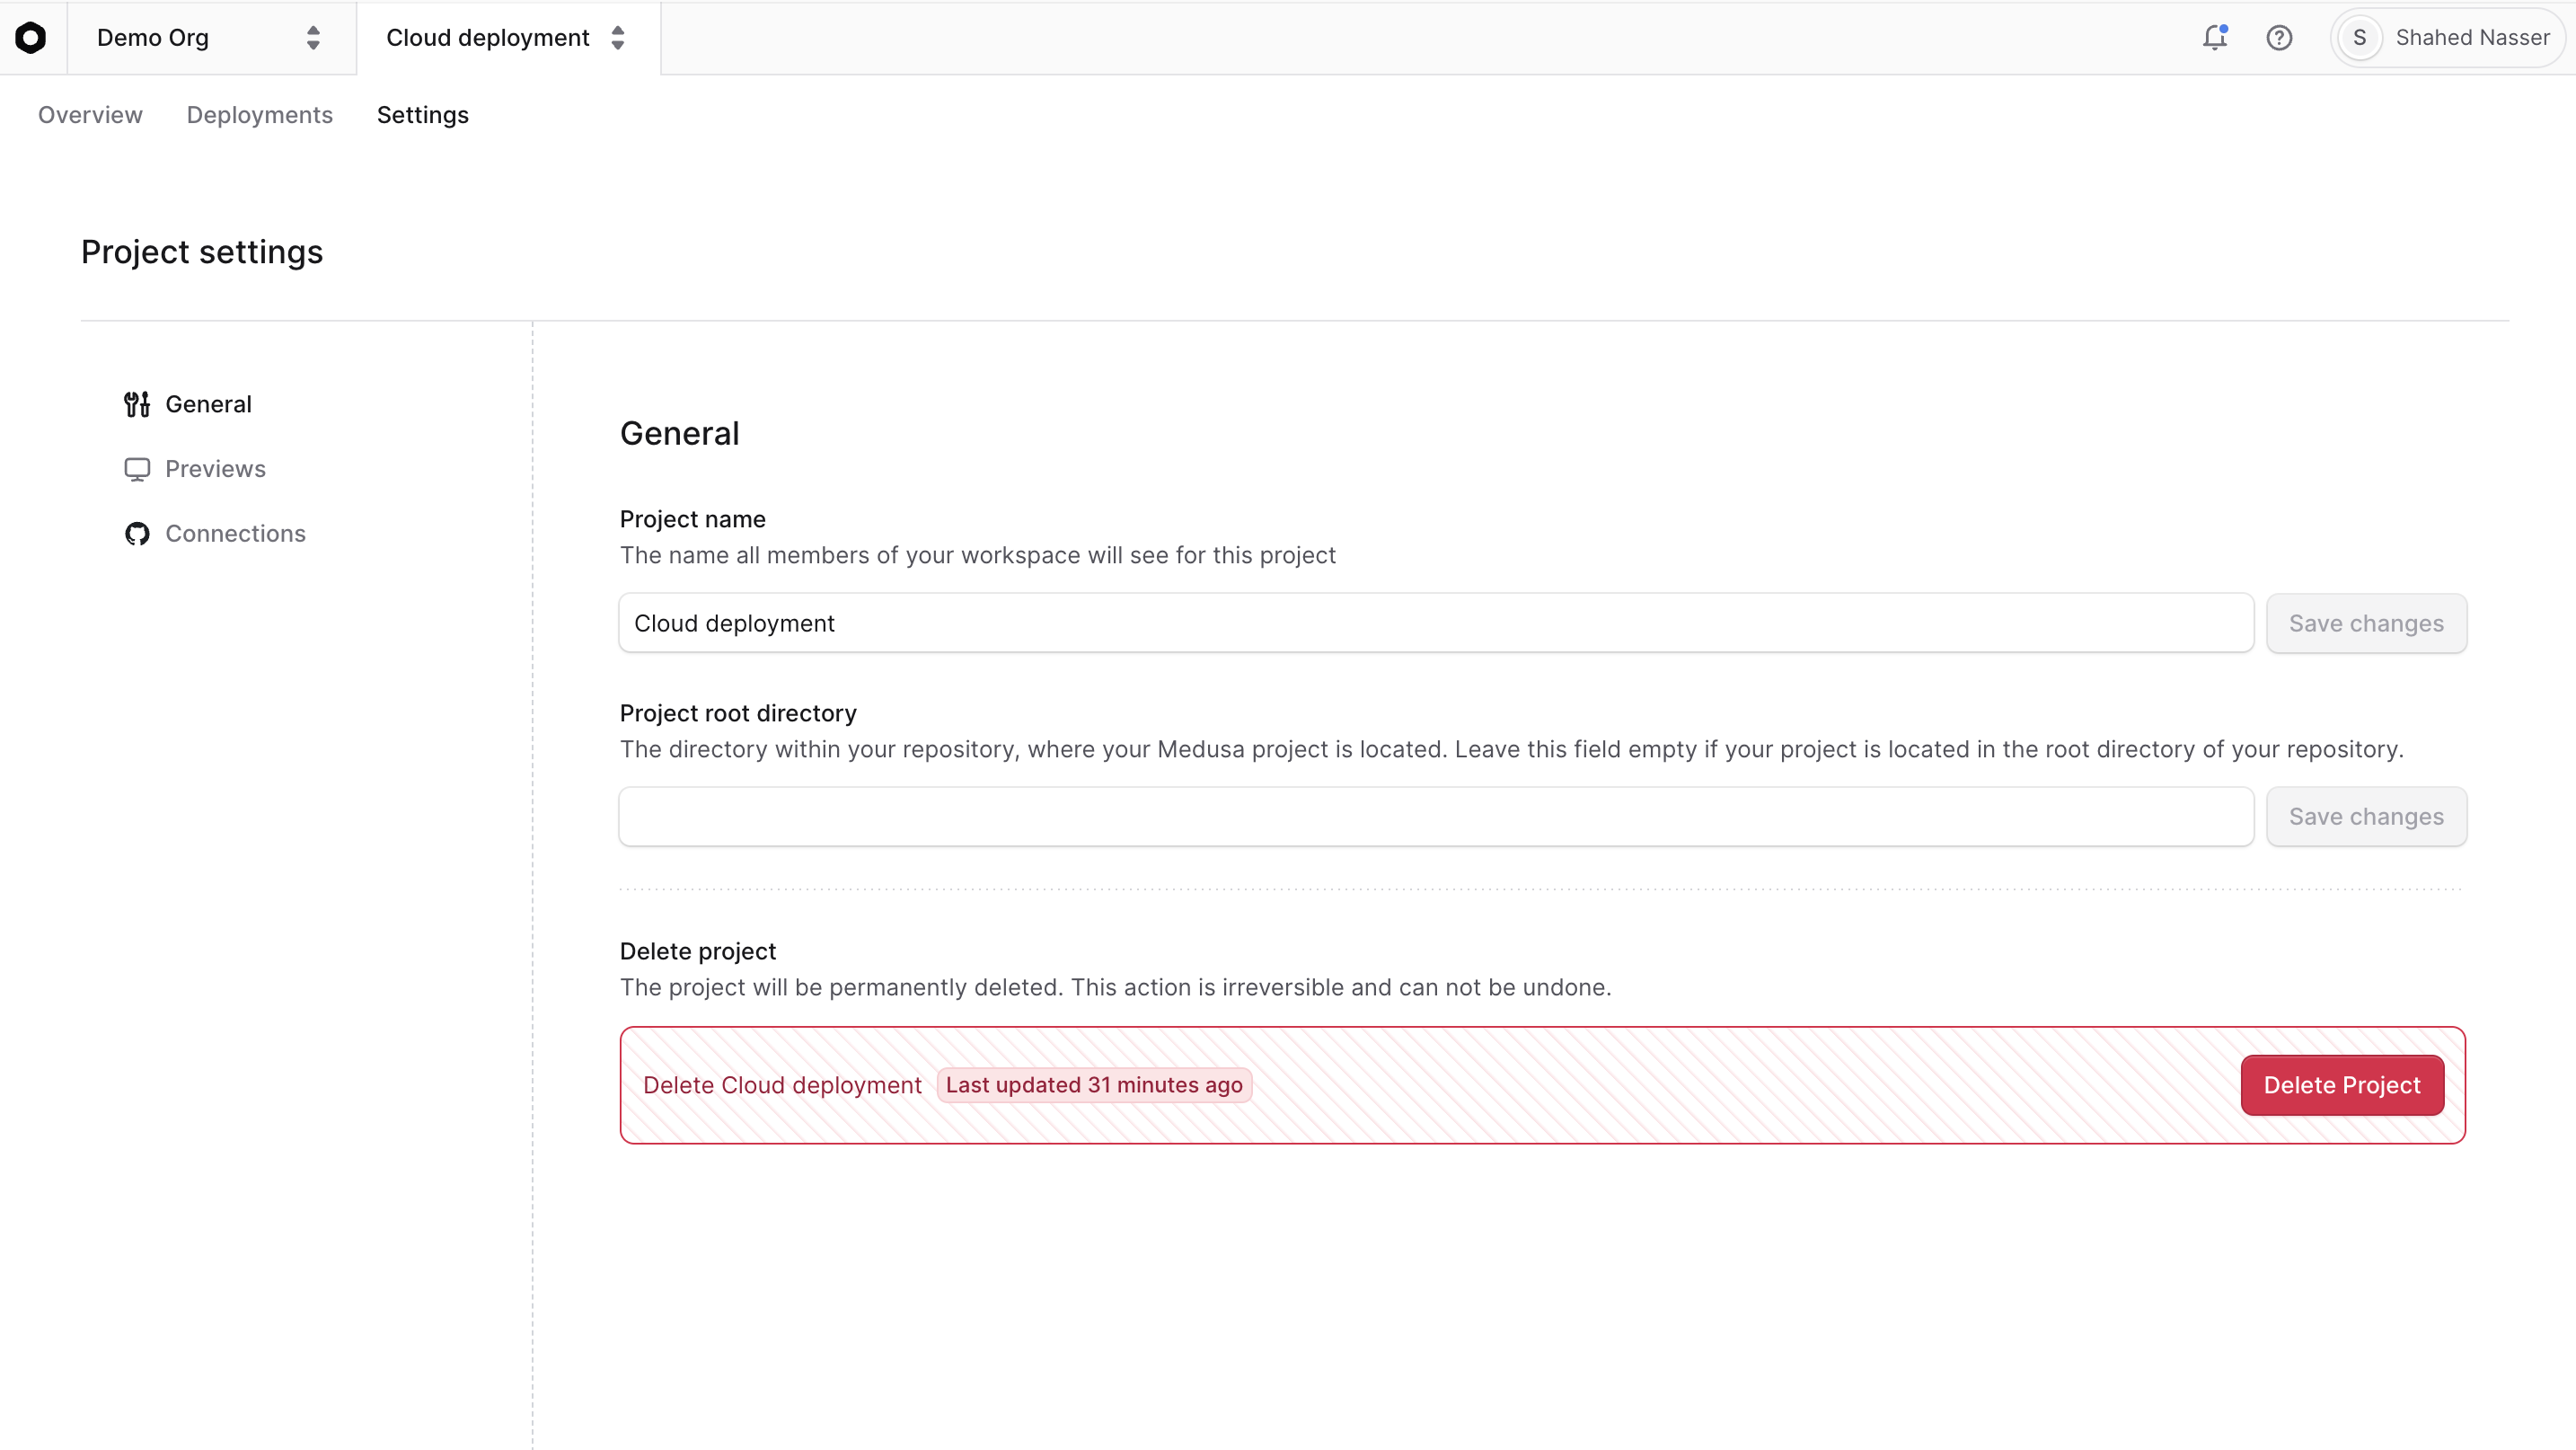
1. Open the project's dashboard.
|
|
2. Click on the "Settings" tab.
|
|
3. In the "General" tab of the Settings page, you can edit the project's name and root directory in the repository.
|
|
- Editing the root directory in the repository is useful if the repository is a monorepo.
|
|
4. Once you're done making changes, click the "Save changes" button next to the input field.
|
|
|
|
|
|
|
|
### Editing Previews Settings
|
|
|
|
You can also edit the "Previews" settings of a project from the "Settings" tab, which are general settings related to Previews environments.
|
|
|
|
Learn more in the [Environments](../environments/page.mdx) guide.
|
|
|
|
---
|
|
|
|
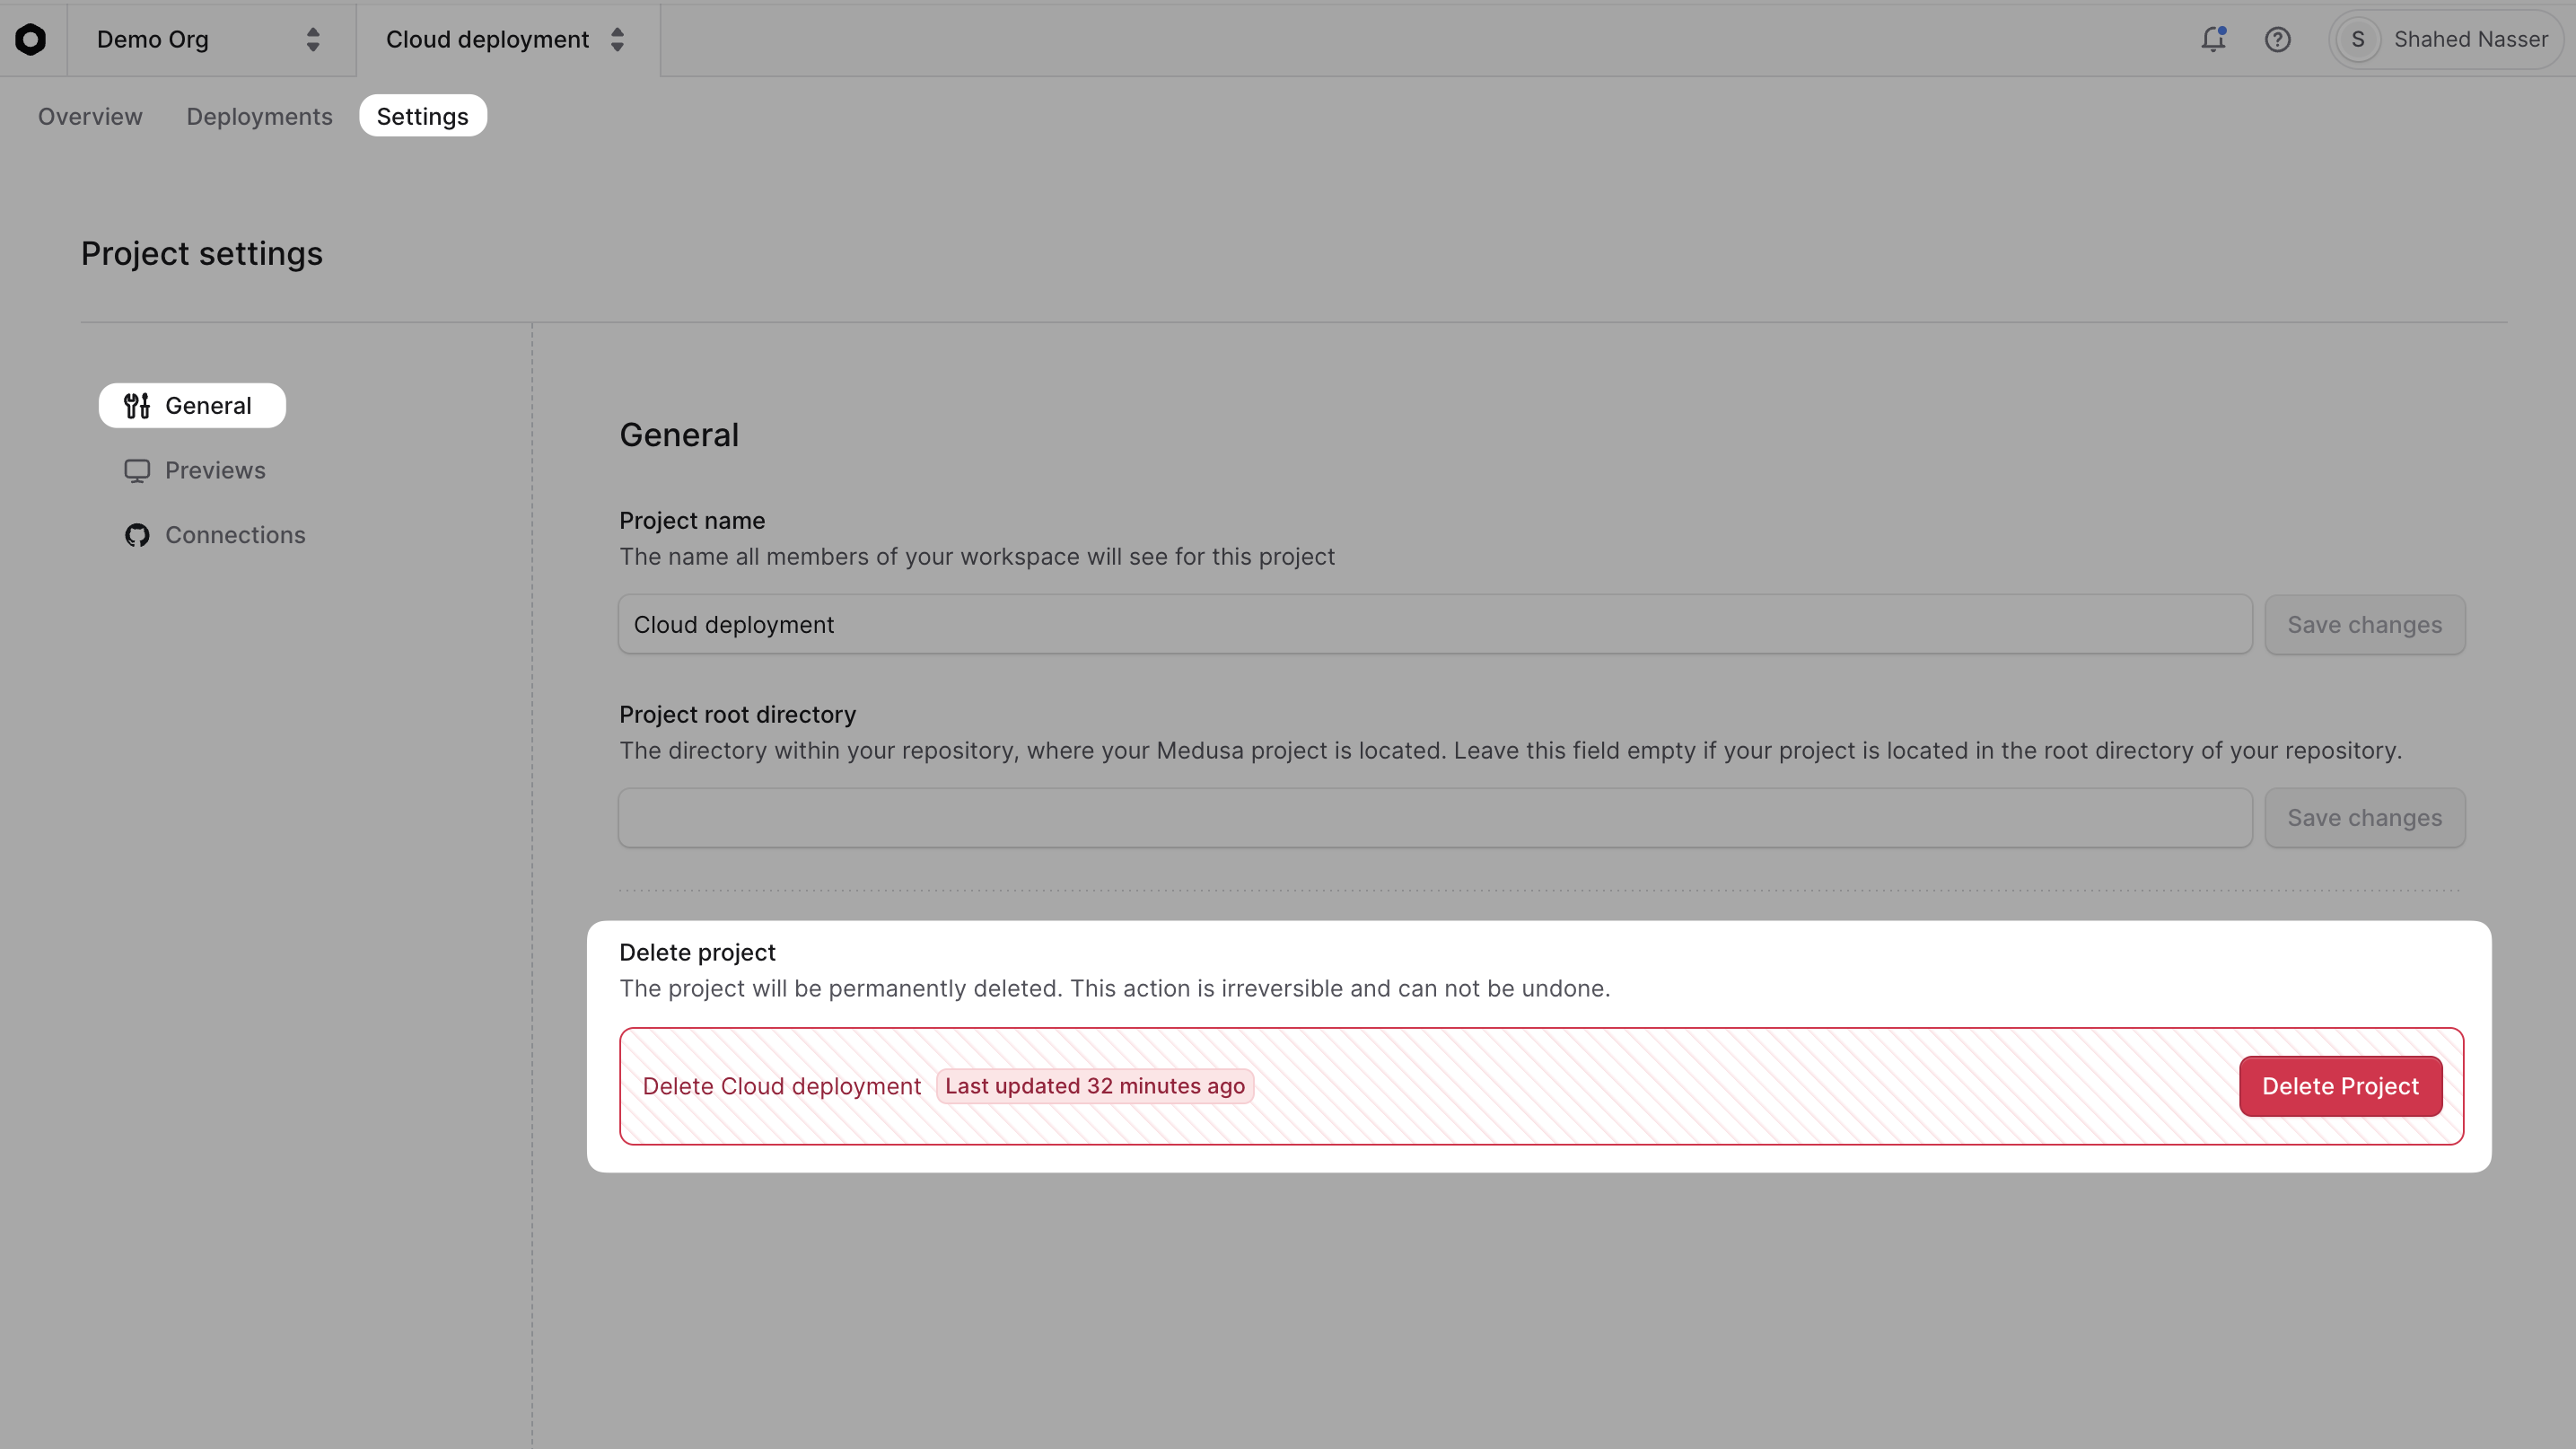
## Delete Project
|
|
|
|
<Note type="warning" title="Danger">
|
|
Deleting a project will delete all its environments and deployments. This action is irreversible.
|
|
You won't be able to recover any data after deletion.
|
|
</Note>
|
|
|
|
To delete a project:
|
|
|
|
1. Open the project's dashboard.
|
|
2. Click on the "Settings" tab.
|
|
3. In the "General" tab of the Settings page, click the "Delete Project" button.
|
|
4. Confirm the deletion by typing the project's name in the confirmation input, then click the "Delete" button.
|
|
|
|
|