334 lines
14 KiB
Markdown
334 lines
14 KiB
Markdown
# Algolia
|
||
|
||
In this document, you’ll learn how to install the [Algolia plugin](https://github.com/medusajs/medusa/tree/master/packages/medusa-plugin-algolia) and use it on both your Medusa Server and your storefront.
|
||
|
||
## Overview
|
||
|
||
[Algolia](https://www.algolia.com/) is a search engine service that allows developers to integrate advanced search functionalities into their websites including typo tolerance, recommended results, and quick responses.
|
||
|
||
Algolia can be used for a wide range of use cases, including ecommerce websites. By integrating Algolia into your ecommerce website, you can provide your customers with a better user experience and help them find what they’re looking for swifltly.
|
||
|
||
Through Medusa's flexible plugin system, it is possible to add a search engine to your Medusa server and storefront using Algolia with just a few steps.
|
||
|
||
## Prerequisites
|
||
|
||
### Medusa Components
|
||
|
||
It is required to have a Medusa server installed before starting with this documentation. If not, please follow along with the [quickstart guide](../quickstart/quick-start.md) to get started in minutes.
|
||
|
||
Furthermore, it’s highly recommended to ensure your Medusa server is configured to work with Redis. As Medusa uses Redis for the event queue internally, configuring Redis ensures that the search indices in Algolia are updated whenever products on the Medusa server are updated. You can follow [this documentation to install Redis](../tutorial/0-set-up-your-development-environment.mdx#redis) and then [configure it on your Medusa server](../usage/configurations.md#redis).
|
||
|
||
:::caution
|
||
|
||
If you don’t install and configure Redis on your Medusa server, the Algolia integration will still work. However, products indexed in Algolia are only added and updated when you restart the Medusa server.
|
||
|
||
:::
|
||
|
||
### Algolia Account
|
||
|
||
You need to [create an Algolia account](https://www.algolia.com/users/sign_up) before you follow this documentation. Algolia offers a free plan to get started quickly.
|
||
|
||
## Create an Algolia App
|
||
|
||
The first step is to create an Algolia app for your Medusa server. To create one, open the [Applications page](https://www.algolia.com/account/applications) or, on your dashboard, go to Settings then choose Applications.
|
||
|
||
On the Applications page, click on the New application button at the top right.
|
||
|
||
|
||
|
||
In the new page that opens, optionally enter a name for the application and choose a subscription plan. You can choose the Free plan for now, but it’s recommended to switch to the Pay-as-you-go plan as your business grows.
|
||
|
||

|
||
|
||
Once you’re done, click on the Next Step button. If you picked Pay as you go service, you’ll need to enter billing details before you proceed.
|
||
|
||
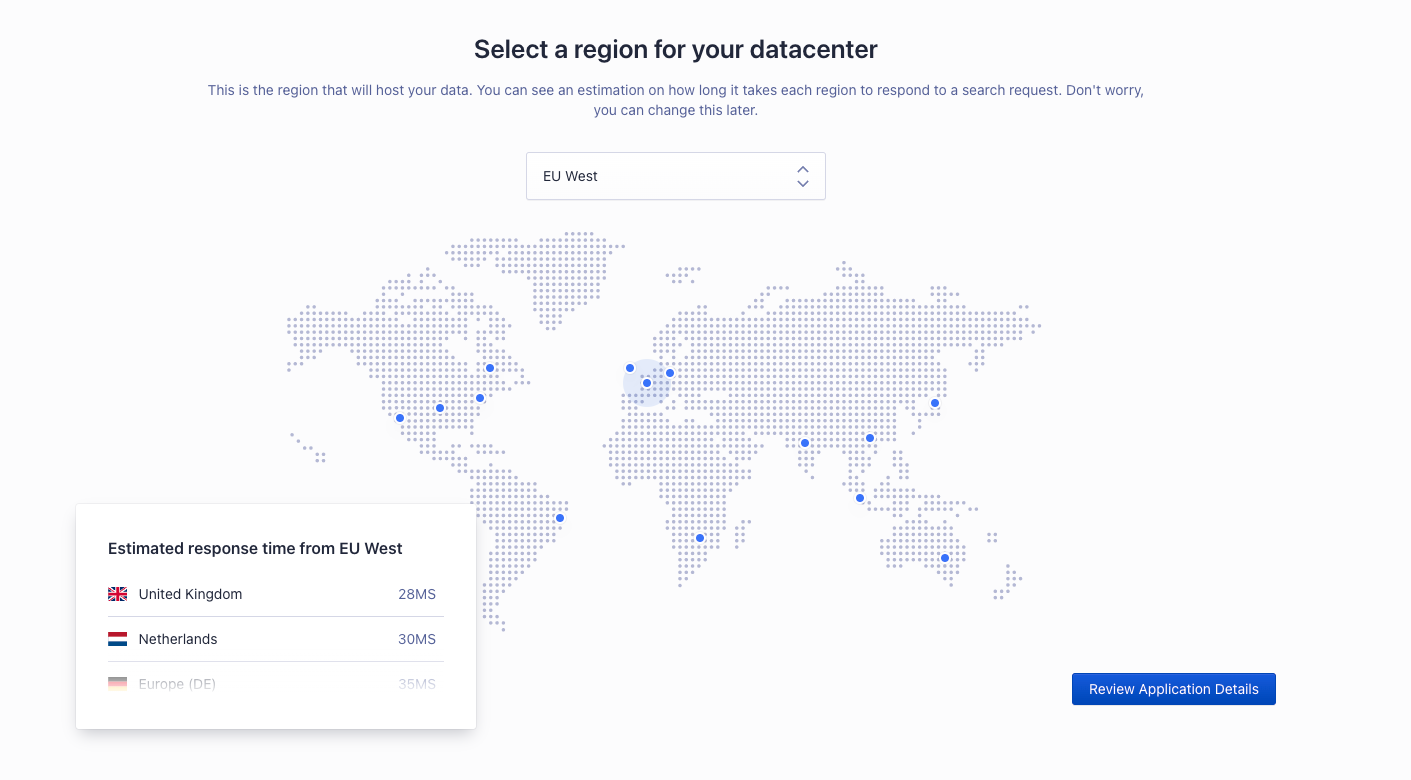
Then, you’ll be asked to pick a region for your application. Once you’re done, click on Review Application Details.
|
||
|
||
|
||
|
||
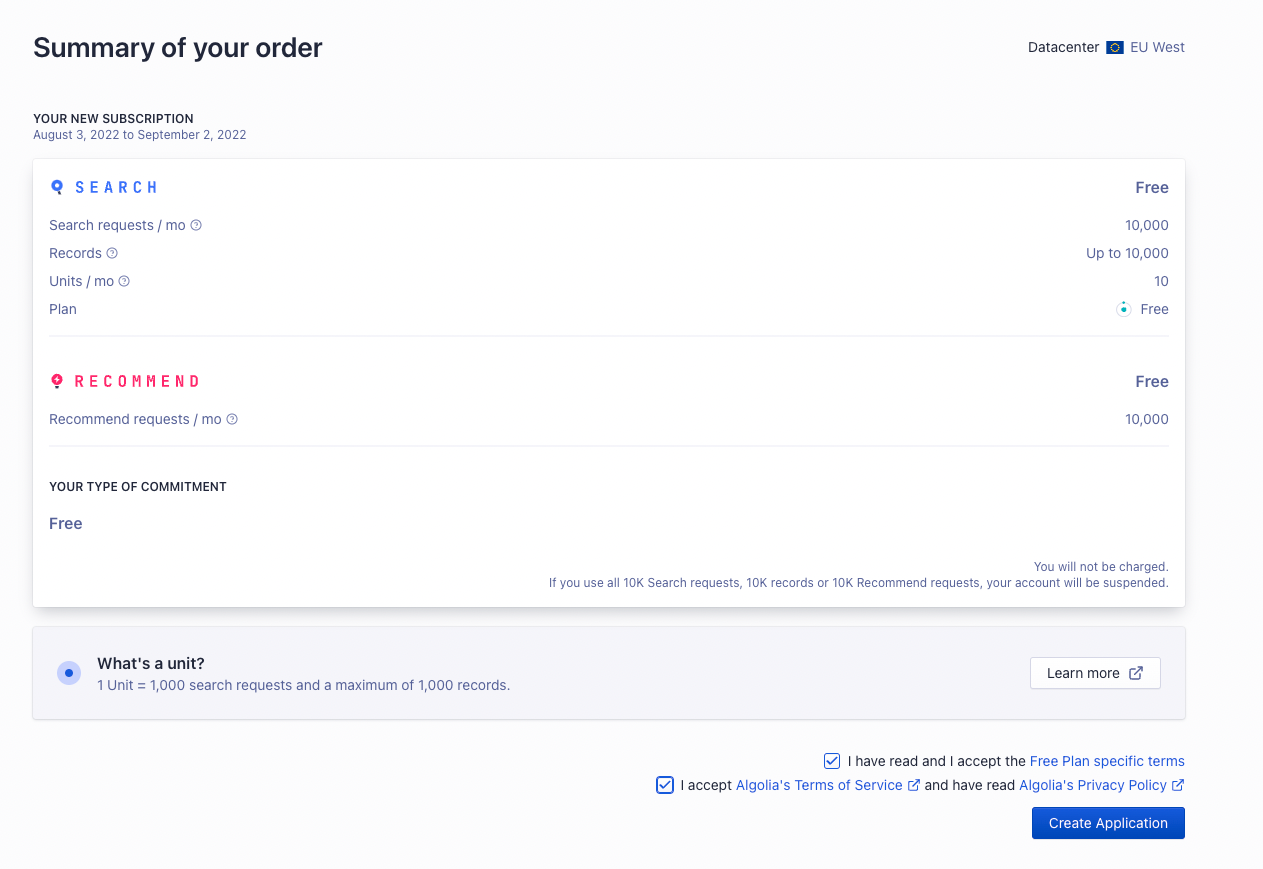
In the last step, you’ll see a summary of your order. If all looks good, check the checkboxes at the end of the form to indicate that you agree to the terms and conditions. Then, click on the Create Application button.
|
||
|
||
|
||
|
||
## Retrieve API Keys
|
||
|
||
To retrieve the API keys that you’ll use in the next sections, go to Settings, then choose API Keys in the Team and Access section.
|
||
|
||

|
||
|
||
On this page, you’ll find the Application ID, Search-Only API Key, and Admin API Key. You’ll need the Application ID and Admin API Key for the Medusa server. As for the storefront, you’ll need the Application ID and Search-Only API Key.
|
||
|
||
:::note
|
||
|
||
If you have more than one application in your Algolia account, make sure you’re viewing the keys of the correct application by checking the Application dropdown at the top left.
|
||
|
||
:::
|
||
|
||

|
||
|
||
## Install the Algolia Plugin
|
||
|
||
In the directory of your Medusa server, run the following command to install the Algolia plugin:
|
||
|
||
```bash npm2yarn
|
||
npm install medusa-plugin-algolia
|
||
```
|
||
|
||
Then, add the following environment variables to your Medusa server:
|
||
|
||
```bash
|
||
ALGOLIA_APP_ID=<YOUR_APP_ID>
|
||
ALGOLIA_ADMIN_API_KEY=<YOUR_ADMIN_API_KEY>
|
||
```
|
||
|
||
Where `<YOUR_APP_ID>` and `<YOUR_ADMIN_API_KEY>` are respectively the Application ID and Admin API Key found on the [API Keys page](#retrieve-api-keys).
|
||
|
||
Finally, in `medusa-config.js` add the following item into the `plugins` array:
|
||
|
||
```jsx
|
||
const plugins = [
|
||
//...
|
||
{
|
||
resolve: `medusa-plugin-algolia`,
|
||
options: {
|
||
application_id: process.env.ALGOLIA_APP_ID,
|
||
admin_api_key: process.env.ALGOLIA_ADMIN_API_KEY,
|
||
settings: {
|
||
products: {
|
||
searchableAttributes: ["title", "description"],
|
||
attributesToRetrieve: [
|
||
"id",
|
||
"title",
|
||
"description",
|
||
"handle",
|
||
"thumbnail",
|
||
"variants",
|
||
"variant_sku",
|
||
"options",
|
||
"collection_title",
|
||
"collection_handle",
|
||
"images",
|
||
],
|
||
},
|
||
},
|
||
},
|
||
},
|
||
];
|
||
```
|
||
|
||
The `searchableAttributes` are the attributes in a product that are searchable, and `attributesToRetrieve` are the attributes to retrieve for each product result. You’re free to make changes to these attributes as you see fit, but these are the recommended attributes.
|
||
|
||
## Test the Algolia Plugin
|
||
|
||
Run your Medusa server with the following command:
|
||
|
||
```bash npm2yarn
|
||
npm run start
|
||
```
|
||
|
||
The quickest way to test that the integration is working is by sending a `POST` request to `/store/products/search`. This endpoint accepts a `q` body parameter of the query to search for and returns in the result the products that match this query.
|
||
|
||

|
||
|
||
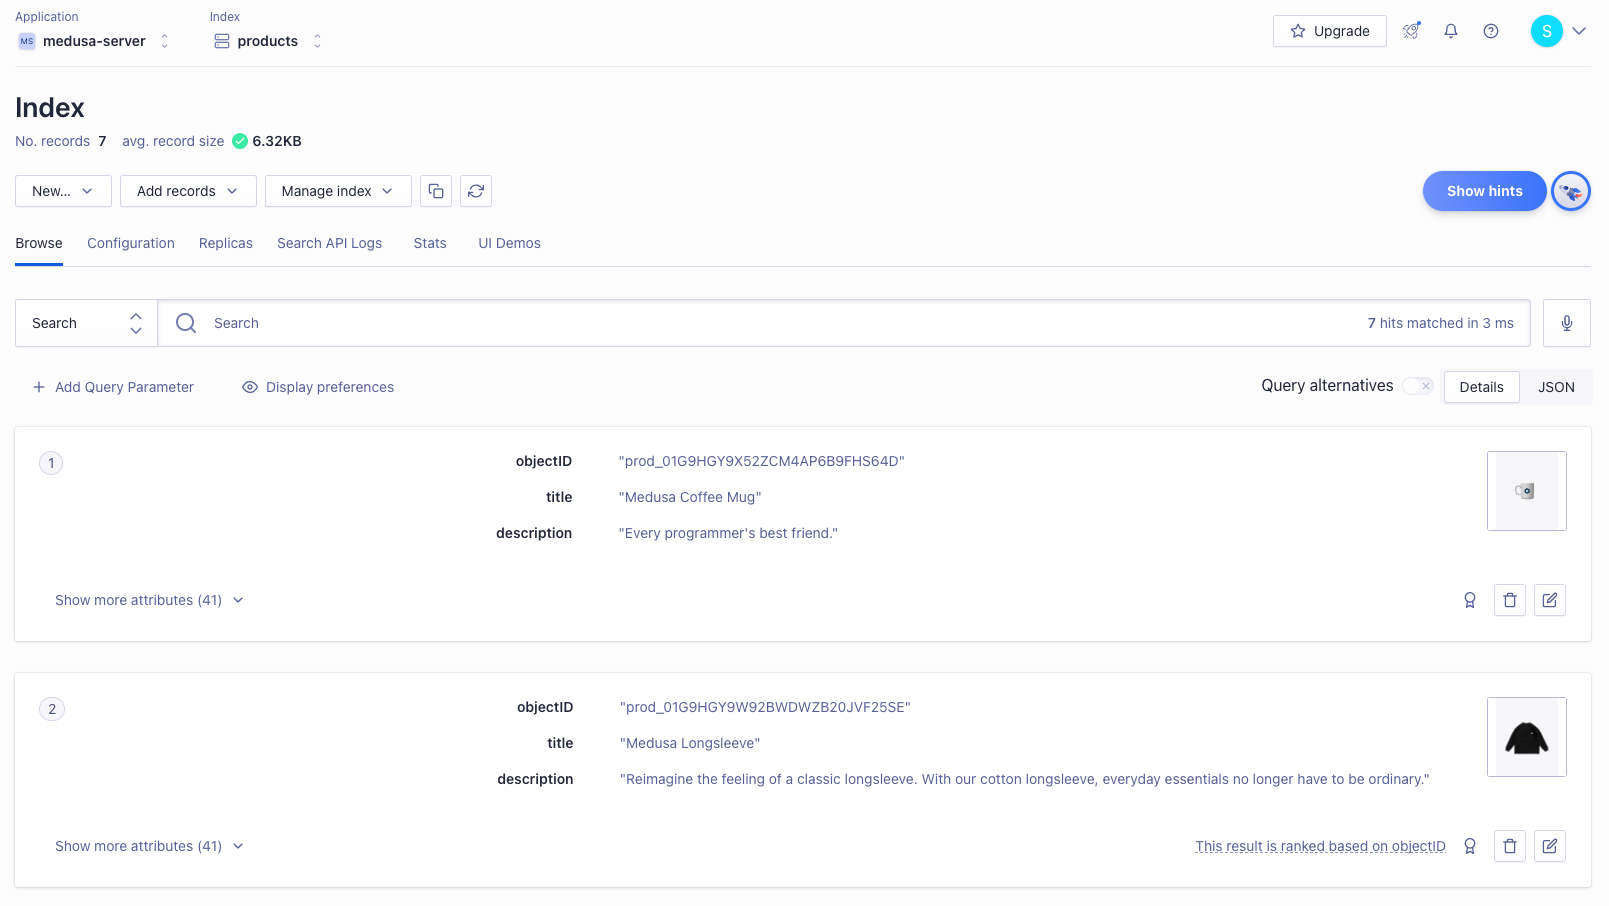
You can also check that the products are properly indexed by opening your Algolia dashboard and choosing Search from the left sidebar. You’ll find your products that are on your Medusa server added there.
|
||
|
||
:::note
|
||
|
||
If you have more than one application on your Algolia account, make sure you’re viewing the keys of the correct one by checking the Application dropdown at the top left.
|
||
|
||
:::
|
||
|
||
|
||
|
||
### Add or Update Products
|
||
|
||
If you add or update products on your Medusa server, the addition or update will be reflected in the Algolia indices.
|
||
|
||
:::note
|
||
|
||
This feature is only available if you have Redis installed and configured with your Medusa server as mentioned in the [Prerequisites section](#prerequisites). Otherwise, you must re-run the Medusa server to see the change in the Algolia indices.
|
||
|
||
:::
|
||
|
||
## Add Search to your Storefront
|
||
|
||
In this section, you’ll learn how to add the UI on your storefront to allow searching with Algolia. This section has instructions for Medusa’s [Next.js](../starters/nextjs-medusa-starter.md) storefront as well as React-based frameworks such as the [Gatsby](../starters/gatsby-medusa-starter.md) storefront.
|
||
|
||
### Storefront Prerequisites
|
||
|
||
It is assumed you already have a storefront set up and working with the Medusa server, as this section only covers how to add the search UI.
|
||
|
||
:::tip
|
||
|
||
If you don’t have a storefront set up, you can use the [Gatsby](../starters/gatsby-medusa-starter.md) or [Next.js](../starters/nextjs-medusa-starter.md) storefronts Medusa provides.
|
||
|
||
:::
|
||
|
||
### Add to Next.js Storefront
|
||
|
||
The Next.js storefront has the Algolia integration available out of the box. To get it working, you just need to follow three steps.
|
||
|
||
First, ensure that the search feature is enabled in `store.config.json`:
|
||
|
||
```json
|
||
{
|
||
"features": {
|
||
"search": true
|
||
}
|
||
}
|
||
```
|
||
|
||
Then, add the necessary environment variables:
|
||
|
||
```bash
|
||
NEXT_PUBLIC_SEARCH_APP_ID=<YOUR_APP_ID>
|
||
NEXT_PUBLIC_SEARCH_API_KEY=<YOUR_SEARCH_API_KEY>
|
||
NEXT_PUBLIC_SEARCH_INDEX_NAME=products
|
||
```
|
||
|
||
Where `<YOUR_APP_ID>` and `<YOUR_SEARCH_API_KEY>` are respectively the Application ID and Search-Only API Key on the [API Keys page](#retrieve-api-keys).
|
||
|
||
Finally, change the code in `src/lib/search-client.ts` to the following:
|
||
|
||
```jsx
|
||
import algoliasearch from "algoliasearch/lite"
|
||
|
||
const appId = process.env.NEXT_PUBLIC_SEARCH_APP_ID || "" // You should add this to your environment variables
|
||
|
||
const apiKey = process.env.NEXT_PUBLIC_SEARCH_API_KEY || "test_key"
|
||
|
||
export const searchClient = algoliasearch(appId, apiKey)
|
||
|
||
export const SEARCH_INDEX_NAME =
|
||
process.env.NEXT_PUBLIC_INDEX_NAME || "products"
|
||
```
|
||
|
||
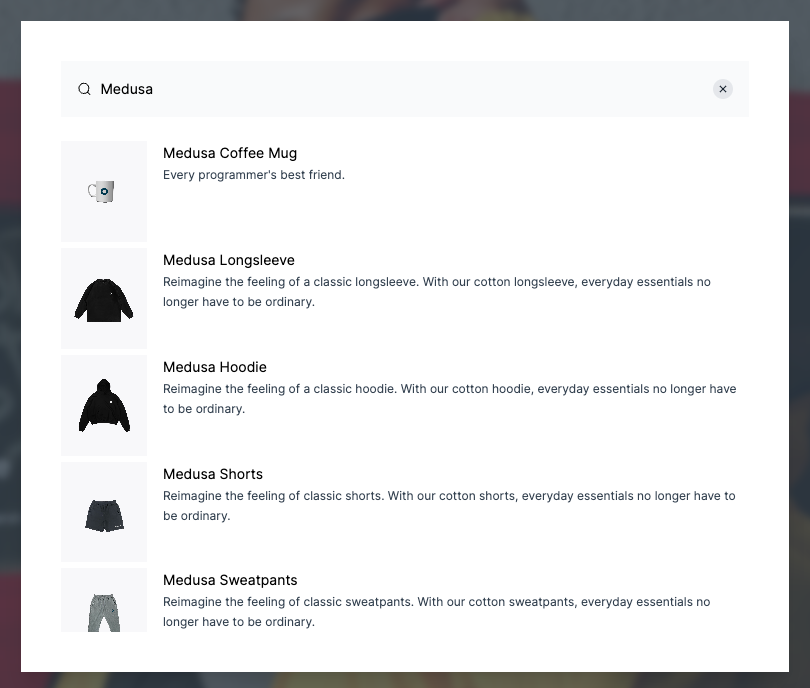
If you run your Next.js storefront now while the Medusa server is running, the search functionality will be available in your storefront.
|
||
|
||
:::note
|
||
|
||
To make sure the Next.js storefront properly displays the products in the search result, include in the `attributesToRetrieve` setting of the Algolia plugin on the Medusa server at least the fields `title`, `handle`, `description`, and `thumbnail`.
|
||
|
||
:::
|
||
|
||
|
||
|
||
## Add to Gatsby and React-Based Storefronts
|
||
|
||
This section covers adding the search UI to React-based storefronts. It uses the Gatsby storefront as an example, but you can use the same steps on any React-based framework.
|
||
|
||
:::tip
|
||
|
||
For other frontend frameworks, please check out [Algolia’s Integrations guide](https://www.algolia.com/developers/?ui-libraries&client-libraries) for steps based on your framework.
|
||
|
||
:::
|
||
|
||
In the directory that contains your storefront, run the following command to install the necessary dependencies:
|
||
|
||
```bash npm2yarn
|
||
npm install algoliasearch react-instantsearch-dom
|
||
```
|
||
|
||
Then, add the following environment variables:
|
||
|
||
```bash
|
||
GATSBY_ALGOLIA_APP_ID=<YOUR_APP_ID>
|
||
GATSBY_ALGOLIA_SEARCH_API_KEY=<YOUR_SEARCH_API_KEY>
|
||
GATSBY_SEARCH_INDEX_NAME=products
|
||
```
|
||
|
||
Where `<YOUR_APP_ID>` and `<YOUR_SEARCH_API_KEY>` are respectively the Application ID and Search-Only API Key on the [API Keys page](#retrieve-api-keys).
|
||
|
||
:::note
|
||
|
||
In Gatsby, environment variables that should be public and available in the browser are prefixed with `GATSBY_`. If you’re using another React-based framework, you might need to use a different prefix to ensure these variables can be used in your code. Please refer to your framework’s documentation for help on this.
|
||
|
||
:::
|
||
|
||
Then, create the file `src/components/header/search.jsx` with the following content:
|
||
|
||
```jsx
|
||
import {
|
||
Highlight,
|
||
Hits,
|
||
InstantSearch,
|
||
SearchBox,
|
||
connectStateResults
|
||
} from "react-instantsearch-dom"
|
||
|
||
import React from "react"
|
||
import algoliasearch from 'algoliasearch/lite';
|
||
|
||
const searchClient = algoliasearch(
|
||
process.env.GATSBY_ALGOLIA_APP_ID,
|
||
process.env.GATSBY_ALGOLIA_SEARCH_API_KEY
|
||
)
|
||
|
||
const Search = () => {
|
||
const Results = connectStateResults(({ searchState, searchResults, children }) =>
|
||
searchState && searchState.query && searchResults && searchResults.nbHits !== 0 ? (
|
||
<div className="absolute top-full w-full p-2 bg-gray-200 shadow-md">
|
||
{children}
|
||
</div>
|
||
) : (
|
||
<div></div>
|
||
)
|
||
);
|
||
|
||
return (
|
||
<div className="relative">
|
||
<InstantSearch indexName={process.env.GATSBY_SEARCH_INDEX_NAME} searchClient={searchClient}>
|
||
<SearchBox submit={null} reset={null} />
|
||
<Results>
|
||
<Hits hitComponent={Hit} />
|
||
</Results>
|
||
</InstantSearch>
|
||
</div>
|
||
)
|
||
}
|
||
|
||
const Hit = ({ hit }) => {
|
||
return (
|
||
<div key={hit.id} className="relative">
|
||
<div className="hit-name">
|
||
<Highlight attribute="title" hit={hit} tagName="mark" />
|
||
</div>
|
||
</div>
|
||
)
|
||
}
|
||
|
||
export default Search;
|
||
```
|
||
|
||
This file uses the dependencies you installed to show the search results. It also initializes Algolia using the environment variables you added.
|
||
|
||
:::note
|
||
|
||
If you named your environment variables differently based on your framework, make sure to rename them here as well.
|
||
|
||
:::note
|
||
|
||
Finally, import this file at the beginning of `src/components/header/index.jsx`:
|
||
|
||
```jsx
|
||
import Search from "./search"
|
||
```
|
||
|
||
And add the `Search` component in the returned JSX before `RegionPopover`:
|
||
|
||
```jsx
|
||
//...
|
||
<Search />
|
||
<RegionPopover regions={mockData.regions} />
|
||
//...
|
||
```
|
||
|
||
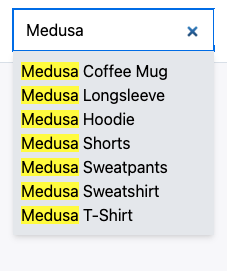
If you run your Gatsby storefront while the Medusa server is running, you should find a search bar in the header of the page. Try entering a query to search through the products in your store.
|
||
|
||
|
||
|
||
## What’s Next
|
||
|
||
- Learn how to [deploy your Medusa server](../deployments/server/index.mdx).
|
||
- Learn how to [deploy your Gatsby storefront](../deployments/storefront/deploying-gatsby-on-netlify.md).
|